Why setup MFA for your AWS EC2? Its pretty simple in this day and age if you don’t setup MFA against your AWS EC2 account(s) remember if any of your account(s) become compromised the hacker/intruder can consume virtually an unlimited number of EC2 resources that bills directly to your personal vs. corporate credit card (end of the month)! They can consume alot of compute even before the AWS folks notice abnormal behaviour against your account and notify you.

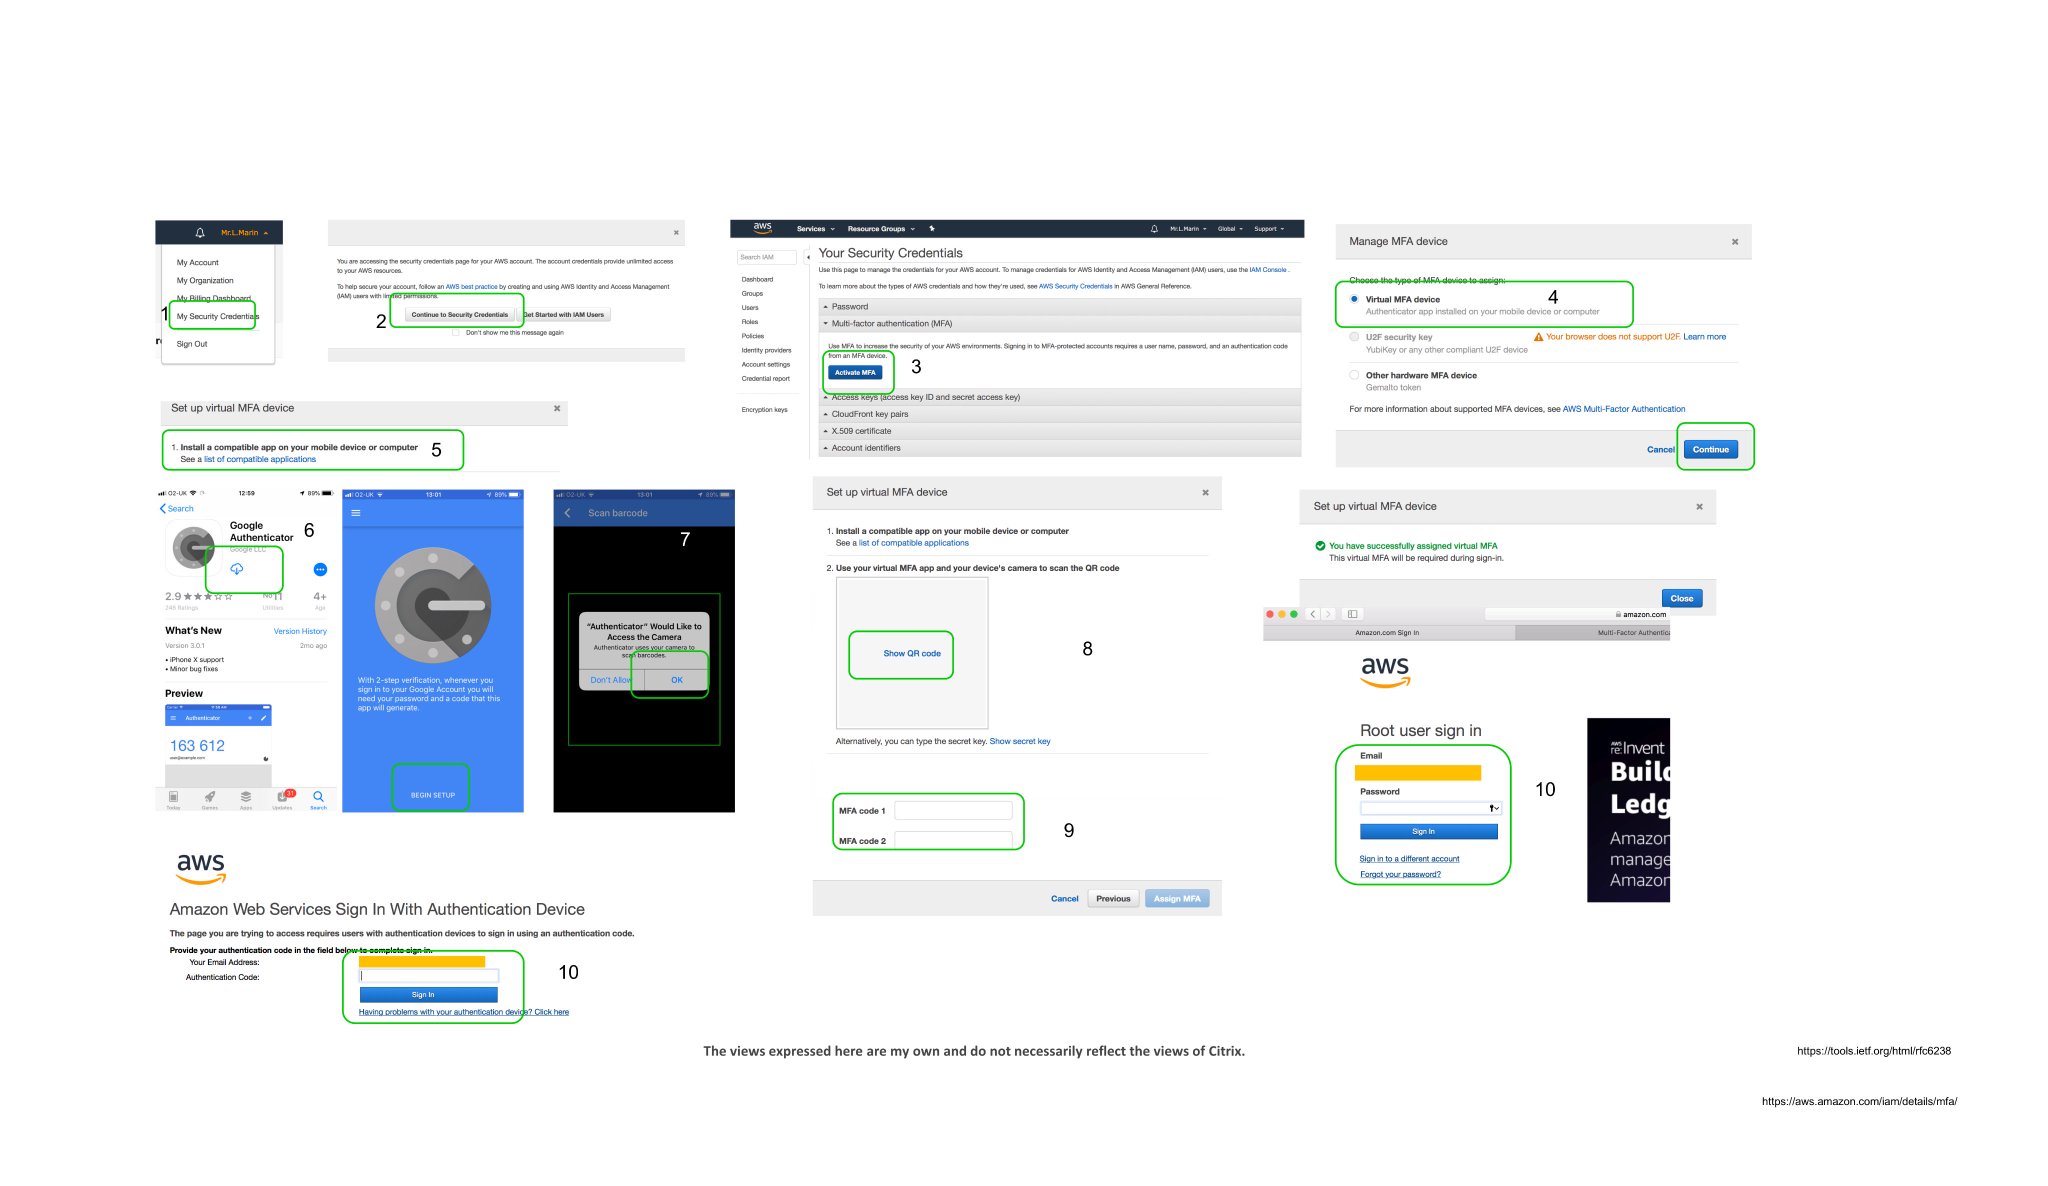
- Successfully login into your AWS EC2 account e.g https://console.aws.amazon.com/console/home?nc2=h_ct&src=header-signin®ion=us-east-1 and under your name select the drop menu and next select “My Security Credentials” e.g https://console.aws.amazon.com/iam/home?region=us-east-1#security_credential.
- On the “Your Security Credentials” select beneath password “Multi-factor authentication (MFA)”
- Select the large “Active MFA” blue button.
- You now have three options available to you to setup MFA against your AWS EC2 account which includes as of 30/12/2018 “Virtual MFA device“; “U2F security key” and “Other hardware MFA device“.
- If you consuming your current AWS EC2 account as a home vs. test lab then select option one which is “Virtual MFA device” its simple and free to consume and provides that extra level of security prior to aiming for UAT vs. pilot workloads of/for anything. This option supports the “TOTP: Time-Based One-Time Password Algorithm” – https://tools.ietf.org/html/rfc6238.
- Check the app compatible list to find a suitable app for your chosen platform of choice. In my case I choose “Google Authenticator for iOS” e.g https://itunes.apple.com/gb/app/google-authenticator/id388497605?mt=8, which I downloaded.
- Now open up the app to begin the setup process and select to “Enable/Allow” the “Google Authenticator” to access your camera. NOTE: It needs access otherwise you cant scan the generated QR code on the AWS EC2 web page coming up.
- You can choose to scan a QR code ( my preferred choice) or type a secret key. Now select “Show QR code” in blue which will generate and display a unique QR Code for you to scan with the “Google Authenticator” app.
- Once scanned you’ll need to be patient and enter in 2x MFA codes. Once you have completed this step select “Assign MFA” the blue button and you should receive an onscreen notification stating that you have successfully setup and assigned a virtual MFA and select “Close”.
- You will be now be prompted to login using your username, passwd and a one-time-token (OTT)
AWS have simple yet affective overview of the available MFA form factors at – https://aws.amazon.com/iam/details/mfa/. Finally if the above overview is not clear enough check the following AWS video below explaining how to enable MFA against your AWS EC2 account.
The views expressed here are my own and do not necessarily reflect the views of Citrix.