A Workspace technology that enabled Flexible Working styles 30+ years with a continuous Vision focused on the Current vs. Future of Work Acumen I decided to put together my second blended doodle together to better explain Citrix Workspace + Citrix Modern Networking, how it works in a visual illustration format to have more meaningful conversations and discussions. I picture can tell a thousand micro stories and the big picture here depicts a simple story which tells you the IT + Business value unlocking your organisations potential using Citrix on Citrix, including the why and why now. A Citrix Workspace supports legacy, traditional and very forward thinking ways of working that prior to the COVID-19 world wide pandemic would take a while to get going however today organisations can leap at pace within there Transformation journeys by unlocking ready to consume Citrix as a Service operating models inclusive BUT also well beyond virtualisation to a world where you can swipe left or right vs. enter in up to 3-5 fields and tap submit/approve to achieve an business and human outcomes within seconds.
The stark truth is that a Citrix Workspace for Citrites is “AWESOME” and the productivity time I get back routinely using our own technologies inspires me more with each day, it allows me to accelerate ‘economics of time I get back’ or take a well deserved break when I need it on my own terms.
Understanding Citrix Workspace + Citrix Modern Networking“Best Together” The following links below will help you better understand the different Citrix service offering capabilities, terminology, strategy and business + technical acumen (>).
I recently moved from iPhone 5S (Ja Ja or Yes Yes) to iPhone XR and thought I’d enable Apple FaceID as my primary authentication method for my corporate owned device vs. PIN/Passcode and … to unlock my device + Citrix Workspace.
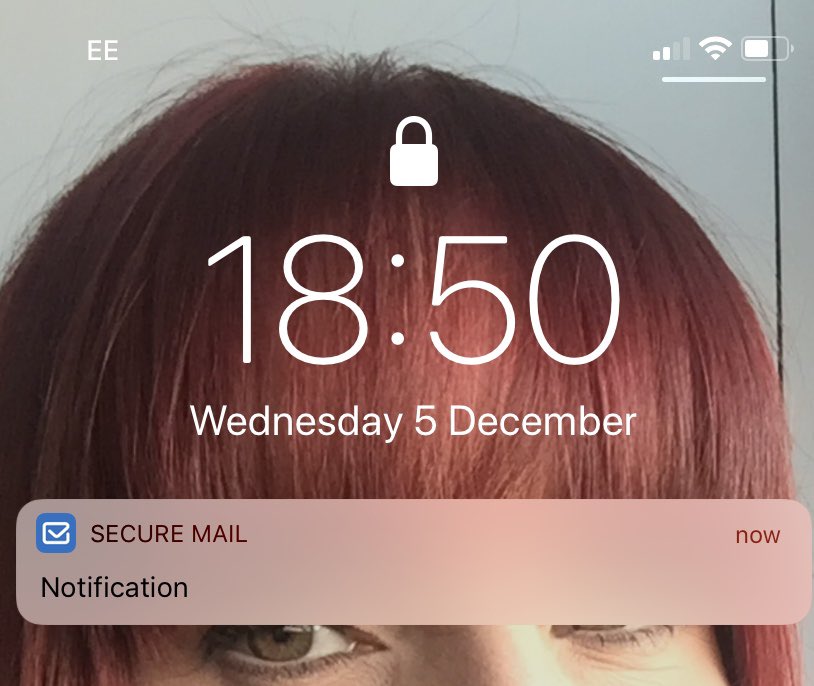
I have to say I’m impressed thus far it’s a really super authentication method and defiantly not a gimmick! Example I setup notifications for Citrix Secure Mail with the Show Previews set to “When Unlocked (Default)” this means that when an unknown vs. family individual picks up my iPhone they’ll see a Secure Mail badge with just “Notification” as the message see below.
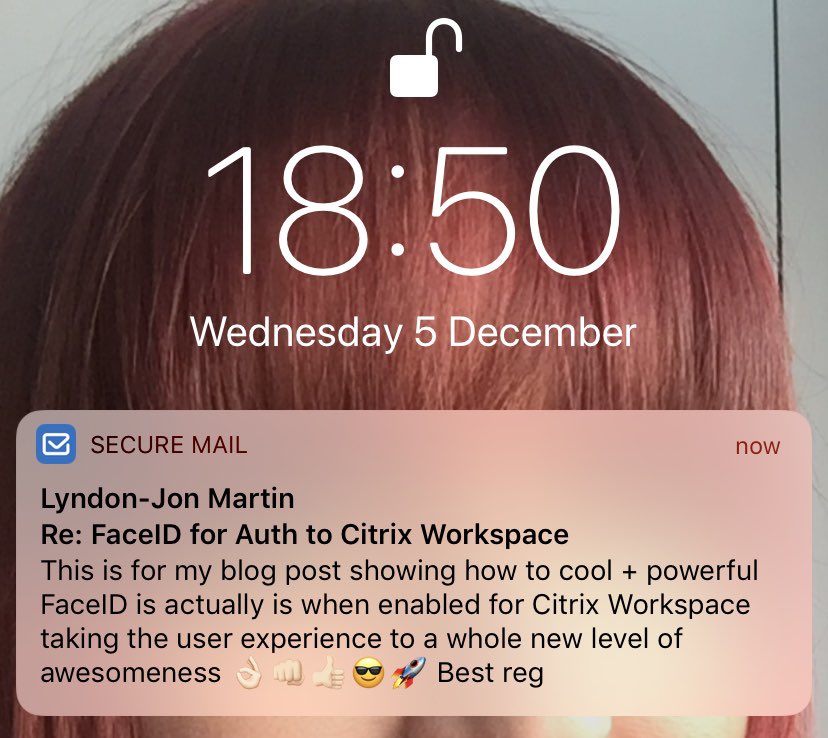
However when I pick up the iPhone I see something quiet different, as you’ll notice below. I now very quickly get the right vs. relevant context surrounding the email(s) content sent, therefore I am better informed to decide when to respond e.g right now, in a few minutes or later dependant upon the activity/task that I am busy with, within my current Citrix Workplace setting e.g Citrix Paddington office, London tube vs. bus, Train up north to Manchester e.t.c as at Citrix it’s recognised that work is not a place anymore.
Workplace setting? What’s that?
Think about yourself, you’re probably consuming 1-2 LOB apps at least 2-3 times before arriving in your first workplace setting for the day for a meeting or attending an event? Take note you’ve already signed into WORK at what 06:00-30 if you have children or perhaps later. Did this behaviour exist 5 years ago for you?
Ok back to Apples FaceID.
I wanted to truly test, push the limits and capabilities of Apple FaceID as a primary authentication method for my Citrix Workspace + Workplaces going beyond what we all test it seems e.g different coloured lighting, in the dark, twilight, dusk, low vs. bright light and the list goes on and it all worked perfectly so great job Apple so far!
I wanted more, I wanted a sudden change in my face to truly push FaceID to its limits so as many men do in November I to pulled a Movember – https://uk.movember.com (perfectly timed) so I had a thickish but full beard + moustache which was timely for me testing its limits so I registered my face with both (yes it was passing the scratchy stage) so I then decided to leave it post Movember for 3 days to see if it was learning more about my face to better recognise me and then implement the dramatic change by shaving it all off clean and what do you think happened? Did Apple FaceID recognise me? Yes it did first time, great job again Apple!
So can you be confident in consuming FaceID for Citrix Workspace app or even for unlocking your iOS devices? Yes, if it’s a supported feature on your iOS device and obviously if your corporate IT policy allows for it by not blocking it through policy controls.
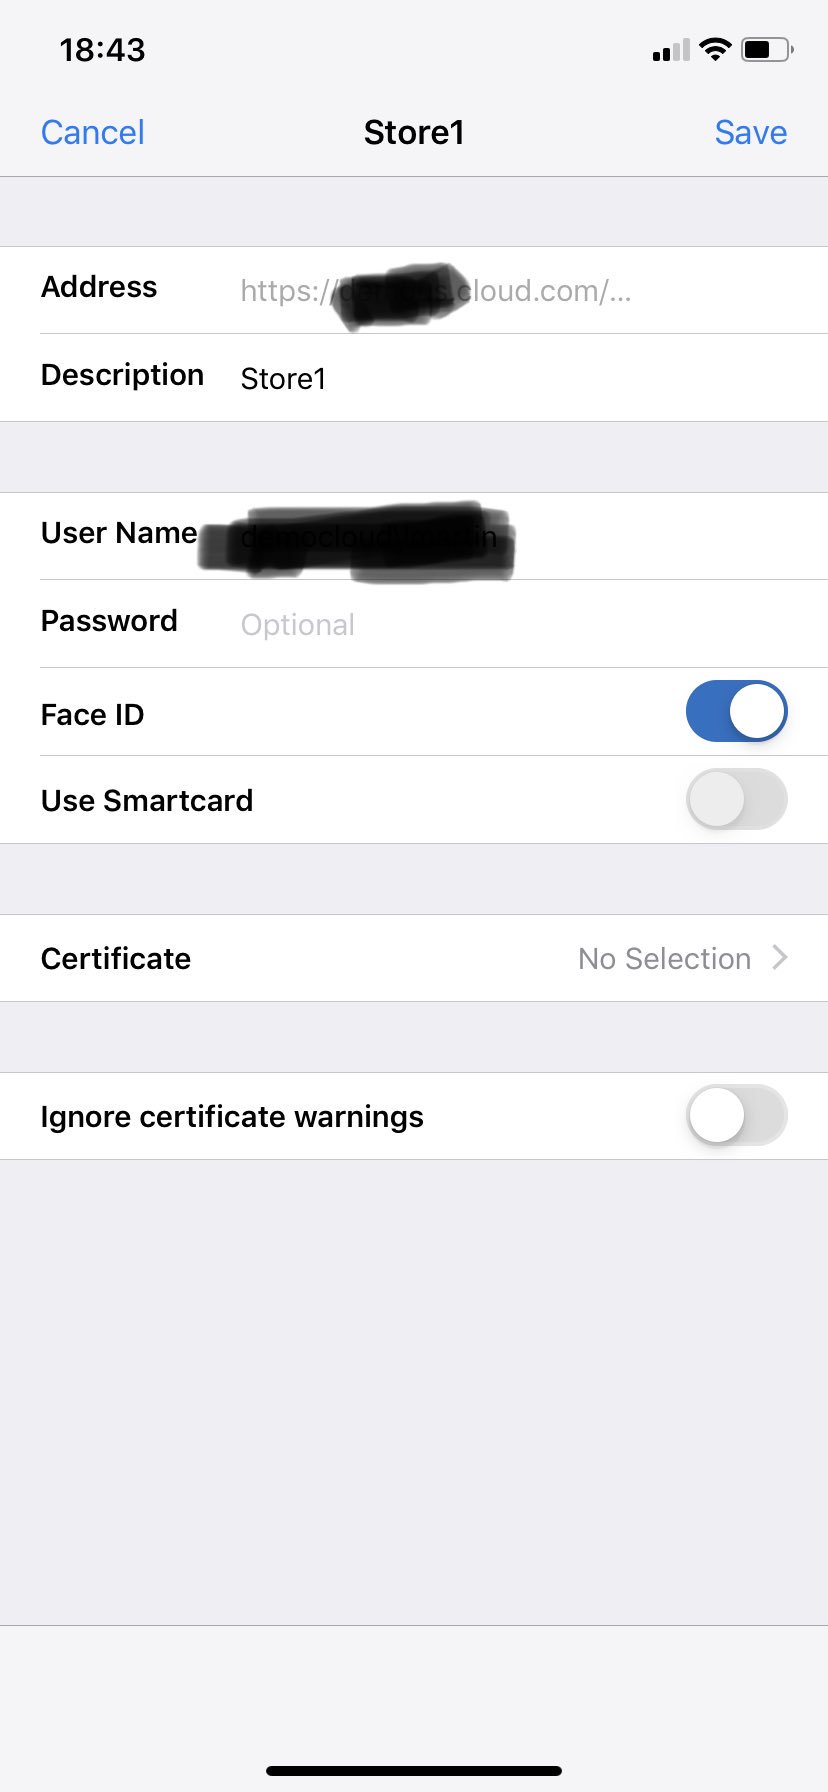
How-to Enable FaceID for Citrix Workspace app on iOS Authenticate yourself within Citrix Workspace app for iOS e.g – https://itunes.apple.com/gb/app/citrix-workspace/id363501921?mt=8 using your current method e.g TouchID and or user/passwd/token e.t.c and then to enable it Apple FaceID navigate to the settings “Menu” tap your desired configured account or the default which is “Store”, next tap “Edit Account” and finally toggle the “FaceID” option to the ON or ENABLEDposition/state and then you are ready to begin consuming Apple FaceID as your primary authentication method to Citrix Workspace app on iOS.
Final Thoughts I was not a fan of Apple FaceID initially when it launched as I wanted to do some homework + research it a bit more and see and hear what other peoples experiences where, but most of all wait for the technology to mature a little.
One thing I do keeping thinking about is that Apple FaceID lets you add up to 2x faces only on the iPhone XR*. I wonder if it needs to support up to 4x for family vs. 1x for business scenarios controlled by MDM/UEM polices?
I will continue my testing over time and circle back in a few months with a new blog post of simply update this and do more background research on Apple FaceID* but until then enjoy it, its worth enabling!
The views expressed here are my own and do not necessarily reflect the views of Citrix or Apple.
The following content is a brief and unofficial prerequisites guide to setup, configure and deploy the Tech Preview of the Citrix Ready WorkspaceHub using an Android Receiver on a mobile smart phone (April 2018) with XenApp & XenDesktop 7.6+ LTSR. The views, opinions, and concepts expressed are those by the author of this entry only and do not necessarily conform to industry descriptions or leading best practises. The views expressed here are my own and do not necessarily reflect the views of Citrix.
Shortened Names
SECURITY – sec
NETSCALER – ns
NETSCALER GATEWAY SERVICE – nsg service
WINDOWS – win
XENAPP – xa
XENDESKTOP – xd
XENAPP/XENDESKTOP – xad
WORKSPACEHUB – wh
Introduction
Citrix has recently announced the availability of the Tech Preview of the Citrix Ready WorkspaceHub at – https://www.citrix.com/blogs/2018/04/04/its-here-download-the-citrix-ready-workspace-hub-tech-preview-today/. So what exactly is it? Its a Raspberry Pi 3 platform at its core with Citrix technology + innovation built into it to provide a number of innovative capabilities for the Digital Workplace #thisishowthefutureworks. For me seeing is believing so the below embedded Tweet by Bas Stapelbroek – @hapster84 or https://twitter.com/hapster84 is a short video clip that demonstrates just one of the many powerful capabilities (sign-on to a thin client using a QR code while your virtual desktop still runs on your smart phone smooth roaming +++++ I like to say) available as part of the Citrix Ready Workspace Hub.
Full credit of the above goes out to Bas Stapelbroek – @hapster84 and thank you for allowing me to include it in my blog post.
You’re probably asking yourself how do you manage them you ask? You leverage Stratodesk NoTouch – https://www.stratodesk.com/products/workspace-hub/ whom work with our supported Citrix Ready Partners that provide the Citrix Ready WorkspaceHub for Internal or external you can use Citrix XenMobile+.
– Your require at a bare minimum XenApp 7.6 LTSR environment running 7.6 VDA for Windows Server (remember this is a Tech Preview ONLY as of April 2018)
– You require a physical Citrix Ready WorkspaceHub device – http://citrixreadyprogram.com/workspace-hub/ which currently includes thin client vendors in alphabetical order nComputing and ViewSonic. If you have had it for a while e.g 2017 firmware please read pages 2 (end)-3(top) for instructions on where to obtain the firmware updates. See page 2 for full h/w details.
– TP only supports Android Receiver 3.13.5 or later for Mobile devices + Bluetooth for
– Networking persecutive your require Android smart phone and WorkspaceHub to be on the same Wi-Fi network with the following open ports 55555, 55556 (default port for SSL connections) and ports 1494 and 8500 must not be blocked for Citrix Casting to work between the Android Receiver on Mobile Device <-> Citrix WorkspaceHub.
– Internal centralised management utilises Stratodesk https://www.stratodesk.com/kb/Main_Page to get started or for external management you can use XenMobile+ also on page 3.
– If you’re looking for Skype for Business support check out page 5
– Recommended HDX Graphics Mode and policy for the TP is to set and enable H.264 for fullscreen the policy is “Use video codec for compression” setting to “For the entire screen”
– Setting up Receiver page 7 ensuring that you DO NOT SELECT e.g UNTICK “Add account type as Web Interface” and during the setup you’ve need to complete the Touch-Free mode for proximity authentication enabled vs. disabled page 8-9. Now test the proximity referring to page 10.
– Setting up the session roaming with a QR code, TLS/SSL (requires SHA256is covered in pages 11-15 with Stratodesk NoTouch
– Please please please read through thoroughly the known limitations within the TP on page 16 and finally there is Citrix Discussions Forum available for support during the TP at https://discussions.citrix.com/forum/1726-citrix-ready-workspace-hub-preview/.
In Closing
I hope you found this blog post useful as I have written it due to the number of people contacting me via social platforms, Slack and of course traditional communications like telephone calls, text/sms and yes email. A final thought, be sure to check out a short demonstration + talk on Citrix Casting and a lot more detail at – https://www.citrix.com/products/citrix-workspace/iot.html.
The following content is a brief and unofficial prerequisites guide to setup, configure and deploy Citrix XenMobile Server (XMS) 10.7 on-premises prior to deploying in a PoC, Pilot or Production environment by the author of this entry. The views, opinions and concepts expressed are those by the author of this entry only and do not necessarily conform to industry descriptions or leading best practises. The views expressed here are my own and do not necessarily reflect the views of Citrix.
Shortened Names
XENMOBILE – xm
XENMOBILE SERVER – xms
VIRTUAL APPLIANCE – v/a
NETSCALER – ns
XENMOBILE DEVICE MANAGER – xdm
XENMOBILR APPCONTROLLER – xac
XENMOBILE NETSCALER CONNECTOR – xnc
XENMOBILE MAIL MANAGER – xmm
WINDOWS – win
MOBILE DEVICE EXPERIENCE – mdx
REAL-TIME – r-t
MICRO VIRTUAL PRIVATE NETWORK – mvpn
FIREWALL – f/w
ACCESS CONTROL LISTS – acl
APPLE PUSH NOTIFICATION SERVICE – apns
UNIFIED ENDPOINT MANAGEMEMNT – uem
MOBILE DEVICE MANAGEMENT – mdm
MOBILE APPLICATION MANAGEMENT – mam
MOBILE CONTENT MANAGEMENT – mcm
CUSTOMER EXPERIENCE IMPROVEMENT PROGRAM – ceip
ACTIVE DIRECTORY – ad
TRUSTED NETWORK – tru
FIRST TIME USER EXPERIENCE – FTU
Author Note
Please be aware that I published this article today 19/02/2018 but it should be considered evergreen until I remove this section thank you.
Introduction
This is going to be one of the longest posts that I am about to write so come back from the moment its published over Feb/March/April 2018 as I will most likely be making adds/moves/changes. This blog post serves to provide the most right vs. relevant information to help you better understand how-to deploy the current Citrix XenMobile on-premises server which is 10.7.x.n as of February 2018. I will be writing a follow-up blog post on deploying the XenMobile Service powered by Citrix Cloud – https://citrix.cloud.com/ in due course.
What is XenMobile?
XenMobile is a complete UEM or MEM via https://twitter.com/JJVLebon (mobility) solution for managing apps, data, and devices from a single unified platform with MDM & MAM (mobile apps cut, copy & paste) policies, automated actions for enrolled (supported platforms) devices that will keep employees safe, secure and productive on vs. offline enabling them to work on there own terms.
Preparation & Initial Guidance
I was one of the first set of individuals to pass the very first Citrix Certified Professional – Mobility (CCP-M) exam for XenMobile 9.x.n while at Citrix Summit in Jan 2014. Now that was one very tough exam as you needed to know Citrix NetScaler, XenMobile NetScaler Connector, (ZenPrise) XenMobile Device Manager, StoreFront, Citrix Mail Manager, Citrix AppController, ShareFile Control Plane and of course StorageZones. Its Fen 2018 and its still equally a tough exam to pass even though the XDM + XAC where merged into a virtual appliance now called the XenMobile Server (XMS).
If you have not deployed a mobility solution in the past or your an expert you’ll agree most likely that mobility or UEM/MEM is complex and is consistency changing with new devices, OS upgrades along with new vs. deprecated vs. behavioural changes to MDM APIs, app updates, push API’s vs. MDM platform + vendor signing of certificates and finally oh yes all those MDM ports that you need configured correctly through-out your organisations Wi-Fi network and so the list continues on and on….
In principle when preparing to deploy any mobility solution regardless of vendor, preparation is of paramount important to be successfully. The below is list of how I personally prepare for a mobility PoC for XenMobile on-premises (yes we at Citrix are cloud first and I live IaaS so I’ll be writing another post on deploy a XenMobile Service PoC in the future):
– Start by reading the XenMobile Security Whitepaper – https://www.citrix.com/content/dam/citrix/en_us/documents/products-solutions/xenmobile-security-understanding-the-technology-used-by-xenmobile.pdf. This will provide a great insight into our XenMobile, FIPS compliance, how SSL VPN or mVPN for MDX enabled apps behaviour and so much more, that is definitely worth your time!
– Configure the XMS with a public routable FQDNand NOT an IP addr if you intend to manage devices externally via the internet vs. internally over corporate Wi-Fi and if your enabling the self-help portal for personal management.
– Utilise the PostgreSQL database option for a PoC’s (up to 100 devices) however this will mean that you need to redeploy the XMS using a remote SQL database for PROD environments as you’ll most likely want to have your XMS v/a in a cluster for high-avaiability. NOTE: Do not pre-create a MS SQL database allow the XMS v/a to create your MS SQL database against the SQL server during the initial setup process when performing the initial FTU within the XMS CLI.
– Utilise local v6 licensing on the XMS v/a for a PoC’s but again for PROD utilise a remote Citrix licensing server which is 100% required to support a XMS Cluster as the XMS v/a are stateless with all the configuration held within the remote Microsoft SQL database.
TIP: You’ll need to active your XenMobile licenses from the available list when configuring the remote v6 license server prior to continuing!
– Create separate mobility admin mailboxes to then be used to create accounts with Apple, Google & Microsoft so that everyone has access to create, sign and revoke MDM push certificates vs. push API’s like FireBase.
– Deciding where to generate all of CSRs for all of your mobility + XMS + NS certs is quiet important not just for the initial PoC but thinking 12 months out when the cert begin to expire where did I generate those certs from now to begin the re-signing process hmmm….??? I prefer in my home lab to generate and renew all my certs on WDC but many SE’s I know will use NetScaler for this and the point I am making is that it does not matter BUT centralise and document the process, passwords e.t.c
– Setup a calendar invite vs. trigger in your choosen support platform to notify the mobility admin mailbox to alert you every 11 months to renew all your certs otherwise you’ll break your MDM deployment e.g no devices under mgmt anymore this applies to ANY MDM vendor to be 100% clear!
– Dont assume that one individual should be deploying the XenMobile (any mobility) PoC themselves as in my experience unless your 100% comfortable with networking, ACLs, SQL DBs, gateways. To be honest most often its 3 people from within the IT team for high security organisation its double I find. Typically the 3 people are the Citrix Admin whom will require help & support from a networking (f/w dude:-)) or netscaler admin and then the SQL guru.
– I typically advise partners and customers to focus and agree on 2x mobile devices and a defined list of UEM policies to configure for testing in the PoC against there use case(s).
– Ensure that all your required ports are opened up correctly in vs. outbound (internet <-> edge <-> dmx <-> tru).
– DO NOT USE A PROD NetScaler deploy a new and fresh NetScaler VPX for your XenMobile (Service) PoC on-premsies vs. your chosen resource location.
– If you are intending to MDX wrap or enlighten your iOS – https://developer.apple.com/programs/enterprise/ and Android mobile apps then I’d suggest that you sign-up for the required developer accounts well in advance as some customers & partners have experienced delays up to 1-8 weeks. You have been warned and also ensure that you understand the rules around these dev accounts!
– Disable the ability to perform a Full Wipe of the enrolled devices (in particular for BYO scenarios you don’t want a lawsuit!) or if your not bothered and you would like to test this capability then I’d suggest that you only use new mobile devices that contain no corporate vs. personal content + data during the PoC. Finally my own personal leading best practise is to setup RBAC for mobility admins and remove the full wipe capability completely! 🙂
– Screen record the PoC deployment e.g GoToMeeting so if you make a mistake you can review the recording to understand what you misconfigured and most importantly where on the NetScaler vs. XMS e.t.c is was that the mistake occurred.
– If your not going to utilise a public CA signed certificates (Strongly Preferred) as your deploying the XMS v/a in your home lab only, then when exporting your cert from your Enterprise CA export using the Base64 format and then export as a full chained PFX format cert.
– Deploy the XMS v/a first and attempt to enrol your chosen mobile device(s) and remember those MDM ports you’ll need to make sure they are available over your corporate wifi including the over air enrolment port especially for Apple iOS devices otherwise your MDM enrolment will fail so you’ll be defaulted to only been able to enrol your device for MAM only e.g Secure MDX enlighten mobile apps
– The XMS mgmt. Web UI for administration is restricted from the internet as the mgmt. web UI is only accessible over https://XMS:4443 which is not part of the XM 10 wizard as of e.g NSG 10.5-55.8+ for security harden purposes (double check eDocs to be safe!). This often leads to Mobility/Citrix Admins thinking that they have misconfigured the wizard on the NetScaler when in fact it most likely is your connecting connection on https://XMS-vip:4443 via the VIP owned by the NetScaler but if you connect directly to the XMS’s configured IP addr via https://XMS-direct:4443 you’ll be able to access the XMS Admin Web UI.
– SuGgEsTeD personal tip utilise Mozilla Firefox for configuring and managing your XMS v/a for me it works the best!
– Ensure that all users/admins have first, last name & e-mail addr fields populated in AD prior to any enrolment otherwise they will receive an error e.g “Invalid user for SSO” when users attempt to sign-on.
Certificates
– APNs see below
– SSL Listener used for HTTPS traffic communication e.g like securing your web server with https
AD/LDAP
– Open up 389 between the XMS v/a(s) and your AD server in your trusted network, you can optionally configure secure AD/LDAP on 636 but you will required extra certs for this configuration and its well documented in Citrix eDocs vs. obviously I believe.
– Windows service account for XMS v/a(s) to query AD/LDAP
NetScaler (Unified) Gateway
– Versions 10.5.x.n, 11.0.x.n, 11.1.x.n and 12.x.n (My current preferred firmware release now)
– 2vGPU, 4GB of RAM and 20GB available storage for HDD
– On-premises Hypervisors include XenServer 6.5 or 7.x.n; VMware ESXi 4.1, ESXi 5.1, ESXi 5.5, ESXi 6.0; Hyper-V Windows Server 2008 R2/2012/2012 R2
– Cloud Hypervisors include Azure (ARM is preferred); AWS EC2 not supported for XenMobile.
– NetScaler service account I’d advise against the default which is nsroot:nsroot slightly obvious but I see this time and again can you believe it!!!!
– AD/LDAP service account that is utilised to check validate and authenticate users against your organisations AD/LDAP.
– IP addressing (Please please please pay attention)
1x private static IP addr that is used for the NetScalers IP Addr (NSIP)
1x private static routable IP addr between your DMZ <-> TRU which is referred to a the NetScalers Subnet IP Addr (SNIP)
1x private static IP addr that is used for the XMS
1x public internet routable FQDN e.g uem.axendatacentre.com with 1x public static internet routable IP addr that resolves to 1x private static IP addr in your DMZ that are owned by the NetScaler.
1x public internet routable FQDN e.g mam.axendatacentre.com with 1x public static internet routable IP addr that resolves to 2x private static IP addrs in your DMZ that are owned by the NetScaler one for direct NAT and the other one is for *L/B of the MAM traffic.
SUMMARY
Total private IP addrs required are 6x.
Total public static internet routable IP addrs required are 2x.
Total public internet routable FQDNs 2x.
MDM Certificates for Apple and Firebase Cloud Messaging (FGM) with Android for Mobile Notification Service Capabilities
1. Create an organisation Apple ID at – https://appleid.apple.com/cgi-bin/WebObjects/MyAppleId.woa/wa/createAppleId
2. Generate your a CSR on NetScaler – https://support.citrix.com/article/CTX211887 or on a Windows Server e.g WDC using e.g IIS NOTE: Please use 2048 cipher encryption for the cert.
3. Navigate to https://xenmobiletools.citrix.com/ and sign in where prompted with your Citrix.com partner access details.
4. Follow the onscreen process for signing your XenMobile APNS CSR which will return a *.plist file.
5. Login to and upload your CSR to the APNS portal at – https://identity.apple.com/pushcert/ by following the onscreen process.
6. Download the generated *.pem file from the APNS portal to the Windows server that you initially created the CSR on.
7. Import the *.pem file into IIS using the complete a CSR response and specfic a friendly name. NOTE: Optional Import Apples Certificates (*.cer, *.crl) from – http://www.apple.com/certificateauthority/ also see http://support.apple.com/kb/ht5012
8. Export the imported certifcate as a *.pfx and specifiying a password. Note: DO NOT FORGET the password.
9. When prompted during the XMS configuration of the WebUI rememeber to enter the your chosen password and import it’s a keystore -> pfx format and select aPNS as the cert type.
Firebase Cloud Messaging (FCM)
Google or FireBase Cloud Messaging (GCM or FCM) enables push capabilities for Android vs. implement during enrolment an “Active poll period policy” for the Android handset to check back into the XMS to receive new policies, apps, check compliance e.t.c. Finally note that if you do any research FCM https://firebase.google.com/docs/cloud-messaging/ is the natural evolution of GCM platform, so think FireBase first for Android :-).
1. Create a organisation Google Developer account at – https://console.firebase.google.com/?pli=1, if your keen to understand how it works visit the XenMobile eDocs web page for Firebase at – https://docs.citrix.com/en-us/xenmobile/server/provision-devices/google-cloud-messaging.html.
2. The process to create the push capabilities is in my personal view way easier than APNs as all you need to do is generate an “API Key” and “Sender ID” which is then stored on the XMS at “Settings – > Google Cloud Messaging“. Visit the above URL to learn how to implement Firebase.
3. Please pay attention to the Firebase XenMobile diagram in the above eDocs link which includes the following Firebase ports 5228, 5229 and 5230 between the enrolled XenMobile handset and the GCM platform. Why is this important well these ports will beed to made available from the corporate network outbound like APNs to enable enrolment from within the corporate enterprise or high security environments otherwise you will need to enrol over 3/4G or via home/guest Wi-Fi.
Deploying the XMS v/a
Before you even attempt to begin I’d strongly advise you to read and or print out the following webpage via Citrix eDocs – *https://docs.citrix.com/en-us/xenmobile/server/install-configure.html which contains a Preinstallation checklist and deployment flowchart. My goal in this section to provide some context with some of the deployment options during the initial configuration of the XMS v/a, you can refer to * for full installation instructions.
1. Download the current XMS 10.7.x.n+ v/a from – https://www.citrix.com/downloads/.
2. Unzip the v/a and upload it to e.g Citrix XenServer 7.1 LTSR via XenCenter or you could use any other Citrix supported on-premises hypervisor. Once successfully uploaded check that your v/a has the minimum required computed requirements 2-4vCPU and 4-8GB of RAM assigned (increase to MAX if 10 or more users in the PoC as its all about the experience but for home lab purposes I utilise 2vCPU and 4GB of RAM as I only have 3 devices connected.
3. Start the XMS v/a via XenCenter it will take longer to boot-up if you have assigned the bare min compute resources and if your underlying storage is (shared) HDD based.
4. Once the XMS v/a has started decide if you are intending to create a XMS h/a cluster this is so that you select the correct options during there FTU, otherwise you will need to redeploy the XMS v/a and start all over. Notes:
4.1 – The CLI uses admin while the Admin account used for the Web UI uses administrator, also be aware they are LOWER CASE!
4.2 – Nothing appears when typing in select inputs.
5. Enter in a strong suitable passwd
6. Next you are promoted for network settings the IP addr will be e.g 10.1.0.99 as per my text diagram above.
7. Next your asked about an “Encrypting Phrase” most people select “y” to randomise it however you’ll never know what it is, nor can you obtain file to read it! If you are considering deploying a cluster of XMS v/a for H/A then most individuals will select “n” and create there own “encryption passphrase“.
8. I currently at the moment will not provide any context on FIPS so I will differ to https://docs.citrix.com/en-us/xenmobile/server/install-configure/fips.html#par_anchortitle_8dcb for configuration options otherwise this blog will get out of hand. I will do a follow-up or adjustment to this post in the future to cover FIPS in greater detail.
9. Next your asked about configuring a database for the v/a to store configuration information. The “l – Local” option will enable PostgreSQL which is now only supported for customer PoC’s while historically prior to Citrix acquiring ZenPrise is was a supported configuration but that was 5+ years ago under XDM, so be 100% clear PostgreSQL is for PoCs ONLY with a XMS v/a! It is also NOT supported with XMS clusters as the v/a’s are stateless relying on the SQL database for configuration information e.g users, policies, delivery groups e.t.c so you require a “r – Remote” SQL database.
TIP:
9.1 – Let the first XMS v/a that you configure as part of the your XMS cluster create the required XM database itself DO NOT pre-populate a database name on your MS SQL database cluster vs. server!
9.2 – If you select to enable XMS clustering you will need to enable port 80 within the XMS f/w ACL and do this BEFORE performing a clone to create your XMS cluster. Also in high security environments remember to include in your submitted ACL to allow the XMS v/a’s to communicate over TCP port 80 to enable R-T comms between all v/a members within the cluster.
9.3 – Finally Citrix does NOT support DB migration e.g PoC to UAT-PROD environments.
10. The most important step that I often see vs. hear vs. receive requests about is what do I type in for the “XenMobile hostname”? Please type in the fully qualified and internet routable FQDN e.g uem.axendatacentre.com, what does this mean? It means that if your where to type in uem.axendatacentre.com on your device that you reading this blog post inside the corporate file or at home it is reachable. Please do not type in e.g xms01 and then internal vs. external DNS entries are entered in for uem.axendatacentre.com to xms01 this will NOT work properly and devices will NOT enrolling you have been warned! If you do this you will beed to START all over with a fresh XMS v/a!
11. For the XMS comm port requirements i.e the v/a communicates with the users (SHP) and devices (UEM or MDM/MAM) it is perfecting fine to accept the defaults ports here unless you a high security organisation + e.g Bank, Government agency e.t.c and want to further harden yourself however remember the most complexity you add e.g changing ports here will mean that you will need to adjust the auto defined ports on the NetScaler if you do the XenMobile Wizard on the NetScaler v/a.
12. Skip the upgrading from a previous XMS version as its a PoC
13. Next we get to the Public Key Infrastructure (PKI) which I’d prefer to configure configure all the certs with the same passwd or pass phrase or you can define a different passwd or pass phrase for each of the four certs (root, intermediate for device enrolment, intermediate for SSL cert and finally an SSL for your connectors +. Finally you’ll require the eXaCt passwd(s) for an XMS v/a within your h/a cluster.
14. Finally now create a passwd for the default “administrator” account. I would personally as my own leading best practise make the CLI admin vs. Web UI administrator passwords different for security purposes as one member of the team maybe the hypervisor admin whom does all the CLI stuff aswell while the Mobility admin handles all the logical configuration via the Web UI administrator account.
15. Once you select “Return” to above set the initial configuration is stored and you are prompted to upgrade from a previous release please select “n” which is also the default! The XMS v/a will stop and start the app and once its completed the you see a FQDN e.g https://10.1.0.99:4443/ this now indicates that you can complete the Web UI part of the XMS v/a setup and configuration. Note this can take up to 5-7 mins dependant upon how much vCPU, RAM that you assigned to the v/a and if your on SSD vs. HDD storage this will speed up the process naturally.
16. The biggest mistake Mobility/Citrix Admins makes with XenMobile is that when they attempt to access and configure the Web UI part of the setup they will typically access it via the NetScaler owned VIP for uem.axendatacentre.com <-> 81.x.x.1 <-> 10.1.0.20 when they should be accessing the direct IP addr of the XMS v/a <-> 10.1.0.99. Most individual do this to test there NetScaler setup, please DO NOT setup the NetScaler do it after you have setup the XMS v/a. Finally the reason you can’t connect to the Web Admin UI via the NS VIP e.g https://uem.axendatacentre.com:4443 either internally or externally is that the NS disables 4443 via the VIP to harden and protect the Web Admin UI from the Internet so you’ll need to connect to the direct XMS v/a <-> 10.1.0.99 IP addr on https://10.1.0.9:4443. Once your at the login prompt of the Web UI type username “administrator” and your chosen passwd and “Sign-in” and the “Get Started page” appears only once to complete the Admin Web UI part of the XMS v/a setup and configuration.
17. The first web page provides an overview of the available licensing configuration options, for a PoC or if its your first time using XenMobile then I’d suggest that you utilise the built-in 30 day evaluation license to give you time better understand how to configure XenMobile so that you can enforce the required UEM policies against devices vs. (MDX) apps. If you intend to deploy a XMS h/a cluster then like the XMS database you’ll need to setup or make use of your existing remote v6 Citrix licensing server however IMPORTANT make sure that this lic server version meets the minimum release requirements of 11.12 for 10.7.x.n XMS firmware/release version. If you choose to use the 30 day trial LOCAL license servers on XMS and now wish to use a REMOTE lic server then please refer to https://docs.citrix.com/en-us/xenmobile/server/system-requirements/licensing.html. I would also suggest to test from each XMS v/a(s) within your cluster that you can successful connect to the remote v6 lic server which is available under the Wrench icon -> Licensing. 18. Next its cert mgmt. and a word of caution as this catches everyone out is that after uploading any certs reboot the XMS v/a(s) is required in order for the new certs to bound to the SSL listener interfaces and the existing ones to be unbind! You’ll need at this point your APNs and SSL certs for e.g uem.axendatacentre.com to upload the XMS v/a when importing your certs follow:
SSL Listener
Import: Keystore
Keystore Type: PKCS#12
Use as: APNs and or SSL Listener
Keystore file:
Password: *********
Description: Date uploaded and what is it? APNs vs. SSL listener?
Wrench icon -> NetScaler Gateway
Authentication: ON (default)
Deliver user certificate for authentication: OFF (default)
Credential Provider: (default)
Select “Add”
Name: NUG
Alias: (default)
External URL: https://mam.axendatacentre.com
Logon Type: Domain only (default)
Password Required: OFF (default)
Export Configuration Script: Allows you to download conf bundle to upload to NUG to configure XenMobile. I prefer to do this manually myself.
Select “Save”
Next add the following to your NetScaler Gateway configuration on the XMS.
^Callback URL: FQDN to verify that the request originated from NetScaler Gateway BUT make sure the callback URL resolves to an IP addr that is reachable by the XMS v/a(s)
^Virtual IP: 10.1.0.21 (See text diagram above in HTML table format)
^ These settings are optional.
20. Next your promoted to setup your AD binding I always prefer using an FQDN vs. IP Addr here as IP addr’s can change however FQDN’s typically don’t otherwise a lot of things in your environment will break.
AD Binding
FQDN: ldap.axendatacentre.com
Port: 389 (Leave defaults unless changed within high security environments)
Domain name: axendatacentre.com
User Base DN: ou=Users,dc=axendatacentre,dc=com (I am just using the AD default location of the Users OU here when you would have setup AD so configure to meet your organisations default OU location of Users)
Group Base DN: cn=Users,dc=axendatacentre,dc=com
User ID: XMS AD service account used to query your AD e.g xms@axendatacentre.com
Password: *****
Domain Alias: axendatacentre.com (yours maybe different)
XenMobile Lockout Limit: 0 (default)
XenMobile Lockout Time: 1 (default)
Global Catalog TCP Port: 3268 (default)
Global Catalog Root Context: (default)
User search by: userPrincipalName (preferred for the modern world)
Use secure connection: (default)
21. Final configuration you’ll need to do is to setup XMS notifications – https://docs.citrix.com/en-us/xenmobile/server/users/notifications.html which is required for things like bulk enrolment (users e-mail addr must be in AD field), communicating with users when automated actions are configured and users have violated your organisations UEM strategy.
22. Now please logout of the Web Admin UI and log back into the XMS CLI via your chosen hypervisor and follow the below instructions to reboot your XMS v/a
Your XMS v/a will begin to restart and once it is successfully rebooted navigate to the XMS v/a direct FQDN https://uem.axendatacentre.com or IP addr and check that the HTTPS cert status in your internet browser to ensure that it is no longer self-assigned by the XMS v/a but matches your uploaded SSL cert bound the SSL Listener.
Troubleshooting & Leading Best Practises
1. Citrix provides a XenMobile tools platform available at – https://xenmobiletools.citrix.com and also be sure to please refer to XenMobile compatibility documentation – https://docs.citrix.com/en-us/xenmobile/server/system-requirements/compatibility.html for compatibility of devices vs. MDX apps + release versions.
2. Users receive Profile Installation Failed The server certificate for “https://XM-FQDN:8443” is invalid when enrolling a device against XenMobile when using iOS devices. I have personally have not seen this issue occur again for quiet some time but I thought its worth including encase it reappears in the future. So what causes this issue? It is to do with the private key of your *.p12 or *.pfx full chained SSL/TLS cert and appears to only occur when exporting your cert from a new CSR on a Windows OS. To resolve the issue I’d suggest that you download, extract and run the DigiCert Certificate Utility available at – https://www.digicert.com/util/ on the originating windows server that you generated your CSR on for tier XMS v/a for your SSL Listener cert e.g HTTPS. Next follow the guide available from Digicert at – https://www.digicert.com/util/pfx-certificate-management-utility-import-export-instructions.htm to help you find and export your XMS v/a HTTPS cert correctly (advise to use TEST feature button before export) and re-upload it to the XMS v/a and remember to REBOOT the XMS v/a(s) when you change any certs on the XMS v/a(s)!!! You should now be able to begin re-enrolling your devices BUT I would strongly advise to remove any MDM certs via Settings in iOS and then delete SecureHub and re-download it and now the enrolment error messages should no longer appear to your users while enrolling there iOS devices.