The following content is a brief and unofficial prerequisites guide to setup, configure and test delivering virtual apps and desktops powered by Citrix Workspace Cloud (CWC) – App’s & Desktop Service with a AWS EC2 resource location prior to deploying in a PoC, Pilot or Production environment by the author of this entry. The views, opinions and concepts expressed are those by the author of this entry only and do not necessary conform to industry descriptions or best practises. The views expressed here are my own and do not necessarily reflect the views of Citrix.
Shortened Names
AMAZON WEB SERVICES – aws
SECURITY GROUPS – sg
ELASTIC COMPUTE CLOUD – ec2
HYBRID CLOUD PROVISIONING – hcp
XENAPP – xa
XENDESKTOP – xd
XENAPP/XENDESKTOP – xad
VIRTUAL DELIVERY AGENT – vda
HIGH DEFINITION EXPERIENCE – hdx
INDEPENDENT COMPUTING ARCHITECTURE – ica
CITRIX WORKSPACE CLOUD CONNECTOR – cwc connector/agent
EXPERIENCE 1st – x1
VIRTUAL DESKTOP – vd
VIRTUAL APPS – va
INFRASTRUCTURE AS A SERVICE – iaas
CITRIX WORKSPACE CLOUD – cwc
CITRIX LIFECYCLE MANAGE
Video Citrix Workspace Cloud: How It Works
PoC Introduction & Overview (This is a Public Draft Blog Article & May Contain Some Errors)
In this particular instance I will be deploying a Citrix Workspace Cloud (CWC) PoC using the Apps & Desktop service which is Citrix online service and is essentially made up of five compoments in my personal view these are people (Users, Consultants & SysAdmins), the Control Plane which is hosted by Citrix and is high available and accessible at – https://workspace.cloud.com/, Resource Locations which could be private, public (IaaS) or hybrid clouds which host and run your actual CItrix workloads e.g servers or desktops OSes with the VDA’s installed and optionally StoreFront and or NetScaler Unified Gateway, Receiver for access to your published virtual apps & desktops and finally the CWC connector which makes everything just work safe & securely.
Please note that I will update this blog post with a how-to re deploying NS for remote access from AWS EC2.

Datasheet for Citrix Workspace Cloud
https://www.citrix.com/content/dam/citrix/en_us/documents/products-solutions/explore-workspace-cloud-take-a-test-drive-or-trial.pdf
What you need
For this PoC I may refer to AWS and XenServer concepts as my home lab is deployed in a Hybrid Cloud model e.g some of my Citrix workloads are in hosted in AWS EC2 (N.Virgina) while others are running on a XenServer 6.5 SP1+ host at my house in London. You don’t have to use AWS like I am for your PoC you could use any IaaS provider e.g Azure, Rackspace, Peer1 or even on-prem with your own host(s) running XenServer, Hyper-V and of course vSphere :-).
1 – CWC trial account entitling you to the CWC Apps & Desktop Service and Identity & Access Management e.g for adding users from your domain and to download the CWC Connector.
2 – Your resource location of choice mine is AWS from here on in through-out this blog article.
3 – 1x Windows Server 2012 R2 I’ll call this VM WDC01 running AD, DNS at a minimum and the Citrix Receiver (http://receiver.citrix.com), CWC Connector downloaded on the desktop (explained later).
4 – 1x Windows Server 2012 R2 domain joined and I’ll call this VM CXA01 with the latest XA 7.8+ Server VDA (https://www.citrix.com/downloads.html which requires a valid Citrix.com customer/partner account with access details ) downloaded.
5 – AWS security groups (on-prem f/w ACL) to allow outbound traffic on TCP 443 (HTTPS) to the Internet, allow HTTPS/ICA/HDX/RDS traffic including HDX RealTime ports for audio and video between all VM’s within your chosen network.
6 – Some suggested test application examples could be Microsoft’s Office 2016 or OpenOffice, Notepad ++, The Gimp, Autodesk Viewer. WaRnInG!!! Disclaimer – Please refer to the ISV’s EULA for terms of usage prior to downloading, installing, configuring and publishing virtual apps to test and play with!.
7 – *Create friendly DNS entries to be used later for WDC01 e.g DNS entry of cwccontroller.axendatacentre.com or your could stick with host name.domainname format it’s your choice. Note: Be sure to setup and configure not just fwd. but also reverse DNS within resolution/look-up!
Setting up your Resource Location
1 – Login as the Domain Admin on WDC01 and navigate to https://workspace.cloud.com and sign in with your trial access details provided by Citrix.
2 – Select from the list on the very TOP left-hand corner Identity & Access Management next click the plus/+ sign and follow the onscreen prompts to download the CWC Connector/agent.
3 – Before installing the CWC Connector/Agent please be sure to read the following documenation – http://docs.citrix.com/en-us/workspace-cloud/workspace-cloud/what-is-a-workspace-cloud-connector-/workspace-cloud-connector-technical-details.html. Once downloaded double click on the CWC Connector/agent and when prompted enter in your CWC trial access details and the installation will complete successfully if the access details provided are correct and if 443 HTTPS is enable outbound to the Internet from WDC01 to https://workspace.cloud.com.
4 – Take a short 1-3 min comfort break then refresh your web page for https://workspace.cloud.com and navigate back to Identity & Access Management and you should see your domain appear within the list, then you may proceed. If you don’t check your firewall ACL’s locally on the Windows server or virtual f/w at the edge of your VPC network and also check your AWS Security Groups are setup correctly to allow in/outbound access on HTTPS/443.
Note: If you turn off WDC01 you’ll receive and error at this page and manage & monitor tabs within the Apps & Desktop Service are NOT accessible until access is restored! Likewise if you only have 1x CWC Connector/agent then you may see an amber warning under domain within Identity & Access Management as you only have 1x CWC Connector/agent and it suggested even for a PoC to install 2x instead of 1x.
5 – Login as a Domain Admin on CXA01 and mount the XA 7.8+ VDA media by right clicking and left clicking on Mount then navigate to Windows Explorer and double click on D drive that has recently mounted with the XA 7.8 installation media and then proceed to select to install the Server VDA from the splash screen or if your downloaded the Server VDA *.exe (suggested & recommended) from Citrix.com then double click to install the VDA. In each case you’ll require 2x reboots as per normal like on-prem installations however now on CXA01 there is one exception at the controller step type in cwccontroller.axendatacente.com* or the hostname.domainname for WDC01 (Point to the CWC Connector/agent that you previously installed) and then continue with installation and once the installation is completed on CXA01, then verify that the VDA has registered and is communicating with WDC01 e.g cwccontroller.axendatacentre.com by reviewing CWC service or the event logs within Computer Management. Tip: Install to enabling remote connections initially to get your head around how the CWC Apps & Desktop Service actually works.
6 – You’ve now successfully completed setting up your XenApp worker for your chosen resource location in my case it’s an AWS EC2 located out of N.Virginia. If your curious about the CWC connector there is a tech overview avaiable at – http://docs.citrix.com/en-us/workspace-cloud/workspace-cloud/what-is-a-workspace-cloud-connector-/workspace-cloud-connector-technical-details.html be sure to review it.
7 – Now we need to continue with creating a machine catalog, delivery group in the hosted Studio and obviously publishing your virtual apps & desktop (server based).
Create a Machine Catalogue and Delivery Groups to publish Virtual apps & desktops
1 – Now go back to the homepage at https://workspace.cloud.com and to the right of the Apps & Desktop Service click “Manage” to launch the management interface which provides you with an Overview page (Scroll to the bottom to find out your cloud hosted StoreFront address. Tip: If you get an red bar with an error message check that your CWC Connector/agent at your resource location is up and available and showing as green for your domain at the Identity & Access Management tab!.
2 – Scroll to bottom of the overview web page to find out exactly what your cloud hosted StoreFront addr is. It should follow the following format https://{TENANT NAME}.xendesktop.net/Citrix/StoreWeb/. Right click on it to open a new tab and to remain at https://apps.cloud.com/. You should be able to login using your test AD security group. Tip: You won’t see any published virtual apps or desktops currently as you have not created a machine catalogue or delivery group.
3 – Go back to the Manage Apps & Desktops Service web page and click Manage or Monitor this will embed a custom, hardened published app version of Studio or Director using the HTML5 Receiver so please ensure that you are utilising an HTML5 compliant internet browser that supports the HTML5 Receiver.
4 – Assuming you’ve clicked on Manage firstly navigate to Hosting Connections create a connection to your chosen resource location either on-prem or cloud (Private or Public) details for setting up hosting connections are available at – http://docs.citrix.com/en-us/xenapp-and-xendesktop/7-8/manage-deployment/connections.html. Once setup wait 1-2 min before proceeding you don’t have to by the way! I do.
5 – Click Machine Catalogue and create as per normal for detailed on how-to please refer to – http://docs.citrix.com/en-us/xenapp-and-xendesktop/7-8/install-configure/machine-catalogs-create.html. Tip: I’d suggest as its your first time using the CWC Apps and Desktop service create your machine catalogue with a single VM with the VDA installed to allow remote connections as described earlier to allow you to get around how the CWC Apps and Desktops Service actually works. You don’t have to either it’s your choice.
6 – Click Delivery Groups and create as per normal aswell and please refer to – http://docs.citrix.com/en-us/xenapp-and-xendesktop/7-8/install-configure/delivery-groups-create.html for guidance delivering virtual apps (Skype for Business 2015 also implment the HDX Optimisation Pack 2.0 check out – https://www.citrix.com/blogs/2016/01/12/citrix-and-microsoft-unveil-v2-solution-for-skype-for-business/ for more information) & desktops (Windows Server 2012 R2). TIP: The name you provide your Delivery Group filters through to the Workspaces at – https://workspace.cloud.com/workspaces and becomes the default name of your published virtual & desktops services that you will assign to your subscribers (users) workspace.
7 – You’ve now successfully setup a Machine Catalog and Delivery Group using the CWC Apps & Desktop Service to published a virtual apps & desktop, however prior to accessing your virtual apps & desktops you’ll need to create a Workspace and add subscribers (users) including which published resources your subscribers (users) are able to access otherwise they wont be able to login nor access any published resources.
You should have the Server VDA and CWC Connector now installed see the below example image below.

Create a Workspace to Delivery published virtual apps & desktops
1 – A workspace consists of a collection of services from CWC e.g Secure Documents (ShareFile), Apps & Desktop Service (XenApp/XenDesktop) and so forth that SysAdmins can combine together to form e.g a Pre-Sales workspace that may consist of a virtual apps e.g Skype for Business 2015 that is also offloaded with the HDX Optimisation Pack 2.0 – https://docs.citrix.com/en-us/hdx-optimization/2-0/hdx-realtime-optimization-pack-about.html and a virtual desktop e.g a dedicated Windows 10 or 2012 R2 desktop. A workspace also consists of subscribers (users) who access the workspace which contains published resources created by Citrix SysAdmins. Please ref to http://docs.citrix.com/en-us/workspace-cloud/workspace-cloud/get-started/creating-and-publishing-a-workspace.html which explains how-to create a workspace, define subscribers and published resources.
2 – Once you have created a Workspace and assigned subscribers, resources then users can login at https://{TENANT}.xendesktop.net/Citrix/StoreWeb/ from there resource location and gain access to there virtual apps & desktops.
3 – Managing your newly created Workspace is easy following this useful online document from eDocs – http://docs.citrix.com/en-us/workspace-cloud/workspace-cloud/get-started/manage-a-workspace.html.
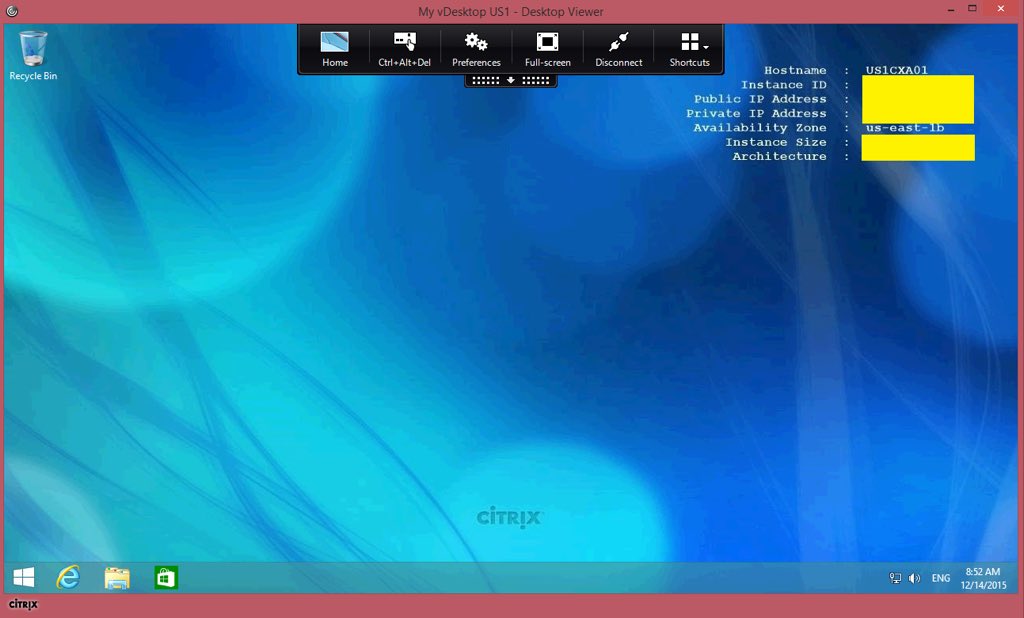
Example of my virtual desktop (Server based) delivered by CWC using the XenApp 7.8 VDA. I also use the same theme for my complete XenApp 7.8 deployment in AWS yes I have both deployed and configured 🙂

A first for me
This is the first time I’ve written a blog post (primarily) completed in the air traveling from somewhere between London – England, Oslo – Norway and Stockholm – Sweden.
Disclaimer
This blog article should be considered to be a draft still and therefore may contain errors and I will be updating and adjusting it time permitting and adding in how-to front this CWC Apps & Desktop service deployment in my AWS EC2 resource location with NetScaler Unified Gateway – https://www.youtube.com/watch?v=qT739UoR8d0.