Tag Archives: AWS

Deploying a Hyper Responsive Web Service with(out) NetScaler?

The views expressed here are my own and do not necessarily reflect the views of Citrix.

Shortened Names
CONTENT DELIVERY NETWORK – cdn
SECURITY ASSERTION MARKUP LANGUAGE – saml
FEDERATED AUTHENTICATION SERVICE – fas
LOAD-BALANCING – l/b
NETSCALER UNIFIED GATEWAY – nug or netscaler ug
NETSCALER – ns
XENAPP – xa
XENDESKTOP – xd
XENAPP/XENDESKTOP – xad
INTERNET SERVICE PROVIDER – isp
MANAGED SERVICE PROVIDER – msp

Introduction
Yes I will be talking about Citrix NetScaler only here as I am a Citrite, this blog post is more about methods vs. technical guidance so lets begin. In a previous life prior to my current role at Citrix I worked for a managed Internet Service Provider (mISP) or MSP where the customers I used to manage where required to deploy app, database & web servers (infrastructure) to service + support customer transactions at a massive scale but also ensuring a fast vs. efficient user experience at scale vs. normal usage. Today I am go explore how to optimise the delivery of web-based service fronted with(out) a Citrix NetScaler from startup to a global organisation we all can’t live without!

My scenario will focus on taking a web based service that you’ve developed as a start-up running on a single VM at instance type of any size running LAMP to be a continually hyper responsive web service as the load increases or popularity of the web service by first implementing simple but very effecting SysAdmin techniques. Your company is now born you’ve found a niche in a market segment/vertical and you’ve adopted a framework for development to build your web service platform on and you’ve identified where to host vs. run your web service from.

Optimising your Web Service to be Hyper Responsive with(out) NetScaler

You can deploy a successful vs. highly available web service without any ADC yes that is right, however there does come a point when its right vs. relevant and you will need to implement an ADC like Citrix NetScaler. So how can you? Well it comes down to thinking like a SysAdmin sometimes how can I optimise by removing stuff vs. consolidating roles or migrating them to alternative platforms.

Lets examine your Web Service that we’ve just launched its currently a single VM instance for argument sake its hosted in a public cloud like AWS vs. Azure vs. GCP or even a private cloud perhaps running on a XenServer host :-). You’re happy and believe your ready to begin your journey with your new startup so you begin promoting it socially on Twitter, LinkedIn, Instagram e.t.c and slowly over a few weeks the demand for the web service begins to grow steadily and you notice that the responsiveness isn’t 100% what it was a the time of launch so you schedule a maintenance window at say 04:00 GMT and scale up the VM instances compute resources to 4vCPU and 24GB of RAM including attaching another SSD HDD and you shift the content e.g images, CCS style sheets and JQuery files onto this HDD to improve performance by shifting I/O Reads for content onto another HDD.

Customers
EDGE
Web, Database & Content Roles running on a single Web Server

Happy days your web service is now back to that 100% (Initial launch experience) but now fast forward a few more weeks vs. months and your web services popularity increases organically vs. social and traditional marketing campaigns so your back to its not quiet as responsiveness anymore vs. isn’t 100% what it was a the time of launch so you schedule a maintenance window to perform some careful real-time investigation work to understand where are the bottle neck(s)? Each Web Service today in my personal opinion will have difference bottle neck(s) this is down to how its developed to run (standard alone vs. h/a cluster vs. globally distributed) vs. coded (framework vs. ground up framework) so careful monitoring of your web service platform from inception to the current date and the future is critical to help you continually truly scale your web service.

After reviewing the gathered insights from various tool(s)* you can see that the number of Reads to the HDD is quiet high and all to often I have seen decisions made to shift the database away from the web service onto another VM instance without checking what service is responsible for all those Reads and what location on the HDD the Reads are occurring from!? In my personal experience its mostly like not the database BUT the content e.g images, scripts, stylesheets that cause the high I/O Reads on the HDD when serving up content to load the web pages for customers on there end-points however with proper coding of your web service you can reduce this by caching the content on the users device (Laptop, PC, Mac, Smartphone, Tablet, Thin client) so when they change web pages there isn’t a hit on the web server (look at NetScalers HTTP Compression technology aswell) for the exact same content BUT only for what has changed perhaps image(s) of items they you want to acquire including its price + title + description collected from the database e.g change of search or click on the next/back buttons of there found vs. filtered results.

At this point you can do one of three things (1) you can migrate the database to an external VM instance and change the web service to connect to the database on now a remote server which is most commonly down without proper investigative work (2) if your in a public cloud you could choose to utilise a PaaS database service this option is not for everyone in my personal opinion just yet and its not necessarily a technology vs. security adoption blocker but I believe its a analytics blocker if the public cloud provider chooses to come into my market and also its way to NEW for me most common theme (3) keep the database exactly where is it and begin to or shift to delivering your Content via a CDN model or sometimes referred to as an Image Farm i.e the bits that make your website look good and the way it looks e.g images, logo, CCS style sheets, JQuery scripts that provide functionality + experience. This approach will help improve the users overhaul experience at any stage because the content is delivered via CDN model or method – https://en.wikipedia.org/wiki/Content_delivery_network (Example www.youtube.com) and not via the web server servicing up the webpage(s) from the web service anymore and typically the responsiveness of web service leads to a better experience for customers and there satisfaction goes up using your web service! This approach free’s up vital compute + I/O resources on your web server running your web service. Visit your favourite online retailer, ISV e.t.c and view the HTML source you’ll see what I mean! Most organisations typically don’t implement this earlier enough and often will implement this strategy after the ADC is deployed as the right vs. relevant skillset for managing your web service at scale simply is not available within the business yet.

Customers
EDGE
Web & Content Roles on single Web Server
Database Role on separate remote Server

Happy days! Your developer suggests to implement lets just keep it simple Round-robin DNS https://en.wikipedia.org/wiki/Round-robin_DNS so that he can make the web service multi web server enlightened e.g clustering so after some tests he/she deploys the new code onto the PROD web server and deploys 1-2 more web servers completes his tests and implements and deploys Round-robin DNS. Personally this is NOT something I would ever implement as if you don’t manage your DNS correctly with someone who knows what they are doing you could fall victim to DNS cache poisoning – https://en.wikipedia.org/wiki/DNS_spoofing or worse and bye bye web service = bye bye business! In a previously life prior to Citrix working at a mSP DNS management was taken very seriously for customers as without it your business would not be available online and the net outcome is simple you cannot transaction business to turn a profit and keep shareholders happy! Back to the blog so you know have a cluster enlightened web service platform to give you scale although its not prefect in my personal opinion with this strategy.

Customers
DNS
Round-robin DNS
EDGE
Web & Content Roles on Web Server
■ ■ ■
Database Role on separate remote Server

Happier Days lie ahead as more bottle necks in your web service have been resolved and the web service is becoming even more and more popular with customers in the particular City vs. County that you initially launched the web service from BUT now as more time passes and the business continues to growth from strength to strength, month on month you once again notice that the responsiveness isn’t 100% what it was a the time of launch vs. the last architectural change(s) that where made to enlightening web service platform and that you choose to switch the database to a remote VM instance, and I also am going to assume you did not implement the CDN concept for content (images, CCS, scripts e.t.c). So your business is now profitable and at a level where you have on-boarded the right vs. relevant skillset within the business to help take your web service to the next level i.e regional vs. GEO vs. global scale or you hire in external but experienced ADC professionals to help with the re-architecture of your web service platform or your go Serverless (Follow-up article!) but we’ll leave that one for todays post as its another blog post all on its own.

Upon investigation utilising various *tools (Network, Cacti, SmokePing, TOP e.t.c.), reviewing historical data points vs. graphs the decision is made that your web service platform now needs to adopt an (NetScaler) Application Delivery Controller (ADC) to scale smarter, intelligently and more efficently on-demand as the business grows while also ensuring high-availability 99.xxxxx% (You choose your 9’s) uptime 24/7/365 and to also maintain that initial customer experience during your startup phase or day 1 trading of business. In my view when implementing an ADC correctly the responsiveness should equal at scale if not be better than that first time you deployed your web service. At this stage most likely dependant upon the web service (What is it? game platform vs. online store e.t.c) you’ll potentially implement the following architecture to easily support a GEO or a region(s) within a GEO e.g EMEA or global scale and remove that Round-robin DNS method!

Content via CDN
Customers
EDGE
NetScaler ADC
□ □
Web/App Servers
■ ■ ■ ■ ■
Database Servers
■ ■
Content Servers
■ ■

What is NetScaler?
It’s a Layer 4-7 networking appliance https://www.citrix.com/networking/ that allows for securing and acceleration of workspace, web and app workloads while remaining transparent to customers. It comes in many different flavours vs. roles from providing secure BUT contextual remote access for SaaS, Web apps, virtual apps & desktops, R/A VPN with end-point scanning, microVPN e.g XenMobile apps e.t.c to virtualising your WAN by bonding multiple internet uplinks together through to supporting and monitoring a deployed web service(s) at local, regional, GEO or global scales all the while also providing deep insight and analytics into your organisation see the below video and much much more.

So Why Implement a NetScaler?
Implementing an NetScaler has many benefits it allows for offloading of TLS or HTTPS traffic https://docs.citrix.com/en-us/netscaler/12/ssl.html freeing up vital compute resources or cycles spent on decrypting the traffic where as now the web servers running your web service can have greater scale as they are now free to get on process transactions, monitor the health – https://docs.citrix.com/en-us/netscaler/12/load-balancing/load-balancing-builtin-monitors.html of each web server that is load-balanced (l/b) – https://docs.citrix.com/en-us/netscaler/12/load-balancing/load-balancing-how-it-works.html by NetScaler and if one or more web server(s) are performing poorly it will receive less transactions until it becomes more responsive, Datastream – https://docs.citrix.com/en-us/netscaler/12/datastream.html enables connection multiplexing to your database servers e.g more efficient writes + reads means faster transactions which means better performance of the web service with a net outcome of better user experience for customers, if don’t use the CDN concept for content take a look at the integrated cache feature – https://docs.citrix.com/en-us/netscaler/12/optimization/integrated-caching.html which allows the NetScaler to store and serve specific content saving a request to the server holding the desired content this further improving the responsiveness of your web service, support for Googles SPDY (Speedy) https://docs.citrix.com/en-us/netscaler/12/optimization/spdy.html and or implement HTTP Compression – https://docs.citrix.com/en-us/netscaler/12/optimization/http-compression.html which compresses responses from servers to compression aware-browsers example – https://developers.google.com/web/fundamentals/performance/optimizing-content-efficiency/optimize-encoding-and-transfer even enable and allow SAML and OAuth – https://docs.citrix.com/en-us/netscaler/12/aaa-tm/oauth-authentication.html logins to now only SaaS apps but also Windows apps used inline with FAS within XAD 7.9+. The list goes on and on so be sure to check out the NetScaler online documentation at – https://docs.citrix.com/en-us/netscaler/12.html and remember NetScaler is an advanced ADC but can also do the following Secure Web Gateway, Web AppFirewall, Unified Gateway and SD-WAN.
Deploy XenApp 7.x in AWS EC2 with PoC Leading Best Practises (Draft)

The following content is a brief and unofficial prerequisites guide to setup, configure and test delivering virtual apps and desktops from AWS EC2 – https://aws.amazon.com powered by XenApp & XenDesktop 7.13+ & 7.15 prior to deploying in a PoC, Pilot or Production environment by the author of this entry. The views, opinions and concepts expressed are those by the author of this entry only and do not necessarily conform to industry descriptions or best practises. The views expressed here are my own and do not necessarily reflect the views of Citrix.

Minor updates include links 7.15 LTSR and not just 7.13 as of 30/12/2018

Shortened Names
LOCAL HOST CACHE – lhc
XENAPP – xa
WINDOWS – win
VIRTUAL DELIVERY AGENT – vda
HIGH DEFINITION EXPERIENCE – hex
VIRTUAL APPS – va
VIRTUAL DESKTOP – vd
SERVER – srv
CUSTOMER EXPERIENCE IMPROVEMENT PROGRAM – ceip
DATA TRANSPORT LAYER – eat
FIREWALL – f/w
ACCESS CONTROL LISTS – all
INFRASTRUCTURE AS A SERVICE – iaas
IDENTITY & ACCESS MANAGEMENT – aim

Reader Notice: This blog post is NOT completely finished and some parts are in draft format! I will continue to update it through-out April/May 2017!

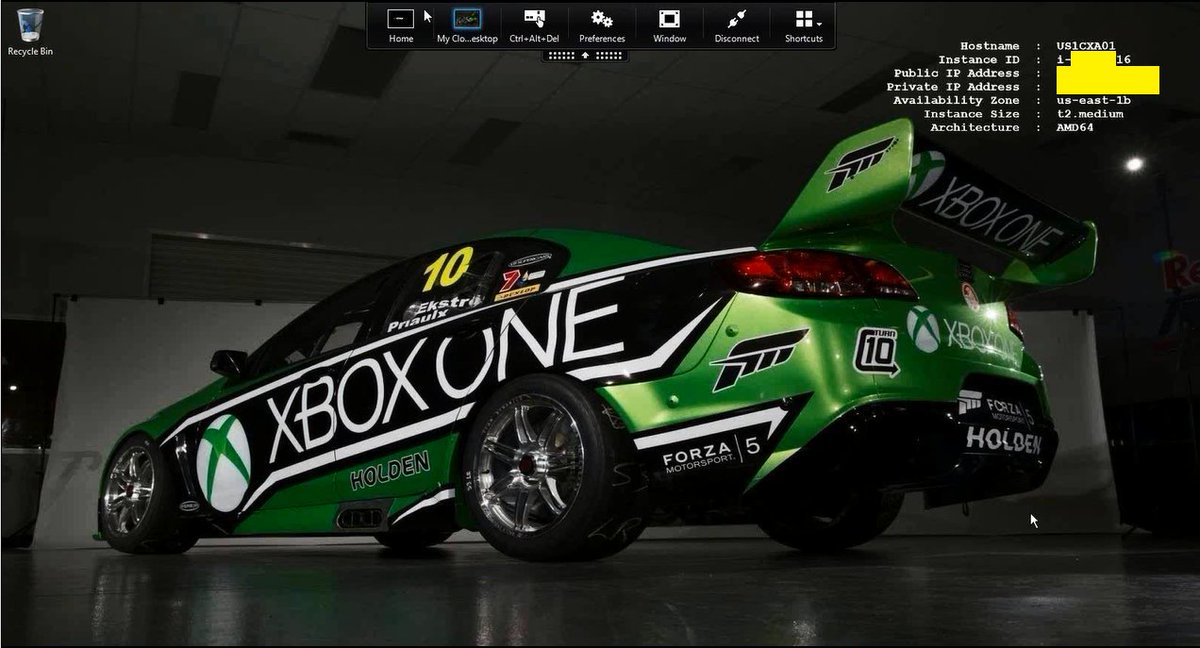
Sample Virtual Desktop from AWS powered by XenApp 7.x
In this example my VPC is in N.Virgina, USA hosting my Citrix XenApp 7.x workloads which are been delivered to me transatlantic to London, England thanks to the HDX.


Link to my original Tweet from 29/04/2016 at – https://twitter.com/lyndonjonmartin/status/726122016621891584 close to the delivery of a UKI Citrix partner enablement workshop on delivering XenApp 7.x PoC from AWS.

What is AWS EC2?
It’s a division with-in Amazon that sells IaaS to customers for consumption. AWS is incredibly simple in my personal view BUT equally at the very same time it’s also an exceptionally powerful Public (IaaS) Cloud platform! IT departments within organisations of all shapes and sizes have an equal capability with AWS’s elastic virtual data centre capacity to rapidly design and implement a VPC to setup, configure and deploy workspace workloads of their choice within a few hours or days dependant upon there IT’s dept’s delivery & execution skillsets. Typing into Google.co.uk “AWS first year” reveals AWS’s first year was 2006 thats now over a decade’s worth of experience, maturity and continued on-going development and innovation. Check out – https://en.wikipedia.org/wiki/Amazon_Web_Services#History or brief history lesson.

Concepts of AWS
Most of what I’ve described below is available on the AWS “Getting Started” web page at – http://docs.aws.amazon.com/AmazonVPC/latest/UserGuide/GetStarted.html so be sure to read through-it.

Virtual Private Cloud (VPC)
Think of this as a virtual datacentre that created onto of AWS IaaS which allows you to create virtual networks (IP addr ranges, subnets e.t.c), deploy VM instances of different sizes for your required workloads and storage accounts to facility your organisations needs and requirements to potential optimise workload delivery, experience or DR scenario’s.

VM Instances Types
AWS provides traditional VM’s that you’d typically assign compute, storage type to on-prem as pre-defined instance types that vary in size and capacity to meet virtually most organisations workspace requirements in AWS. For an up to date list please check out –
https://aws.amazon.com/ec2/instance-types/.

Security Groups
Think of these as your traditional or virtual f/w’s ACL’s BUT now assigned against VM instance(s) within your VPC either individually or in a group, to control what traffic type e.g ports vs. protocol are allowed in/outbound. Check out – http://docs.aws.amazon.com/AWSEC2/latest/UserGuide/using-network-security.html#default-security-group which also covers the standard “Default Security Groups” within your VPC that you can utilise and modify for your PoC.

*Availability Zones
A logical representation of one or more data centres facilities in a city, state/province/county or even country.

*Regions
Simply put its a Geo area and they are isolated form other regions for H/A. In a Citrix world a simple example could be to think of multiple sites (London, Paris, Oslo all built to N+1) managed using FMA 7.7+ Zones (Primary and Satellite) for H/A for geo area.

* http://docs.aws.amazon.com/AWSEC2/latest/UserGuide/using-regions-availability-zones.html

Identity & Access Management (IAM)
This one is quiet important to understand if you want to deploy your PoC with MCS provisioned XA VDA workloads in AWS from a master VM instance like you would traditionally on-prem with XenServer, Hyper-V, Acropolis or vSphere. Setting up IAM enables/allows Studio to communicate with the AWS EC2 cloud hypervisor to provision your VM instances –
http://docs.aws.amazon.com/IAM/latest/UserGuide/introduction.html from your master VM instance in your VPC(s). If your not interested in deploying MCS workloads then skip learning IAM for now BUT please come back to it as it’s equally important as Security Groups for Pilot, UAT and PROD workloads in AWS with(out) Citrix workloads.

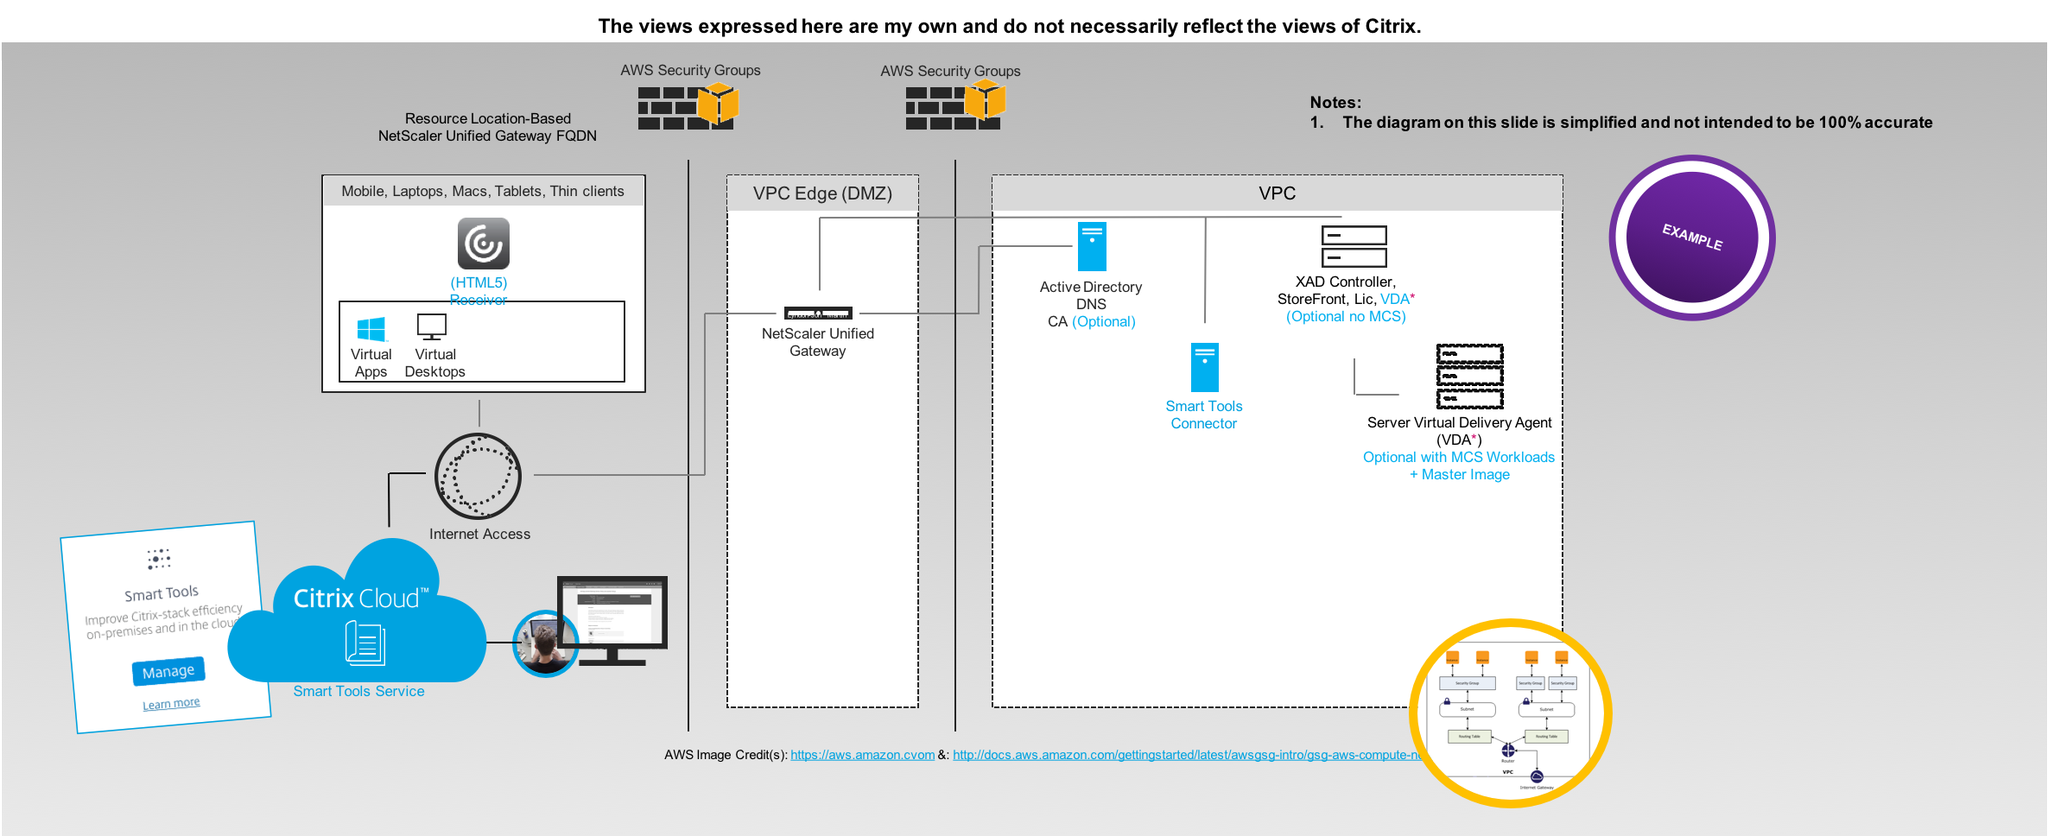
Suggested PoC Architecture
I tweeted the image at – https://twitter.com/lyndonjonmartin/status/854809306629361669 (its not intended to be accurate!) if you want a high resolution copy. Its intended to provide a high level only PoC deployment overview of delivering virtual apps & desktops (server) from AWS EC2 using Citrix XenApp 7.15 fronted by NetScaler Unified Gateway and or you can utilise Citrix Smart Tools – https://www.citrix.com/products/citrix-cloud/services.html to deploy blueprint to stand up a XenApp PoC in AWS.

AWS & Citrix Pre-requisites, System Requirements
The following provides an brief and selective overview of standing up the bare min requirements to delivery Citrix secure workspace workloads from AWS.

0. Amazon Web Services (AWS) (cloud) hypervisor support – http://docs.citrix.com/en-us/xenapp-and-xendesktop/7-13/system-requirements.html#par_anchortitle_8a90 &  https://docs.citrix.com/en-us/xenapp-and-xendesktop/7-15-ltsr/system-requirements.html#hosts–virtualization-resources.
1. Sign-up for a AWS EC2 account at – https://console.aws.amazon.com it will redirect you to the default AWS login and sign-up web page. You will need a valid credit card that you own and be sure to read through AWS terms & conditions, UAP e.t.c.
2. Once your have signed-up select a EC2 region i typically utilise N.Virgina as I expense this myself and it also makes for good tests locations of my Citrix workloads when testing out legacy vs. current vs. the latest HDX (3D Pro) technologies & innovations transatlantic from the US too the London, England :-).
3. Now that you’ve chosen or decided upon your region you’ll need to deploy your VPC – http://docs.aws.amazon.com/AWSEC2/latest/UserGuide/using-vpc.html you can make use of the default AWS VPC configurations which you can easily modify as required to meet the needs of your PoC.
4. Now create a e.g Citrix VAD “Security Group” which acts as a firewall ACL controlling which ports/protocols and traffic by *.* or IP range(s)* e.t.c are permitted in/out bound of your VPC to your VM instance(s) associated to this security group so that the delivery of virtual apps & desktops is possible from VM instances running the Server VDA’s.

Suggested example Traffic flow from the Internet to a Virtual App & Desktop delivered by an EC2 Instance

– Untrusted network or public raw internet
– DMZ or edge of a network, network/vnet or (network) security group depending on your network deployment choice
– Trusted network or private secure network

WWW Internet Gateway Router VPC Availability Zone Security Group Network EC2 Instances

Suggested (Security Group – Mgmt. VM) Port Configuration for RDS access to your mgmt. VM running AD, DNS e.t.c

For this particular security group I’d strongly recommended that when you setup the security group you limit the access to a single IP addr or range that you know and trust RDS access to come from to your mgmt. VM sat in your VPC.

Protocol Port Inbound Outbound Internal VPC
TCP: SSH PuTTY (NS Mgmt. only) 22
TCP: HTTP (Internal Communication) 80
TCP: RDP/RDS 3389 * *

Suggested (Security Group – Citrix VAD) Port Configuration for Citrix Workloads to the World

The following table is actually more about the required TCP/UD Ports and dependant upon your deployment approach e.g with(out) a L2L IPSec VPN tunnel vs. NetScaler Unified Gateway i’ve decided for this section most of it available with the exception of a few which are a no no for external inbound access.

Warning once again caution this table ONLY represents primary PORTS typically required in a PoC and does not imply that you should use this as your ACL for your AWS security groups as you requirements for your particular PoC use case may differ from organisation to organisation! For a complete list of the ports and what they do please ref to http://docs.citrix.com/en-us/xenapp-and-xendesktop/7-13/technical-overview/default-network-ports.html & https://docs.citrix.com/en-us/xenapp-and-xendesktop/7-15-ltsr/technical-overview/default-network-ports.html  .

Protocol Port Inbound Outbound Internal VPC
TCP: HTTPS (TLS) 443 * *
UDP: HTTPS (TLS) 443 * *
TCP: ICA/HDX Thinwire 1494 * *
UDP: ICA/HDX EDT or Framehawk 1494 * *
TCP: Session Reliability 2598 * *
UDP: Session Reliability for EDT only 2598 * *
UDP: HDX RealTime e.g Skype for Business 16500-16509 * *

5. Lunch an NEW single instance from the EC2 dashboard under “Create Instance” this will be your mgmt. VM “wdc01” for the PoC and AWS will guide you through the deployment process (wizard).
6. Select your VM instance type to be deployed in your default or custom VPC and a suggested example instance type to utilise could be a AWS “t2.medium” instance type. You can find a complete list available at – https://aws.amazon.com/ec2/instance-types/.
6. Assign the default storage or increase and you can add another HDD later.
7. Assign the RDS mgmt. security group ensuring that RDS is enabled to connect to your mgmt VM.
8. Allow the VM to provision typically up to 5 minutes (depends on time of day, location of your VPC) then decrypt the passwd
9. Login and utilise this as your mgmt. VM and install the following suggested roles e.g AD, DNS and CA (Optional) as a bare minimum once you’ve assigned it an internal private static IP addr prior to installing and configuring.
10. Check a folder called e.g “Share” on C:\ and enable file sharing to this folder for your domain admin account.
11. Navigate to https://www.citrix.com/downloads/xenapp-and-xendesktop/ and download the latest XenApp/XenDesktop version available which is as of 12/04/2017 7.13 and copy it to the C:\Share to be used later to install XenApp 7.13+ onto your XA worker.
12. Now repeat steps 5 through 9 to deploy another single VM instance which will be your XenApp PoC VM e.g “xad01poc” and assign the following suggested instance type “t2.large’ with the exception of step 7 where you’d assigned the default VPC security group and login via RDS to this VM from your mgmt. VM e.g “wdc01”.
12. Once its ready login to your mgmt. VM “wdc01” and RDS to “xad01poc” provide it with a custom or use the default hostname and AD domain join it.
13. After successfully domain joining it login and create a folder on the C:\ drive called “Temp” on “xad01poc” and copy the *.iso from \\wdc01\Share to it.
14. Right click on the *.iso and “Mount” the media and the autorun should display the splash screen and select “XenApp”.
15. Select to install the “Delivery Controller” checking all the features e.g Studio, Director, Controller, MS SQL Express, StoreFront, License server and all the required ports.
16. You have now setup a mgmt. VM and a XenApp mgmt. VM.
17. Install and bound SSL certificate on “xad01poc” to be able to utilise https to protect username and passed credential handling when accessing RfW.

Understanding Machine Creation Services requirements for AWS
https://docs.citrix.com/en-us/xenapp-and-xendesktop/7-15-ltsr/manage-deployment/connections.html.

PoC Deployment of Virtual Apps & Desktops
Deployment Option 1 – NO MCS nor NetScaler UG & NOT SUGGESTED!!!
This option to be very clear is typically used to demonstrate the power of HDX from a public cloud e.g AWS and DOES IT WORK? Yes of course! I would strongly recommend that you don’t deploy your PoC with this approach but front it with a NetScaler UG but i’ve included it as I have covered this topic once before and sometime Citrix SysAdmins just want to test to see is it actually at all possible with little to know effort at all before actually deploying a PoC so I hope that this clears up this PoC deployment approach/path is messy and NOT SUPPORTED!!!!

1. Now also assign the Citrix VAD “Security Group” to “xad01poc” VM.
2. Re-mount the *.iso media if required and on the installation splash screen select to install the Server VDA choosing to enable existing connections selecting “Enable Remote PC Access” the VM will restart a few times which will take circa up to 5 minutes while the VDA installs.
3. Once the VDA is installed successfully launch “Studio” and complete creating a Site, machine catalog and delivery group based upon “xad01poc” VM.
4. Modify the SFS default.ica file for your default Store to include a line to utilise your external dynamic static IP addr and check that your Windows f/w rules are correctly configured to allow in/out bound access based upon the Citrix VAD “Security Group” or you can open the downloaded file you receive post login and modify the internal private static IP addr to the “xad01poc” VM’s dynamic public IP addr assigned by AWS and you should be able to launch your virtual app or desktop. Note: You’ll need to do it for each app or virtual desktop and if you modified the default.ica file with dynamic IP each time you stop and deallocate the VM you’ll need to modify the file again unless you utilise a AWS static public IP addr which is chargeable cost per month!
5. Navigate to https://xad01poc-dynamic-public-ip-addr/Citrix/StoreWeb/ with Citrix Receiver install on your Windows, Mac or Linux end-points and login as a domain admin or user and launch a virtual app or desktop that you’ve published.
6. Test the vitual app and our desktops performance by playing YouTube movie trailers here is fav one of mine – https://www.youtube.com/watch?v=sGbxmsDFVnE or download Google Chrome and publish it and access https://p3d.in. You’ll notice I have not mentioned what HDX graphics mode why? It should provide a good UX out of the box with 7.13+.
7. Shutdown and turn off your VM’s within your AWS VPC when finished to save costs. You will be billed for storage on-going e.g GB that you’ve consumed but I have to say its a very low cost per GB.

Deployment Option 2 – No MCS but fronted by NetScaler UG
Coming…

Deployment Option 3 – With MCS Workloads fronted by NetScaler UG
Coming…

Deployment Option 4 – Powered by Citrix Smart Tools (Notice some offers have been deprecated in 2018)
0. What is Smart Tools? Watch https://www.youtube.com/watch?v=RUTL1X_nBSg. I won’t expand on this topic more than what I have below for this particular blog post otherwise its going to get quiet length but I have to say you should explore Smart Tools post testing/deploying an AWS XenApp PoC.
1. Sign-up to Smart Tools Service at https://citrix.cloud.com/.
2. Create an AWS EC2 resource location with the Smart Tools Connector (formerly CLM our Lifecycle Management Connector) – https://manage-docs.citrix.com/hc/en-us/articles/212713903 and also please read – https://manage-docs.citrix.com/hc/en-us/articles/212713923 & https://manage-docs.citrix.com/hc/en-us/articles/212713963-Add-an-Amazon-Web-Services-resource-location.

3. Read the Blueprint available which explains deploying a blueprint to deploy workloads on AWS at – https://manage-docs.citrix.com/hc/en-us/articles/212714483-Deploy-a-blueprint-to-an-Amazon-Web-Services-resource-location which should give you a decent overview.
4. Download or read online the following getting started PoC guide for XenApp on AWS powered by Smart Tools Service (Smart Build using as Blueprint) available at the following URL with step by step instructions and images – https://docs.citrix.com/content/dam/docs/en-us/lifecycle-management/downloads/get-started-lifecycle-management-aws.pdf.

Leading Best Practises
1. Review the content available at – https://www.citrix.com/global-partners/amazon-web-services/xendesktop-on-aws.html
2. The number one AWS resource to check first and foremost is the AWS Well-Architected microsite at AWS EC2 at – https://aws.amazon.com/architecture/well-architected/ to help you get started. You should also understand how IAM in AWS works so be sure to check out –https://docs.aws.amazon.com/IAM/latest/UserGuide/intro-structure.html.

Notes from the field
1. The number one leading best practise is “Shutdown and turn off your VM’s within your AWS VPC when finished” to save your own personal costs incurred and or your organisations costs that maybe incurred.
2. You do need a suggusted intermediate knowledge level of AWS EC2 and Citrix in order to deploy virtual apps & desktops CORRECTLY I personally believe to ensure that those testing on your behalf actually are getting the correct HD or balanced experience to ensure a successful PoC. I’ve many misconfigurations in a variety of areas since 2015.
3. Take a look at using Citrix Smart Tools as an enabler to help you with XenApp environment(s) on AWS – https://manage-docs.citrix.com/hc/en-us/articles/213723663-Create-a-XenApp-and-XenDesktop-production-deployment-on-AWS.

Deploying a PoC with the Citrix Workspace Cloud (CWC) Apps & Desktop Service now Citrix Cloud XenApp and XenDesktop Service (Draft)

The following content is a brief and unofficial prerequisites guide to setup, configure and test delivering virtual apps and desktops powered by Citrix Workspace Cloud (CWC) – App’s & Desktop Service with a AWS EC2 resource location prior to deploying in a PoC, Pilot or Production environment by the author of this entry. The views, opinions and concepts expressed are those by the author of this entry only and do not necessary conform to industry descriptions or best practises. The views expressed here are my own and do not necessarily reflect the views of Citrix.

Shortened Names
AMAZON WEB SERVICES – aws
SECURITY GROUPS – sg
ELASTIC COMPUTE CLOUD – ec2
HYBRID CLOUD PROVISIONING – hcp
XENAPP – xa
XENDESKTOP – xd
XENAPP/XENDESKTOP – xad
VIRTUAL DELIVERY AGENT – vda
HIGH DEFINITION EXPERIENCE – hdx
INDEPENDENT COMPUTING ARCHITECTURE – ica
CITRIX WORKSPACE CLOUD CONNECTOR – cwc connector/agent
EXPERIENCE 1st – x1
VIRTUAL DESKTOP – vd
VIRTUAL APPS – va
INFRASTRUCTURE AS A SERVICE – iaas
CITRIX WORKSPACE CLOUD – cwc
CITRIX LIFECYCLE MANAGE

Video Citrix Workspace Cloud: How It Works

PoC Introduction & Overview (This is a Public Draft Blog Article & May Contain Some Errors)
In this particular instance I will be deploying a Citrix Workspace Cloud (CWC) PoC using the Apps & Desktop service which is Citrix online service and is essentially made up of five compoments in my personal view these are people (Users, Consultants & SysAdmins), the Control Plane which is hosted by Citrix and is high available and accessible at – https://workspace.cloud.com/, Resource Locations which could be private, public (IaaS) or hybrid clouds which host and run your actual CItrix workloads e.g servers or desktops OSes with the VDA’s installed and optionally StoreFront and or NetScaler Unified Gateway, Receiver for access to your published virtual apps & desktops and finally the CWC connector which makes everything just work safe & securely.

Please note that I will update this blog post with a how-to re deploying NS for remote access from AWS EC2.

Datasheet for Citrix Workspace Cloud
https://www.citrix.com/content/dam/citrix/en_us/documents/products-solutions/explore-workspace-cloud-take-a-test-drive-or-trial.pdf

What you need
For this PoC I may refer to AWS and XenServer concepts as my home lab is deployed in a Hybrid Cloud model e.g some of my Citrix workloads are in hosted in AWS EC2 (N.Virgina) while others are running on a XenServer 6.5 SP1+ host at my house in London. You don’t have to use AWS like I am for your PoC you could use any IaaS provider e.g Azure, Rackspace, Peer1 or even on-prem with your own host(s) running XenServer, Hyper-V and of course vSphere :-).

1 – CWC trial account entitling you to the CWC Apps & Desktop Service and Identity & Access Management e.g for adding users from your domain and to download the CWC Connector.
2 – Your resource location of choice mine is AWS from here on in through-out this blog article.
3 – 1x Windows Server 2012 R2 I’ll call this VM WDC01 running AD, DNS at a minimum and the Citrix Receiver (http://receiver.citrix.com), CWC Connector downloaded on the desktop (explained later).
4 – 1x Windows Server 2012 R2 domain joined and I’ll call this VM CXA01 with the latest XA 7.8+ Server VDA (https://www.citrix.com/downloads.html which requires a valid Citrix.com customer/partner account with access details ) downloaded.
5 – AWS security groups (on-prem f/w ACL) to allow outbound traffic on TCP 443 (HTTPS) to the Internet, allow HTTPS/ICA/HDX/RDS traffic including HDX RealTime ports for audio and video between all VM’s within your chosen network.
6 – Some suggested test application examples could be Microsoft’s Office 2016 or OpenOffice, Notepad ++, The Gimp, Autodesk Viewer. WaRnInG!!! Disclaimer – Please refer to the ISV’s EULA for terms of usage prior to downloading, installing, configuring and publishing virtual apps to test and play with!.
7 – *Create friendly DNS entries to be used later for WDC01 e.g DNS entry of cwccontroller.axendatacentre.com or your could stick with host name.domainname format it’s your choice. Note: Be sure to setup and configure not just fwd. but also reverse DNS within resolution/look-up!

Setting up your Resource Location
1 – Login as the Domain Admin on WDC01 and navigate to https://workspace.cloud.com and sign in with your trial access details provided by Citrix.
2 – Select from the list on the very TOP left-hand corner Identity & Access Management next click the plus/+ sign and follow the onscreen prompts to download the CWC Connector/agent.
3 – Before installing the CWC Connector/Agent please be sure to read the following documenation – http://docs.citrix.com/en-us/workspace-cloud/workspace-cloud/what-is-a-workspace-cloud-connector-/workspace-cloud-connector-technical-details.html. Once downloaded double click on the CWC Connector/agent and when prompted enter in your CWC trial access details and the installation will complete successfully if the access details provided are correct and if 443 HTTPS is enable outbound to the Internet from WDC01 to https://workspace.cloud.com.
4 – Take a short 1-3 min comfort break then refresh your web page for https://workspace.cloud.com and navigate back to Identity & Access Management and you should see your domain appear within the list, then you may proceed. If you don’t check your firewall ACL’s locally on the Windows server or virtual f/w at the edge of your VPC network and also check your AWS Security Groups are setup correctly to allow in/outbound access on HTTPS/443.

Note: If you turn off WDC01 you’ll receive and error at this page and manage & monitor tabs within the Apps & Desktop Service are NOT accessible until access is restored! Likewise if you only have 1x CWC Connector/agent then you may see an amber warning under domain within Identity & Access Management as you only have 1x CWC Connector/agent and it suggested even for a PoC to install 2x instead of 1x.

5 – Login as a Domain Admin on CXA01 and mount the XA 7.8+ VDA media by right clicking and left clicking on Mount then navigate to Windows Explorer and double click on D drive that has recently mounted with the XA 7.8 installation media and then proceed to select to install the Server VDA from the splash screen or if your downloaded the Server VDA *.exe (suggested & recommended) from Citrix.com then double click to install the VDA. In each case you’ll require 2x reboots as per normal like on-prem installations however now on CXA01 there is one exception at the controller step type in cwccontroller.axendatacente.com* or the hostname.domainname for WDC01 (Point to the CWC Connector/agent that you previously installed) and then continue with installation and once the installation is completed on CXA01, then verify that the VDA has registered and is communicating with WDC01 e.g cwccontroller.axendatacentre.com by reviewing CWC service or the event logs within Computer Management. Tip: Install to enabling remote connections initially to get your head around how the CWC Apps & Desktop Service actually works.
6 – You’ve now successfully completed setting up your XenApp worker for your chosen resource location in my case it’s an AWS EC2 located out of N.Virginia. If your curious about the CWC connector there is a tech overview avaiable at – http://docs.citrix.com/en-us/workspace-cloud/workspace-cloud/what-is-a-workspace-cloud-connector-/workspace-cloud-connector-technical-details.html be sure to review it.
7 – Now we need to continue with creating a machine catalog, delivery group in the hosted Studio and obviously publishing your virtual apps & desktop (server based).

Create a Machine Catalogue and Delivery Groups to publish Virtual apps & desktops
1 – Now go back to the homepage at https://workspace.cloud.com and to the right of the Apps & Desktop Service click “Manage” to launch the management interface which provides you with an Overview page (Scroll to the bottom to find out your cloud hosted StoreFront address. Tip: If you get an red bar with an error message check that your CWC Connector/agent at your resource location is up and available and showing as green for your domain at the Identity & Access Management tab!.
2 – Scroll to bottom of the overview web page to find out exactly what your cloud hosted StoreFront addr is. It should follow the following format https://{TENANT NAME}.xendesktop.net/Citrix/StoreWeb/. Right click on it to open a new tab and to remain at https://apps.cloud.com/. You should be able to login using your test AD security group. Tip: You won’t see any published virtual apps or desktops currently as you have not created a machine catalogue or delivery group.
3 – Go back to the Manage Apps & Desktops Service web page and click Manage or Monitor this will embed a custom, hardened published app version of Studio or Director using the HTML5 Receiver so please ensure that you are utilising an HTML5 compliant internet browser that supports the HTML5 Receiver.
4 – Assuming you’ve clicked on Manage firstly navigate to Hosting Connections create a connection to your chosen resource location either on-prem or cloud (Private or Public) details for setting up hosting connections are available at – http://docs.citrix.com/en-us/xenapp-and-xendesktop/7-8/manage-deployment/connections.html. Once setup wait 1-2 min before proceeding you don’t have to by the way! I do.
5 – Click Machine Catalogue and create as per normal for detailed on how-to please refer to – http://docs.citrix.com/en-us/xenapp-and-xendesktop/7-8/install-configure/machine-catalogs-create.html. Tip: I’d suggest as its your first time using the CWC Apps and Desktop service create your machine catalogue with a single VM with the VDA installed to allow remote connections as described earlier to allow you to get around how the CWC Apps and Desktops Service actually works. You don’t have to either it’s your choice.
6 – Click Delivery Groups and create as per normal aswell and please refer to – http://docs.citrix.com/en-us/xenapp-and-xendesktop/7-8/install-configure/delivery-groups-create.html for guidance delivering virtual apps (Skype for Business 2015 also implment the HDX Optimisation Pack 2.0 check out – https://www.citrix.com/blogs/2016/01/12/citrix-and-microsoft-unveil-v2-solution-for-skype-for-business/ for more information) & desktops (Windows Server 2012 R2). TIP: The name you provide your Delivery Group filters through to the Workspaces at – https://workspace.cloud.com/workspaces and becomes the default name of your published virtual & desktops services that you will assign to your subscribers (users) workspace.
7 – You’ve now successfully setup a Machine Catalog and Delivery Group using the CWC Apps & Desktop Service to published a virtual apps & desktop, however prior to accessing your virtual apps & desktops you’ll need to create a Workspace and add subscribers (users) including which published resources your subscribers (users) are able to access otherwise they wont be able to login nor access any published resources.

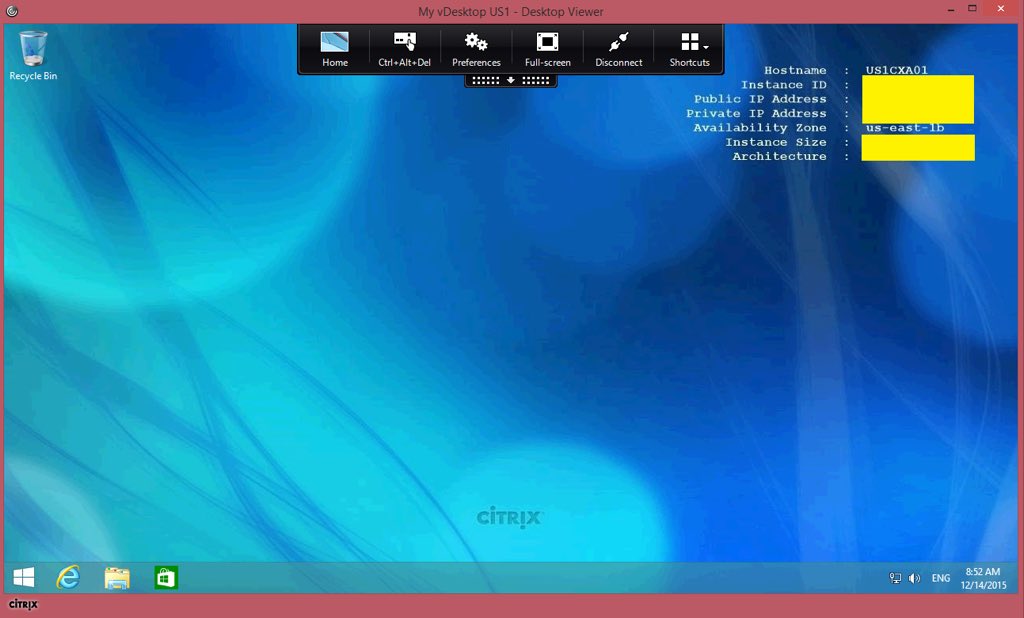
You should have the Server VDA and CWC Connector now installed see the below example image below.

Create a Workspace to Delivery published virtual apps & desktops
1 – A workspace consists of a collection of services from CWC e.g Secure Documents (ShareFile), Apps & Desktop Service (XenApp/XenDesktop) and so forth that SysAdmins can combine together to form e.g a Pre-Sales workspace that may consist of a virtual apps e.g Skype for Business 2015 that is also offloaded with the HDX Optimisation Pack 2.0 – https://docs.citrix.com/en-us/hdx-optimization/2-0/hdx-realtime-optimization-pack-about.html and a virtual desktop e.g a dedicated Windows 10 or 2012 R2 desktop. A workspace also consists of subscribers (users) who access the workspace which contains published resources created by Citrix SysAdmins. Please ref to http://docs.citrix.com/en-us/workspace-cloud/workspace-cloud/get-started/creating-and-publishing-a-workspace.html which explains how-to create a workspace, define subscribers and published resources.
2 – Once you have created a Workspace and assigned subscribers, resources then users can login at https://{TENANT}.xendesktop.net/Citrix/StoreWeb/ from there resource location and gain access to there virtual apps & desktops.
3 – Managing your newly created Workspace is easy following this useful online document from eDocs – http://docs.citrix.com/en-us/workspace-cloud/workspace-cloud/get-started/manage-a-workspace.html.

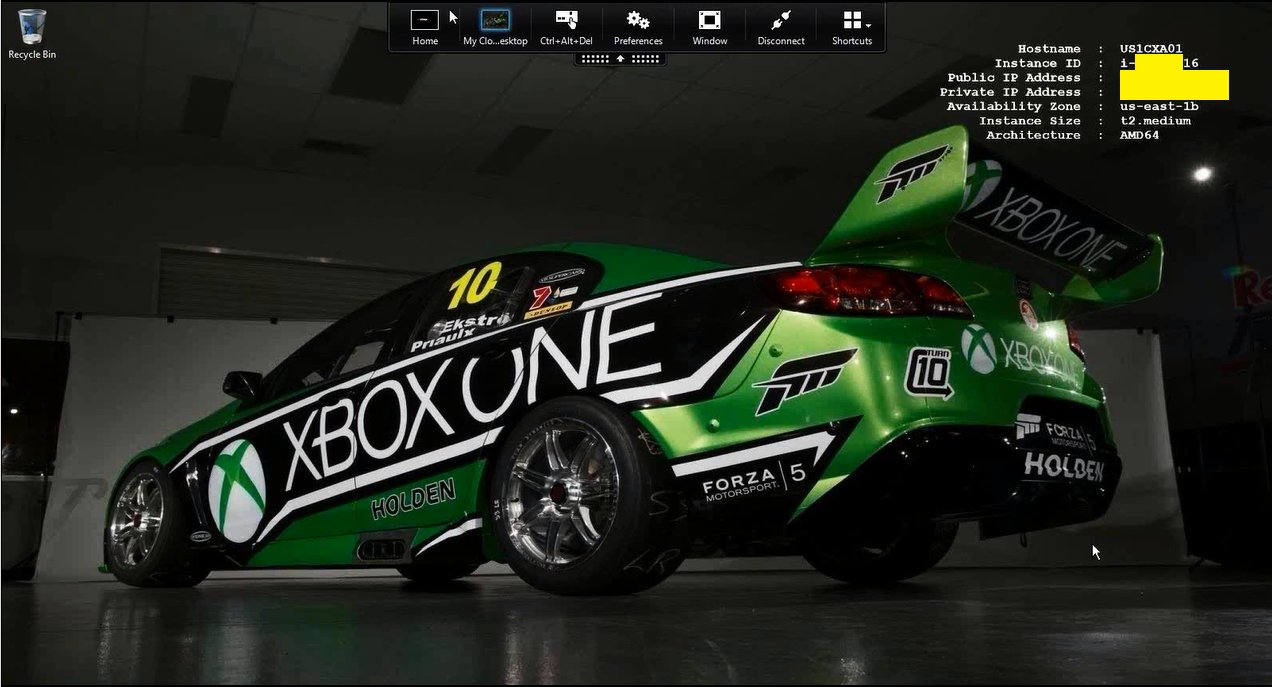
Example of my virtual desktop (Server based) delivered by CWC using the XenApp 7.8 VDA. I also use the same theme for my complete XenApp 7.8 deployment in AWS yes I have both deployed and configured 🙂

A first for me
This is the first time I’ve written a blog post (primarily) completed in the air traveling from somewhere between London – England, Oslo – Norway and Stockholm – Sweden.

Disclaimer
This blog article should be considered to be a draft still and therefore may contain errors and I will be updating and adjusting it time permitting and adding in how-to front this CWC Apps & Desktop service deployment in my AWS EC2 resource location with NetScaler Unified Gateway – https://www.youtube.com/watch?v=qT739UoR8d0.

Deploying XenApp 7.x in AWS EC2

The following content is a brief and unofficial prerequisites guide to setup, configure and test delivering virtual apps and desktops powered by XenApp 7.8 in AWS EC2 prior to deploying in a PoC, Pilot or Production environment by the author of this entry. The views, opinions and concepts expressed are those by the author of this entry only and do not necessary conform to industry descriptions or best practises. The views expressed here are my own and do not necessarily reflect the views of Citrix.

Shortened Names
AMAZON WEB SERVICES – aws
SECRUITY GROUPS – sg
ELASTIC COMPUTE CLOUD – ec2
HYBRID CLOUD PROVISIONING – hcp
XENAPP – xa
XENDESKTOP – xd
XENAPP/XENDESKTOP – xad
VIRTUAL DELIVERY AGENT – vda
HIGH DEFINITION EXPERIENCE – hdx
INDEPENDENT COMPUTING ARCHITECTURE – ica
FEATURE PACK – fp
EXPERIENCE 1st – x1
VIRTUAL DESKTOP – vd
VIRTUAL APPS – va
INFRASTRUCTURE AS A SERVICE – iaas
CITRIX WORKSPACE CLOUD – cwc
CITRIX LIFECYCLE MANAGEMENT – clm
THINWIRE COMPATIBLE MODE – tcm also known as ecm

Experience Deploying My 1st Virtual Desktop & Apps in AWS
The following screenshot is of a virtual desktop (Windows Server 2012 R2 powered by XenApp 7.8) hosted in AWS EC2 located in N.Virginia, US delivered Windows 8.1 (Yes I know I need to get to Win 10 :-)) laptop running Citrix Receiver Windows 4.4 in London, England with the HDX Thinwire Compatible Mode graphics mode configured with a Preferred Color Depth set to 16-Bit and the performance is very good considering what Ive configured I then adjusted my HDX policies to then switch to HDX SuperCodec (H.264) the UX gets even better providing an even closer HD local like experience in my personal view only so give it ago for yourself.

The HDX policies overview is documented below so for now back to my experience deploying XenApp 7.8 on AWS.

It was substantially easier than I anticipated or even expected as the AWS documentation is easy to understand I believe however that maybe due to the fact I used to previously work for a Managed Services ISP in City of London so many concepts related to Managed Hosting, IaaS, Private and Hybrid Cloud come quiet naturally to me.

Thinwire+ (Thinwire Compatible Mode) 16-Bit Preferred Graphics

Supercodec (H.264)

Introduction to Provisioning XenApp Workloads on AWS EC2
Citrix has had the capability to deploy virtual applications and desktops powered by XenApp 6-7.x.n for quiet sometime utilising the traditional Manual CTX SysAdmin approach then Citrix introduced a concept entitled Hybrid Cloud Provisioning (HCP) under the unified FMA architecture for XAD some time ago which allows CTX SysAdmins the capability to expand there existing Citrix workloads e.g virtual apps and desktops (server based only) to IaaS providers e.g AWS or often generically referred to as the Cloud by adding in a secure new hosting connection within Studio for AWS the requirements include providing the Connection URL, API key and Secret key from your AWS EC2 account ref – http://docs.citrix.com/en-us/xenapp-and-xendesktop/7-6/xad-connections.html. You can utilise this exact same concept to provision XenApp based workloads from within a AWS EC2 XenApp 7.x FMA Site as described in detail in the following deployment guide entitled “Deploy XenApp 7.5 and 7.6 and XenDesktop 7.5 and 7.6 with Amazon VPC” available at – http://support.citrix.com/article/CTX140427. Finally if I have not explained well enough what hybrid cloud provisioning actually is powered by XenApp 7.x then this short and simple YouTube video from Citrix below should hopefully re-enforce your understanding of HCP.

You can still utilise hybrid cloud provisioning within XenApp 7.8 today and Citrix continues to evolve with its next generation cloud 1st approach of provisioning of Citrix workloads within IaaS, Private and Hybrid clouds with Citrix Workspace Cloud (CWC) its now known as Citrix Cloud. How does it work? Once more there is a fantastic YouTube video which demonstrates setting up, configuring, publishing and delivering a Windows virtual application utilising CWC by one of Citrix’s CTO its well worth watching!

Finally you can utilise Citrix Lifecycle Management (CLM) to automate the deployment and auto scaling of your Citrix workloads on AWS EC2, however this topic is currently not in scope for this blog article however I may update this blog article in the future to include provisioning XenApp on AWS EC2 powered by Citrix Lifecycle Management (CLM).

Pre-requisites & System Requirements for Deploying a XA 7.8 PoC in AWS EC2 (Draft + The Basic’s Only)
0. Check that your XAD license entitlement is correct at – https://www.citrix.com/go/products/xendesktop/feature-matrix.html to provision XenApp workloads on AWS EC2. As of writing and publishing this blog article you require XenApp or XenDesktop Enterprise or above licensing in order to provision workloads on AWS and also Azure.
1. You need an AWS account, Credit card
2. Choose your EC2 region e.g N.Virgina
3. Create your “Security Groups” which acts as a virtual firewall for ICA 1494, 2598 Session Reliability, HTTPS 443, RDS 3389 (SysAdmin access)
4. Lunch an single instance from the EC2 dashboard under “Create Instance” this will be your mgmt. VM
5. Decrypt the passwd & login your mgmt. VM install your require roles e.g AD, DNS as a min requirement for XA 7.x
6. Lunch another single instance from the EC2 dashboard under “Create Instance” this will be your XA PoC VM
7. Download the media from Citrix.com and any FP’s and install all the components onto your XA PoC VM (Studio, Director, Controller, MS SQL Express, StoreFront, License server)
7. Install the latest VDA (existing connections) once ready launch Studio and create your Site, configure your machine catalogue and delivery groups.
8. Modify SFS default.ica file to include your external static IP and check your Windows f/w rules to ensure 1494 is correctly configured to allow traversing NAT’s
9. Navigate to https://AWS-XA-PoC-VM/Citrix/StoreWeb/ and login as a domain admin or user and launch a virtual app and or desktop.
10. Shutdown and turn off your VM’s within your AWS VPC when you are finished with your tests to ensure that your cost(s) are kept to a minimum.

Tuning Your AWS EC2 Virtual Apps & Desktop’s
1. Configuring TCM or ECM is very well documented at the following web links at – http://docs.citrix.com/en-us/xenapp-and-xendesktop/7-8/hdx/thinwire-compatibility-mode.html, https://www.citrix.com/blogs/2015/10/23/thinwire-compatibility-tuning-lowering-your-bandwidth-even-further/ however I have also listed in table format below what polices you need to select and then apply to your test domain users or group (preferred).

Begin with the following HDX policies listed below to enable TCM/ECM/Thinwire+/Thinwire Compatible Mode and be sure to check out CTX202687 described below in-line with the Very High Definition Experience HDX Policy template.

Policy Name Default Value Comment
Preferred color depth for simple graphics 24 bits per pixel Legacy Mode
Target frame rate 30 fps Legacy Mode
Use video codec for compression Do not use Video codec Force ECM on explicitly by turning H.264 off (Testing)

2. Configuring the super codec (H.264) is actually very easy select the Very High Definition Experience form the HDX templates in Studio and create a policy from it applying again to your test security group (preferred) or domain users it’s your choice. Please note that this policy will enable H.264 however it will default to TCM if you connect from a device that does not support H.264.
3. Finally for all those advanced CTX consultants and SysAdmins out there check the following CTX article – http://support.citrix.com/article/CTX202687 entitled “HDX Graphics Modes – Which Policies Apply to DCR/Thinwire/H.264 – An Overview for XenDesktop/XenApp 7.6 FP3” which documents each policy for each HDX encoding or graphics mode supporter by XAD 7.8