Tag Archives: Thinwire +

Deploy XenApp 7.x in AWS EC2 with PoC Leading Best Practises (Draft)

The following content is a brief and unofficial prerequisites guide to setup, configure and test delivering virtual apps and desktops from AWS EC2 – https://aws.amazon.com powered by XenApp & XenDesktop 7.13+ & 7.15 prior to deploying in a PoC, Pilot or Production environment by the author of this entry. The views, opinions and concepts expressed are those by the author of this entry only and do not necessarily conform to industry descriptions or best practises. The views expressed here are my own and do not necessarily reflect the views of Citrix.

Minor updates include links 7.15 LTSR and not just 7.13 as of 30/12/2018

Shortened Names
LOCAL HOST CACHE – lhc
XENAPP – xa
WINDOWS – win
VIRTUAL DELIVERY AGENT – vda
HIGH DEFINITION EXPERIENCE – hex
VIRTUAL APPS – va
VIRTUAL DESKTOP – vd
SERVER – srv
CUSTOMER EXPERIENCE IMPROVEMENT PROGRAM – ceip
DATA TRANSPORT LAYER – eat
FIREWALL – f/w
ACCESS CONTROL LISTS – all
INFRASTRUCTURE AS A SERVICE – iaas
IDENTITY & ACCESS MANAGEMENT – aim

Reader Notice: This blog post is NOT completely finished and some parts are in draft format! I will continue to update it through-out April/May 2017!

Sample Virtual Desktop from AWS powered by XenApp 7.x
In this example my VPC is in N.Virgina, USA hosting my Citrix XenApp 7.x workloads which are been delivered to me transatlantic to London, England thanks to the HDX.
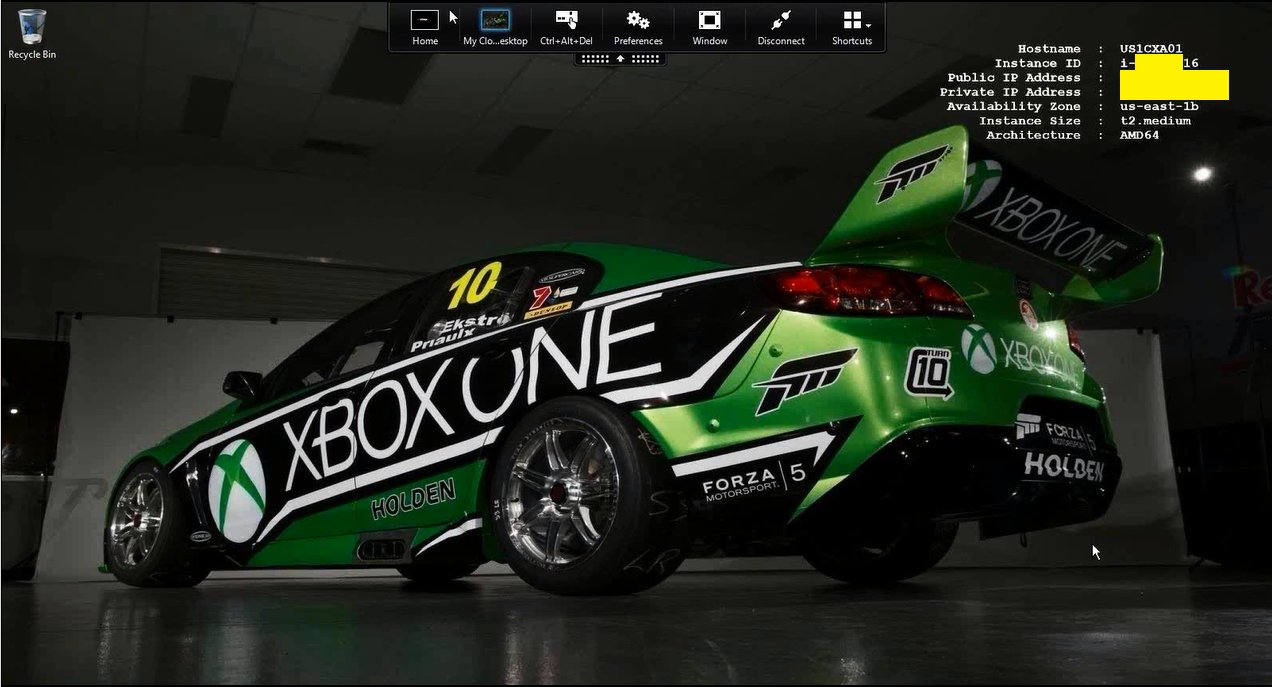

Link to my original Tweet from 29/04/2016 at – https://twitter.com/lyndonjonmartin/status/726122016621891584 close to the delivery of a UKI Citrix partner enablement workshop on delivering XenApp 7.x PoC from AWS.

What is AWS EC2?
It’s a division with-in Amazon that sells IaaS to customers for consumption. AWS is incredibly simple in my personal view BUT equally at the very same time it’s also an exceptionally powerful Public (IaaS) Cloud platform! IT departments within organisations of all shapes and sizes have an equal capability with AWS’s elastic virtual data centre capacity to rapidly design and implement a VPC to setup, configure and deploy workspace workloads of their choice within a few hours or days dependant upon there IT’s dept’s delivery & execution skillsets. Typing into Google.co.uk “AWS first year” reveals AWS’s first year was 2006 thats now over a decade’s worth of experience, maturity and continued on-going development and innovation. Check out – https://en.wikipedia.org/wiki/Amazon_Web_Services#History or brief history lesson.

Concepts of AWS
Most of what I’ve described below is available on the AWS “Getting Started” web page at – http://docs.aws.amazon.com/AmazonVPC/latest/UserGuide/GetStarted.html so be sure to read through-it.

Virtual Private Cloud (VPC)
Think of this as a virtual datacentre that created onto of AWS IaaS which allows you to create virtual networks (IP addr ranges, subnets e.t.c), deploy VM instances of different sizes for your required workloads and storage accounts to facility your organisations needs and requirements to potential optimise workload delivery, experience or DR scenario’s.

VM Instances Types
AWS provides traditional VM’s that you’d typically assign compute, storage type to on-prem as pre-defined instance types that vary in size and capacity to meet virtually most organisations workspace requirements in AWS. For an up to date list please check out –
https://aws.amazon.com/ec2/instance-types/.

Security Groups
Think of these as your traditional or virtual f/w’s ACL’s BUT now assigned against VM instance(s) within your VPC either individually or in a group, to control what traffic type e.g ports vs. protocol are allowed in/outbound. Check out – http://docs.aws.amazon.com/AWSEC2/latest/UserGuide/using-network-security.html#default-security-group which also covers the standard “Default Security Groups” within your VPC that you can utilise and modify for your PoC.

*Availability Zones
A logical representation of one or more data centres facilities in a city, state/province/county or even country.

*Regions
Simply put its a Geo area and they are isolated form other regions for H/A. In a Citrix world a simple example could be to think of multiple sites (London, Paris, Oslo all built to N+1) managed using FMA 7.7+ Zones (Primary and Satellite) for H/A for geo area.

* http://docs.aws.amazon.com/AWSEC2/latest/UserGuide/using-regions-availability-zones.html

Identity & Access Management (IAM)
This one is quiet important to understand if you want to deploy your PoC with MCS provisioned XA VDA workloads in AWS from a master VM instance like you would traditionally on-prem with XenServer, Hyper-V, Acropolis or vSphere. Setting up IAM enables/allows Studio to communicate with the AWS EC2 cloud hypervisor to provision your VM instances –
http://docs.aws.amazon.com/IAM/latest/UserGuide/introduction.html from your master VM instance in your VPC(s). If your not interested in deploying MCS workloads then skip learning IAM for now BUT please come back to it as it’s equally important as Security Groups for Pilot, UAT and PROD workloads in AWS with(out) Citrix workloads.

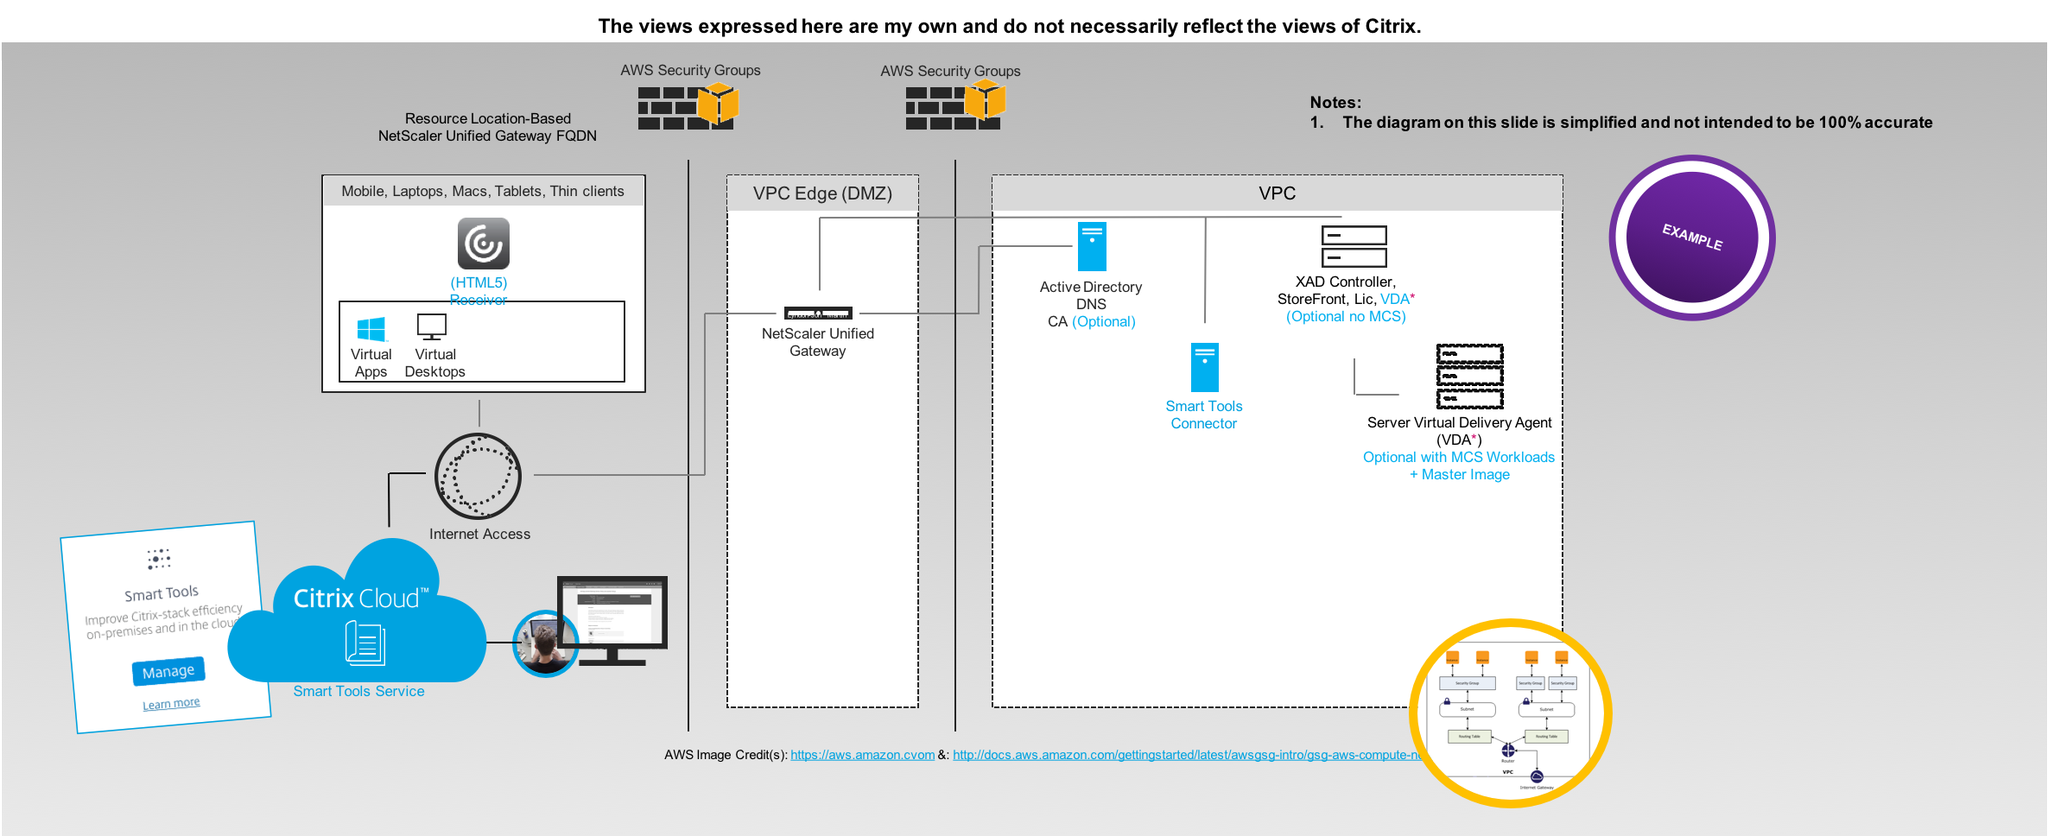
Suggested PoC Architecture
I tweeted the image at – https://twitter.com/lyndonjonmartin/status/854809306629361669 (its not intended to be accurate!) if you want a high resolution copy. Its intended to provide a high level only PoC deployment overview of delivering virtual apps & desktops (server) from AWS EC2 using Citrix XenApp 7.15 fronted by NetScaler Unified Gateway and or you can utilise Citrix Smart Tools – https://www.citrix.com/products/citrix-cloud/services.html to deploy blueprint to stand up a XenApp PoC in AWS.
AWS & Citrix Pre-requisites, System Requirements
The following provides an brief and selective overview of standing up the bare min requirements to delivery Citrix secure workspace workloads from AWS.

0. Amazon Web Services (AWS) (cloud) hypervisor support – http://docs.citrix.com/en-us/xenapp-and-xendesktop/7-13/system-requirements.html#par_anchortitle_8a90 &  https://docs.citrix.com/en-us/xenapp-and-xendesktop/7-15-ltsr/system-requirements.html#hosts–virtualization-resources.
1. Sign-up for a AWS EC2 account at – https://console.aws.amazon.com it will redirect you to the default AWS login and sign-up web page. You will need a valid credit card that you own and be sure to read through AWS terms & conditions, UAP e.t.c.
2. Once your have signed-up select a EC2 region i typically utilise N.Virgina as I expense this myself and it also makes for good tests locations of my Citrix workloads when testing out legacy vs. current vs. the latest HDX (3D Pro) technologies & innovations transatlantic from the US too the London, England :-).
3. Now that you’ve chosen or decided upon your region you’ll need to deploy your VPC – http://docs.aws.amazon.com/AWSEC2/latest/UserGuide/using-vpc.html you can make use of the default AWS VPC configurations which you can easily modify as required to meet the needs of your PoC.
4. Now create a e.g Citrix VAD “Security Group” which acts as a firewall ACL controlling which ports/protocols and traffic by *.* or IP range(s)* e.t.c are permitted in/out bound of your VPC to your VM instance(s) associated to this security group so that the delivery of virtual apps & desktops is possible from VM instances running the Server VDA’s.

Suggested example Traffic flow from the Internet to a Virtual App & Desktop delivered by an EC2 Instance

– Untrusted network or public raw internet
– DMZ or edge of a network, network/vnet or (network) security group depending on your network deployment choice
– Trusted network or private secure network

WWW Internet Gateway Router VPC Availability Zone Security Group Network EC2 Instances

Suggested (Security Group – Mgmt. VM) Port Configuration for RDS access to your mgmt. VM running AD, DNS e.t.c

For this particular security group I’d strongly recommended that when you setup the security group you limit the access to a single IP addr or range that you know and trust RDS access to come from to your mgmt. VM sat in your VPC.

Protocol Port Inbound Outbound Internal VPC
TCP: SSH PuTTY (NS Mgmt. only) 22
TCP: HTTP (Internal Communication) 80
TCP: RDP/RDS 3389 * *

Suggested (Security Group – Citrix VAD) Port Configuration for Citrix Workloads to the World

The following table is actually more about the required TCP/UD Ports and dependant upon your deployment approach e.g with(out) a L2L IPSec VPN tunnel vs. NetScaler Unified Gateway i’ve decided for this section most of it available with the exception of a few which are a no no for external inbound access.

Warning once again caution this table ONLY represents primary PORTS typically required in a PoC and does not imply that you should use this as your ACL for your AWS security groups as you requirements for your particular PoC use case may differ from organisation to organisation! For a complete list of the ports and what they do please ref to http://docs.citrix.com/en-us/xenapp-and-xendesktop/7-13/technical-overview/default-network-ports.html & https://docs.citrix.com/en-us/xenapp-and-xendesktop/7-15-ltsr/technical-overview/default-network-ports.html  .

Protocol Port Inbound Outbound Internal VPC
TCP: HTTPS (TLS) 443 * *
UDP: HTTPS (TLS) 443 * *
TCP: ICA/HDX Thinwire 1494 * *
UDP: ICA/HDX EDT or Framehawk 1494 * *
TCP: Session Reliability 2598 * *
UDP: Session Reliability for EDT only 2598 * *
UDP: HDX RealTime e.g Skype for Business 16500-16509 * *

5. Lunch an NEW single instance from the EC2 dashboard under “Create Instance” this will be your mgmt. VM “wdc01” for the PoC and AWS will guide you through the deployment process (wizard).
6. Select your VM instance type to be deployed in your default or custom VPC and a suggested example instance type to utilise could be a AWS “t2.medium” instance type. You can find a complete list available at – https://aws.amazon.com/ec2/instance-types/.
6. Assign the default storage or increase and you can add another HDD later.
7. Assign the RDS mgmt. security group ensuring that RDS is enabled to connect to your mgmt VM.
8. Allow the VM to provision typically up to 5 minutes (depends on time of day, location of your VPC) then decrypt the passwd
9. Login and utilise this as your mgmt. VM and install the following suggested roles e.g AD, DNS and CA (Optional) as a bare minimum once you’ve assigned it an internal private static IP addr prior to installing and configuring.
10. Check a folder called e.g “Share” on C:\ and enable file sharing to this folder for your domain admin account.
11. Navigate to https://www.citrix.com/downloads/xenapp-and-xendesktop/ and download the latest XenApp/XenDesktop version available which is as of 12/04/2017 7.13 and copy it to the C:\Share to be used later to install XenApp 7.13+ onto your XA worker.
12. Now repeat steps 5 through 9 to deploy another single VM instance which will be your XenApp PoC VM e.g “xad01poc” and assign the following suggested instance type “t2.large’ with the exception of step 7 where you’d assigned the default VPC security group and login via RDS to this VM from your mgmt. VM e.g “wdc01”.
12. Once its ready login to your mgmt. VM “wdc01” and RDS to “xad01poc” provide it with a custom or use the default hostname and AD domain join it.
13. After successfully domain joining it login and create a folder on the C:\ drive called “Temp” on “xad01poc” and copy the *.iso from \\wdc01\Share to it.
14. Right click on the *.iso and “Mount” the media and the autorun should display the splash screen and select “XenApp”.
15. Select to install the “Delivery Controller” checking all the features e.g Studio, Director, Controller, MS SQL Express, StoreFront, License server and all the required ports.
16. You have now setup a mgmt. VM and a XenApp mgmt. VM.
17. Install and bound SSL certificate on “xad01poc” to be able to utilise https to protect username and passed credential handling when accessing RfW.

Understanding Machine Creation Services requirements for AWS
https://docs.citrix.com/en-us/xenapp-and-xendesktop/7-15-ltsr/manage-deployment/connections.html.

PoC Deployment of Virtual Apps & Desktops
Deployment Option 1 – NO MCS nor NetScaler UG & NOT SUGGESTED!!!
This option to be very clear is typically used to demonstrate the power of HDX from a public cloud e.g AWS and DOES IT WORK? Yes of course! I would strongly recommend that you don’t deploy your PoC with this approach but front it with a NetScaler UG but i’ve included it as I have covered this topic once before and sometime Citrix SysAdmins just want to test to see is it actually at all possible with little to know effort at all before actually deploying a PoC so I hope that this clears up this PoC deployment approach/path is messy and NOT SUPPORTED!!!!

1. Now also assign the Citrix VAD “Security Group” to “xad01poc” VM.
2. Re-mount the *.iso media if required and on the installation splash screen select to install the Server VDA choosing to enable existing connections selecting “Enable Remote PC Access” the VM will restart a few times which will take circa up to 5 minutes while the VDA installs.
3. Once the VDA is installed successfully launch “Studio” and complete creating a Site, machine catalog and delivery group based upon “xad01poc” VM.
4. Modify the SFS default.ica file for your default Store to include a line to utilise your external dynamic static IP addr and check that your Windows f/w rules are correctly configured to allow in/out bound access based upon the Citrix VAD “Security Group” or you can open the downloaded file you receive post login and modify the internal private static IP addr to the “xad01poc” VM’s dynamic public IP addr assigned by AWS and you should be able to launch your virtual app or desktop. Note: You’ll need to do it for each app or virtual desktop and if you modified the default.ica file with dynamic IP each time you stop and deallocate the VM you’ll need to modify the file again unless you utilise a AWS static public IP addr which is chargeable cost per month!
5. Navigate to https://xad01poc-dynamic-public-ip-addr/Citrix/StoreWeb/ with Citrix Receiver install on your Windows, Mac or Linux end-points and login as a domain admin or user and launch a virtual app or desktop that you’ve published.
6. Test the vitual app and our desktops performance by playing YouTube movie trailers here is fav one of mine – https://www.youtube.com/watch?v=sGbxmsDFVnE or download Google Chrome and publish it and access https://p3d.in. You’ll notice I have not mentioned what HDX graphics mode why? It should provide a good UX out of the box with 7.13+.
7. Shutdown and turn off your VM’s within your AWS VPC when finished to save costs. You will be billed for storage on-going e.g GB that you’ve consumed but I have to say its a very low cost per GB.

Deployment Option 2 – No MCS but fronted by NetScaler UG
Coming…

Deployment Option 3 – With MCS Workloads fronted by NetScaler UG
Coming…

Deployment Option 4 – Powered by Citrix Smart Tools (Notice some offers have been deprecated in 2018)
0. What is Smart Tools? Watch https://www.youtube.com/watch?v=RUTL1X_nBSg. I won’t expand on this topic more than what I have below for this particular blog post otherwise its going to get quiet length but I have to say you should explore Smart Tools post testing/deploying an AWS XenApp PoC.
1. Sign-up to Smart Tools Service at https://citrix.cloud.com/.
2. Create an AWS EC2 resource location with the Smart Tools Connector (formerly CLM our Lifecycle Management Connector) – https://manage-docs.citrix.com/hc/en-us/articles/212713903 and also please read – https://manage-docs.citrix.com/hc/en-us/articles/212713923 & https://manage-docs.citrix.com/hc/en-us/articles/212713963-Add-an-Amazon-Web-Services-resource-location.

3. Read the Blueprint available which explains deploying a blueprint to deploy workloads on AWS at – https://manage-docs.citrix.com/hc/en-us/articles/212714483-Deploy-a-blueprint-to-an-Amazon-Web-Services-resource-location which should give you a decent overview.
4. Download or read online the following getting started PoC guide for XenApp on AWS powered by Smart Tools Service (Smart Build using as Blueprint) available at the following URL with step by step instructions and images – https://docs.citrix.com/content/dam/docs/en-us/lifecycle-management/downloads/get-started-lifecycle-management-aws.pdf.

Leading Best Practises
1. Review the content available at – https://www.citrix.com/global-partners/amazon-web-services/xendesktop-on-aws.html
2. The number one AWS resource to check first and foremost is the AWS Well-Architected microsite at AWS EC2 at – https://aws.amazon.com/architecture/well-architected/ to help you get started. You should also understand how IAM in AWS works so be sure to check out –https://docs.aws.amazon.com/IAM/latest/UserGuide/intro-structure.html.

Notes from the field
1. The number one leading best practise is “Shutdown and turn off your VM’s within your AWS VPC when finished” to save your own personal costs incurred and or your organisations costs that maybe incurred.
2. You do need a suggusted intermediate knowledge level of AWS EC2 and Citrix in order to deploy virtual apps & desktops CORRECTLY I personally believe to ensure that those testing on your behalf actually are getting the correct HD or balanced experience to ensure a successful PoC. I’ve many misconfigurations in a variety of areas since 2015.
3. Take a look at using Citrix Smart Tools as an enabler to help you with XenApp environment(s) on AWS – https://manage-docs.citrix.com/hc/en-us/articles/213723663-Create-a-XenApp-and-XenDesktop-production-deployment-on-AWS.
HDX Thinwire “For actively changing regions” or HDX Adaptive Display v2

The following content is a brief and unofficial overview of the new HDX policy setting that enables HDX Adaptive Display v2. The views, opinions and concepts expressed are those by the author of this entry only and do not necessary conform to industry descriptions, best practises. The views expressed here are my own and do not necessarily reflect the views of Citrix.

Shortened Names
XENAPP – xa
XENSERVER – xs
XENDESKTOP – xd
XENAPP/XENDESKTOP – xad
VIRTUAL DELIVERY AGENT – vda
HIGH DEFINITION EXPERIENCE – hdx
INDEPENDENT COMPUTING ARCHITECTURE – ica
HDX ADAPTIVE DISPLAY V2 – hdxadv2

Introduction
The following capability is also referred to as Selective use of H.264, Selective H.264, HDX Adaptive Display v2 and Hybrid mode – https://www.citrix.com/blogs/2016/09/28/hdx-graphics-gone-hybrid/ but in this blog post it’s referred to as “HDX Adaptive Display v2” but its technical accurate name from eDoc’s is “Selective use of a video codec (H.264) to compress graphics” as reffered to here – http://docs.citrix.com/en-us/xenapp-and-xendesktop/7-11/whats-new.html#par_anchortitle_59c9.

Overview
In the release of XAD 7.11 (Seven11) a new Thinwire HDX policy was released which is part of the following policy Use video codec for compression” with the following option selected “For actively changing regions” which enables HDX Adaptive Display v2 – http://docs.citrix.com/en-us/xenapp-and-xendesktop/7-11/whats-kmnew.html#par_anchortitle_59c9 which blends the following Citrix HDX Graphics modes H.264 & Thinwire Compatible Mode together to offer the best UX but also to provide a balanced apporach by implementing the most right vs. relevant HDX graphics mode to offer the best rich & HD experience or near to local-like experience while balancing all compute, network resources between the server and or desktop VDA over the organisational network, internet to the users end-point.

The following CTX blog article – https://www.citrix.com/blogs/2016/09/28/lossless-compression-lowering-the-cost-of-pixel-perfection/ most accurately describes the what, the how and the why? So be sure read it and watch the following YouTube video demonstration entitled “Citrix Desktop Master Class – Adaptive Display v2 Demo by Lee Bushen“.

Understanding Actively Changing Regions
If you take a look at the below example of a YouTube web page (rendered in HTML in Oct 2016) e.g delivered as a virtual app published internet browser or a virtual desktop and you access the above YouTube web page HDX Adaptive Display v2 will selectively utilise H.264, Thinwire and overlay lossless text.

To further understand this in greater details please refer to this Citrix blog article first and foremost https://www.citrix.com/blogs/2016/09/28/lossless-compression-lowering-the-cost-of-pixel-perfection/ and then watch
Citrix Desktop Master Class – What’s New in XenApp/XenDesktop 7.11 – Sept 2016available at – https://www.youtube.com/watch?v=rGHdTX202_U but scrub to 1:12:00 if you just want to understand HDX Adaptive Display v2 in greater detail.

Name of application e.g an Internet Browser
Organisation logo, banner of YouTube Channel
YouTube menu
YouTubeVideo  Title
Description 
YouTube Channels
Organisation Videos Library

YouTube Video Thumbnail YouTube Video Thumbnail YouTube Video Thumbnail YouTube Video Thumbnail YouTube Video Thumbnail YouTube Video Thumbnail
Title
Owner
Title
Owner
Title
Owner
Title
Owner
Title
Owner
Title
Owner
Start menu, taskbar and notification centre

What’s New and Understanding Citrix XenApp & XenDesktop 7.11 (Seven 11)

The following content is a brief and unofficial prerequisites guide to setup, configure and test delivering virtual apps and desktops powered by XenApp & XenDesktop 7.11 (Seven 11) prior to deploying in a PoC, Pilot or Production environment by the author of this entry. The views, opinions and concepts expressed are those by the author of this entry only and do not necessarily conform to industry descriptions or best practises.

Shortened Names
XENAPP – xa
XENDESKTOP – xd
XENAPP/XENDESKTOP – xad
VIRTUAL DELIVERY AGENT – vda
HIGH DEFINITION EXPERIENCE – hdx
INDEPENDENT COMPUTING ARCHITECTURE – ica
EXPERIENCE 1st – x1
VIRTUAL DESKTOP – vd
VIRTUAL APPS – va
THINWIRE COMPATIBLE MODE – tcm also known as ecm or thinwire+
UNIVERSAL WINDOWS PLATFORM – uwp
FEDERAL INFORMATION PROCESSING STANDARD – fips
SELF-SERVICE PASSWORD RESET – sspr
PROVISIONING SERVER – pvs
MACHINE CREATION SERVICES – mcs
AZURE RESOURCE MANAGER – arm

What’s New
1. XAD 7.11 infrastructure support on Windows Server 2016 for the Controller, StoreFront, Studio, Director, Server VDA, Session Recording Server & Agent, Universal Print Server.
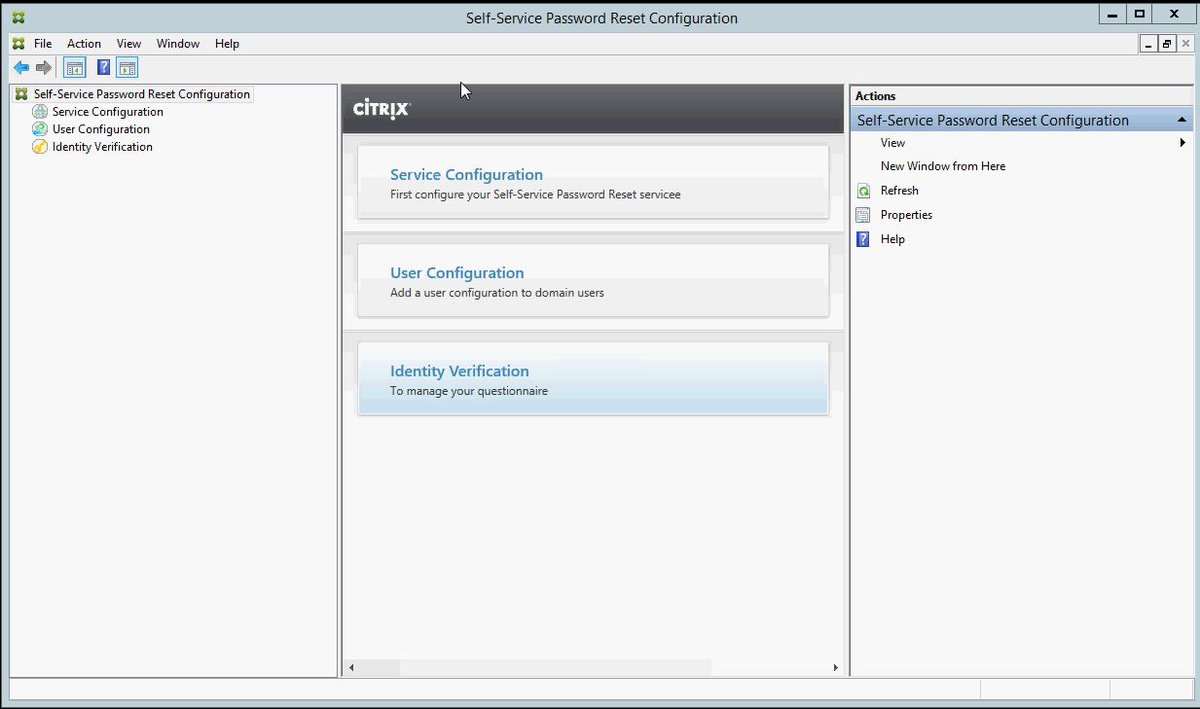
2. Self-Service Password Reset 1.0 (SSPR) is now part of the StoreFront 3.7 & XAD 7.11 (Platinum feature) release and can be installed on Windows Server 2008 R2, 2012 R2 and 2016* and allows users to unlock or reset their AD passwords through a series of questions. For a detailed overview please read the CTX blog entitled “StoreFront 3.7 has been released!“- https://www.citrix.com/blogs/2016/09/14/storefront-3-7-has-been-released/

3. SQL Server 2014 Express is still installed by default when installing the XAD Controller which became the default in XAD 7.9 release ref – http://docs.citrix.com/en-us/xenapp-and-xendesktop/7-9/whats-new.html#par_anchortitle_ddbe so be aware of the installation behavioural changes for SQL and SQL Server 2016 is now supported ref –http://docs.citrix.com/en-us/xenapp-and-xendesktop/7-11/system-requirements.html#par_anchortitle_384a and for a full list of the supported databases for XAD please refer to http://support.citrix.com/article/CTX114501 which contains and up to date tablised view of XAD versions vs. SQL versions and which are and are’nt supported! Finally DB sizing can be found by referring to the LTSR release of XAD 7.6 at – http://docs.citrix.com/en-us/categories/solution_content/implementation_guides/database-sizing-guidance-for-xendesktop-7-6.html which has great guidance on database sizing for XAD 7.6+.

4. Publish URL’s, documents and media files from network shares (WAHOO!) is now available on as part of the XAD 7.11 release. It currently only supports publishing of content via PoSH cmdlets and all the examples can be found and a detaied overview of the feature is avaiable at – http://docs.citrix.com/en-us/xenapp-and-xendesktop/7-11/install-configure/publish-content.html*.

Example Publishing a Word Document from Citrix eDoc’s*
New-BrokerApplication -Name ReadMe -PublishedName”ReadMe Document” -ApplicationType PublishedContent -CommandLineExecutable \\MyFolderShare\Documents\ReadMe.doc -DesktopGroup Content

5. Use of System Center Virtual Machine Manager to provision VMs used to create AppDisks. If you are unfamiliar with AppDisks the following YouTube video from the Citrix channel demonstrates how’s setup, create and assign your AppDisks to users virtual desktops. There is also a fantastic AppDisks FAQ avaiable at – http://docs.citrix.com/content/dam/docs/en-us/xenapp-xendesktop/xenapp-xendesktop-7-8/downloads/AppDisk%20FAQ.pdf

6. Installation behavioural changes for CIS programs entitled “Citrix Customer Experience Improvement Program (CEIP)” and “Citrix Call Home“. For more information please refer to and read – http://docs.citrix.com/en-us/xenapp-and-xendesktop/7-11/manage-deployment/cis.html.
7. New HDX enhancements include:

– A new HDX policy setting combining Thinwire Compatible Mode (ECM) and H.264 can be enabled by selecting the following policy Use video codec for compression and select For actively changing regions. If you do not then the default HDX graphics mode is used which is Use video codec for compression Use video codec when preferred. For a more detailed overview please check out – http://docs.citrix.com/en-us/xenapp-and-xendesktop/7-11/policies/reference/ica-policy-settings/graphics-policy-settings.html.
– Up to 5% bandwidth reduction with the new behavioural enhancements for video content with Thinwire and requires XAD 7.11 with either Windows Receiver 4.5 or Linux 13.4.
– Support for USB generic mass storage devices for XenApp
TWAIN 2.0 scanning protocol support with Windows Receiver 4.5+
– New behavioural changes for the optimisation of client USB devices – http://docs.citrix.com/en-us/xenapp-and-xendesktop/7-11/policies/reference/ica-policy-settings/usb-devices-policy-settings.html
– Support for publishing universal apps for Windows 10, Server 2016 using the Microsoft Universal Windows Platform (UWP).
– Support for H.264 hardware encoding with supported nVidia GPU cards (NVENC hardware encoding – https://developer.nvidia.com/nvidia-video-codec-sdk) and also to read the following entitled “Better Together: Citrix XenDesktop 7.11 + NVIDIA GRID” from – https://blogs.nvidia.com/blog/2016/09/14/citrix-xendesktop-nvidia-grid/!
Default VDA policy settings for XAD 7.11 – http://docs.citrix.com/en-us/xenapp-and-xendesktop/7-11/policies/policies-default-settings.html

8. StoreFront 3.7 includes SSRP 1.0 as mentioned above in point 2., UI support for small form factor devices improving the user’s overall experience when you configur the unified Citrix Receiver experience on StoreFront against your Store(s) which can be configured by reffering to – http://docs.citrix.com/en-us/storefront/3-7/manage-citrix-receiver-for-web-site/unified-receiver-experience.html so when connecting to from e.g Safari on an iPhone your end-users experience is way better try for yourself! Finally a great new addition or rather enhancement to Zones in StoreFront 3.7 & XAD 7.11 is that now client location based zone preference passes the zone information to the controller (required configuration – http://docs.citrix.com/en-us/xenapp-and-xendesktop/7-11/manage-deployment/zones.html#par_anchortitle_1db7) which in turn utilises this information to select the more appropriate workstation/server VDA’s that are closest in proximity to the user so when connecting to virtual apps & desktops there receive the best rich HD experience possible.
9. Windows Server 2016 analysis and reporting including Expanded security analysis with AppDNA 7.11 – http://docs.citrix.com/en-us/dna/7-11/whats-new.html.
10. Automate Director notifications with Citrix Octoblu – http://docs.citrix.com/en-us/xenapp-and-xendesktop/7-11/director/alerts-notifications.html#par_anchortitle_1d19. For a detailed overview and look at this integration be sure to read the blog post – http://horacegoesskiing.com/index.php/2016/09/16/using-xenappxendesktop-7-11-alert-policies-with-octoblu/.
11. Support for Windows Server 2016 as a server and a target platform for PVS 7.11 including an enhanced diagnostic model so much more so be sure to review the PVS 7.11 online documentation at – http://docs.citrix.com/en-us/provisioning/7-11.html.
12. Citrix XenApp and XenDesktop 7.6 FIPS 140-2 Sample Deployments (Technically NOT new but very useful for Citrix customers and partners alike) – http://docs.citrix.com/content/dam/docs/en-us/categories/public-sector/downloads/Citrix%20XenApp%207.6%20and%20XenDesktop%207.6%20FIPS%20140-2%20Sample%20Deployments.pdf
13. Provisioning Citrix workloads in Microsoft Azure using ARM is now available. For a detailed how-to read – http://docs.citrix.com/en-us/xenapp-and-xendesktop/7-11/install-configure/install-prepare/azure-rm.html but before deploying your VM’s be sure to read the following whitepaper entitled “The scalability and economics of delivering Citrix XenApp services from Microsoft Azure” available from – https://www.citrix.com/content/dam/citrix/en_us/documents/white-paper/xa711-scalability-azure-rm.pdf. To get started with deploying and using XenApp 7.x in Azure take a look at deploying the XenApp Trial in the Azure Marketplace at – https://azure.microsoft.com/en-gb/marketplace/partners/citrix/citrix-xacitrix-xa-trial/ which will be you a complete XA 7.x enviromnent in Azure along with StoreFront, NetScaler and 2x VM’s to deliver a server virtual desktop and the other for delivery of just virtual apps.
14. Citrix Receiver 7.1 is ready for iOS 10 – https://www.citrix.com/blogs/2016/09/15/citrix-receiver-ready-for-ios-10/.
15. Finally be sure to check out and be aware of the list of known issues with XAD 7.11 release at – http://docs.citrix.com/en-us/xenapp-and-xendesktop/7-11/whats-new/known-issues.html

* Microsoft Windows Server 2016 is currently still in TP and is not officially released as of writing this blog post.

For a completely detailed summary of what is avaiable in XAD 7.11 (Seven 11) check out – http://docs.citrix.com/en-us/xenapp-and-xendesktop/7-11/whats-new.html.

XenApp and XenDesktop 7.x.n (As of this blog post its 7.11) Features
https://www.citrix.com/go/products/xendesktop/feature-matrix.html

Quick upgrade guide to XenApp 7.11 and XenDesktop 7.11 by #Citrix #CTP @ervik
http://www.ervik.as/quick-upgrade-guide-to-xenapp-7-11-and-xendesktop-7-11/

Upgrading My Azure XAD 7.9 environment to XAD 7.11
Coming…

Installing a XAD 7.11 PoC environment on Azure
I have testing installing XAD 7.11 (Seven 11) onto Windows Server 2016 Technical Preview 5 or TP5 on Azure via the Azure Market Place – https://azure.microsoft.com/en-us/marketplace/?term=Windows+Server+2016+TP5. The CLEAN installation that I performed did not have any issues or errors however the when creating the machine catalog for Windows Server 2016 TP5 even installing the Server DVA 7.11 it will revert to recommended VDA release of 7.8 only so you have been warned!

Once Microsoft releases Windows Server 2016 officially I will follow-up with an overview of setting up and configuring XAD 7.11 on Windows Server 2016 hosted on Microsoft Azure.

Scheduled & Coming…

What’s new in XenApp & XenDesktop 7.9

The following content is a brief and unofficial prerequisites guide to setup, configure and test delivering virtual apps and desktops powered by XenApp & XenDesktop 7.9 prior to deploying in a PoC, Pilot or Production environment by the author of this entry. The views, opinions and concepts expressed are those by the author of this entry only and do not necessarily conform to industry descriptions or best practises.

Shortened Names
XENAPP – xa
XENDESKTOP – xd
XENAPP/XENDESKTOP – xad
VIRTUAL DELIVERY AGENT – vda
HIGH DEFINITION EXPERIENCE – hdx
INDEPENDENT COMPUTING ARCHITECTURE – ica
EXPERIENCE 1st – x1
VIRTUAL DESKTOP – vd
VIRTUAL APPS – va
THINWIRE COMPATIBLE MODE – tcm also known as ecm or thinwire+

What’s New THAT You Probably Missed!
So firstly I thought I’d start with what consultants, IT Professionals and most importantly CTX SysAdmins been an ex-one myself may miss with the latest XenApp & XenDesktop 7.9 release and then cover the what’s new e.g most commonly known as a blog article up.

1 – Windows 10 support under the XAD 7.6 Long Term Service Release (LTSRP) – https://www.citrix.com/blogs/2016/06/13/a-sneak-peek-behind-the-scenes-of-the-long-term-service-release-ltsr/ but the detail about been compliant is avaiable at the following CTX article titled “CTX205549 XenApp and XenDesktop Servicing Options (LTSR) FAQ” – http://support.citrix.com/article/CTX205549 and then search for How do I get a Windows 10 VDA that is 7.6 LTSR compliant? on the web page. The following Citrix LTSR Assistant tool note its “Tech Preview – v1.0.0.32” but has been updated as of 10 June 2016 and can be downloaded at – http://support.citrix.com/article/CTX209577 but its NOT recommended when using with a production enviroment so against your UAT enviroment to ensure that your actual Citrix XAD PROD enviroment is XAD 7.6 LTSR compliant. For more in-depth information check out – http://docs.citrix.com/en-us/xenapp-and-xendesktop/7-6-long-term-service-release/xad-whats-new.html which provides a link to the Windows 10 statement for CTX205549.
2 – Support for Windows 10 in the HDX 3D Pro VDA
3 – Federated Authentication Service or FAS leverages a MS CA to dynamically issue certs to logon users as if they where using a smart card and extends Citrix authentication capabilities is must read for any real (CTX) SysAdmin and security experts – http://docs.citrix.com/en-us/xenapp-and-xendesktop/7-9/secure/federated-authentication-service.html.
4 – New default HDX graphics behaviour within XAD 7.9 is to support the use of Thinwire Compatible Mode or more commonly referred to as Thinwire+ and then to utilise “Use video codec for compression” when preferred e.g when playing a video which makes alot of sense to me so I am very happy to see this new default behaviours kudos to the HDX engineers that would on HDX Graphics Modes! Great job again 🙂
5 – HDX 3D Pro support for Intel CPUs with Intel Iris Pro graphics 5th & 6th Generation check out the following eDoc article for the full details – http://docs.citrix.com/en-us/xenapp-and-xendesktop/7-9/hdx/gpu-acceleration-desktop.html. For a good overview and demonstration of this new GPU support for XAD 7.9 powered by XenServer 7.0 yes that is correct XenServer 7.0 watch the following YouTube clip. Also please be sure to check out the latest XenServer 7.0 documentation at – http://docs.citrix.com/en-us/xenserver/xenserver-7-0.html there is some seriously new very cool stuff which I will cover in another up and comming Blog article time permitting between work and family life.

6 – The HTML5 Receiver 2.0 introduces a enhanced floating toolbar and you can now control its behaviour by completely hiding it or an individual icon only so check out the how-to at – http://docs.citrix.com/en-us/receiver/html5/2-0/about-this-release.html and after that it descirbes the new Client side appswitcher feature which also means CTX SysAdmins dont have to install the Client side appswitcher seperately on your VDAs.
7 – The following guides are for XAD 7.6+ and onwards although not actually classed as NEW they are often missed I find:

– Implementation and Configuration Guides – http://docs.citrix.com/en-us/categories/solution_content/implementation_guides.html
– Design Guides – http://docs.citrix.com/en-us/categories/solution_content/design_guides.html
– Reference Architectures – http://docs.citrix.com/en-us/categories/solution_content/reference-architectures.html

8 – Securing your StoreFront deployment is a must read in my person view – http://docs.citrix.com/en-us/storefront/3-6/secure.html. AppDNA now also introduces a compliance module – http://docs.citrix.com/en-us/dna/7-9/whats-new.html which helps SysAdmins identity if any apps that are due to be rolled out into your virtual app eco-system may introduce secuirty vulnerabilities or more importantly risk(s).
9 – Provisioning nVidia vGPU enabled XenDesktop machines powered by GRID K1 and K2 cards – http://docs.citrix.com/en-us/provisioning/7-9/xendesktop-setup-wizard-vgpu.html.
10 – Finally you should be aware of the new installation & upgrade default behaviour changes for XAD 7.9 so be sure to read/review the full and complete list of whats new at – http://docs.citrix.com/en-us/xenapp-and-xendesktop/7-9/whats-new.html.

HDX Broadcast now with Thinwire Compatible Mode

The following content is a brief and unofficial prerequisites guide to setup, configure and test HDX Broadcast now with Thinwire Compatible Mode with XAD 7.3 FP3+ prior to deploying in a PoC, Pilot or Production environment by the author of this entry. The views, opinions and concepts expressed are those by the author of this entry only and do not necessary conform to industry descriptions or best practises.

Shortened Names
XENAPP – xa
XENDESKTOP – xd
XENAPP/XENDESKTOP – xad
VIRTUAL DELIVERY AGENT – vda
HIGH DEFINITION EXPERIENCE – hdx
UNIFIED COMMUNICATIONS – uc
MICROSOFT – ms
NETSCALER GATEWAY – ns(g)
INDEPENDENT COMPUTING ARCHITECTURE – ica
FEATURE PACK – fp
NETSCALER UNIFIED GATEWAY – nug
NETSCALER GATEWAY – nsg
EXPERIENCE 1st – x1
STOREFRONT SERVER – sfs
THINWIRE COMPATIBLE MODE – tcm
THINWIRE COMPATIBLE MODE – ecm

My Own View/Opinion
ThinWire Compatible Mode can be implemented to replace the Citrix SuperCodec (H.264) in my personal opinion for numerous use cases hOwEvEr based upon your organisations end-user use cases and or scenario’s by department and role you should always test which graphics mode/encoder(s) are most suitable within your environment by department or role to meet your end-user’s X1 UX expectations on a daily basis.

What is Thinwire Compatible Mode?
If your new to Citrix I’d suggest that before reading any further to get a better understanding of what Thinwire Compatible Mode (TCM) is and does i’d suggest that you read the following entitled “HDX technologies for optimizing application and desktop delivery” available at – http://www.citrix.com/content/dam/citrix/en_us/documents/products-solutions/citrix-hdx-technologies.pdf. Its the latest graphics encoder/mode available within Citrix XAD 7.6 FP3 supported on the following OSes Windows 8.x, 10 and Windows Server 2012 R2.

Use Cases for TCM
1. Lower powered endpoint devices that can support Receiver but do not support Citrix’s SuperCodec which requires an H.264 decoder
2. Delivery of virtual apps and desktops over low bandwidth networks e.g remote branch offices that have limited internet uplink capacity based upon there geographic location i.e. ISDN, 3/4G or low capacity ADSL.
3. Delivery of 3D apps over LAN networks offers a great X1 UX which a fuzzy-first approach as described at – http://docs.citrix.com/en-us/xenapp-and-xendesktop/7-6/xad-hdx-landing/thinwire-compatibility-mode.html search for “Build to lossless” on that web page. You should always thoroughly test between both TCM/H.264 graphics modes to ensure that your end-users X1 UX meets there expectations and requirements day to day.
4: Greater user density on Windows Server 2012 R2 for XenApp based workloads.

TCM Key Features
The following is just a short snippet into some of the features part of TCM below so be sure to check out and read the following CTX Blog article –
https://www.citrix.com/blogs/2015/10/09/a-big-leap-in-ica-protocol-innovation-for-citrix/ for a full list of all the details and more.

– Intelligent bitmap matching for a bitmap-only provider. As much as possible, previously sent bitmaps are reused resulting in lower bandwidth.
– Emulated 16-bit mode, further reducing bandwidth for typical workloads.
– Ultra-low server CPU usage, improving scalability.
– Designed for port to Linux (already used by the Citrix Linux VDA)
– …

Demonstration of Thinwire Compatible Mode
TBC…

Pre-requisites & System Requirements for Deploying a Basic/Intro Thinwire Compatible Mode policy (Draft + The Basic’s Only)
1: Download and install the latest component’s for XAD 7.6 FP3 within a test/poc environment and not in a PROD environment!
2: Currently the XAD 7.6 FP3 VDA’s provide support for TCM with the following Windows OSes Windows 8.x, Windows 10 and Windows Server 2012 R2 OSes.
3: Citrix Receiver You can utilise the latest or older Citrix Receiver’s including the HTML5 Receiver with Thinwire Compatible Mode encoder.
4: Create the following policy in Studio below to enable TCM within a ICA/HDX session:

– Create a new policy
– Search for the following policy entitled “Use video codec for compression” select it and set the following value – “Do not use Video codec” which will force the ICA/HDX session to utilise Thinwire Compatibility Mode.
– Assign the policy to your test “Delivery Group” with either a virtual desktop (Win 8.x, 10 or Server 2012 R2) and save the new policy.
– Login to ReceiverforWeb or Citrix Receiver and launch your virtual desktop ensure that your test user was assigned to the test delivery group which you assigned the TCM policy to/against.

Tuning Thinwire Compatible Mode
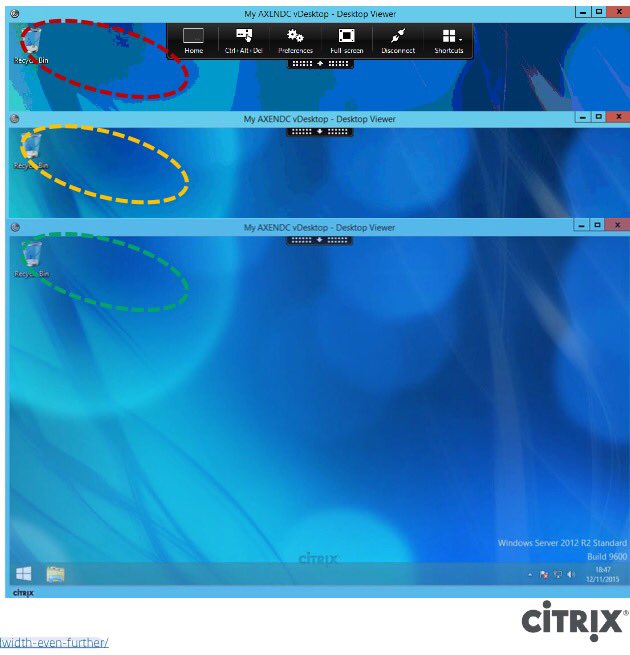
You can easily tune TCM to utilise less bandwidth with a single policy entitled “Preferred colour depth for simple graphics” but still delivery a really good eXperience 1st User eXperience for your end-users. Simply modify the TCM policy that your created earlier in this blog article and search for and add “Preferred colour depth for simple graphics” and select either “16 bits per pixel” or “24 bits per pixel” then click next and next again saving the policy. Now disconnect from your existing ICA/HDX session to your test virtual desktop and re-launch it and if you’ve opted for 16 bits per pixel in the policy above you’ll notice a difference straight away BUT the UX is still acceptable graphically for knowledge/task workers and more importantly its still as responsive and usable.

There are obviously many other policies that can be applied to make even more efficiencies so for a full list including detailed notes of what to configure please refer to and check out the following CTX article entitled “HDX Graphics Modes – Which Policies Apply to DCR/Thinwire/H.264 – An Overview for XenDesktop/XenApp 7.6 FP3” available at – http://support.citrix.com/article/CTX202687. I have embedded the basics into a simple HTML table below with how to explicitly enable ECM for testing purposes.

Policy Name Default Value Comment
Display memory limit 65536 KB http://support.citrix.com/article/CTX201696 – Support for Monitors Including 4K Resolution and Multi-Monitors
Dynamic window preview Enabled
Extra color compression Disabled Legacy Mode *
Moving image compression Enabled Legacy Mode
Preferred color depth for simple graphics 24 bits per pixel Legacy Mode **
Target frame rate 30 fps Legacy Mode
Target minimum framerate 10 fps
Visual quality Medium Legacy Mode
OPTIONAL Adjusted Policy Comments
Use video codec for compression Do not use Video codec Force ECM on explicitly by turning H.264 off (Testing)

Example of Tuning between 8 (red), 16(amber) and 24(green) Bit Modes of Thinwire Compatible Mode below but please note that the image is not in a high resolution JPEG format!

Useful Resources
A Big Leap in ICA Protocol Innovation for Citrix – https://www.citrix.com/blogs/2015/10/09/a-big-leap-in-ica-protocol-innovation-for-citrix/.
Thinwire Compatibility Tuning: Lowering Your Bandwidth Even Further – https://www.citrix.com/blogs/2015/10/23/thinwire-compatibility-tuning-lowering-your-bandwidth-even-further/.
Read Blog articles by this author Muhammad Dawood –
https://www.citrix.com/blogs/author/muhammadj/.

Supported Citrix Receivers
1: You can download either Receiver by visiting your OSes app store or navigating to – http://receiver.citrix.com for help download the correct Receiver for your platform.
2: The HTML5 Receiver is also supported.
3: The Citrix Receiver feature matrix is available at – https://www.citrix.com/content/dam/citrix/en_us/documents/products-solutions/citrix-receiver-feature-matrix.pdf.