The views expressed here are my own and do not necessarily reflect the views of Citrix.
This year I am honoured to be presenting at UCDay 2017 (founded by MVP Andrew J. Price) which is described as being the UK’s Premier Microsoft Community Conference (check out the speakers for a starters!) which is to be held on 9th October at National Motorcycle Museum, Birmingham, UK with this years sessions key focus on Microsoft Azure, Skype for Business, Office365, Exchange & Cloud. Personally I’ll be delivering the following community session entitled “Deploying Citrix (Cloud) Workloads in Azure and Beyond ARA” details about my session are available at – http://www.ucday.co.uk/timetable/event/deploying-citrix-cloud-workloads-in-azure-and-beyond-ara/ and if you have any asks vs. requests for me to cover during my session please feel free to DM on Twitter @ https://twitter.com/lyndonjonmartin or LinkedIn @ https://www.linkedin.com/in/lyndonjonmartin.
On a personal note I am seriously keen myself to take the opportunity to learn, network, connect with my peers and attend some of the other knock out sessions (when its NOT my session), so be sure to check out all the sessions at – http://www.ucday.co.uk/schedule/#not-set:all delivered by community IT Pro’s focused on EUC, UEM, Workspaces, Public Cloud (Azure), UC & Collaboration and more and then get registered for a ticket at – http://www.ucday.co.uk. For me attending UCDay is an absolutely MUST weather you’re a customer vs. partner vs. consultant vs. vendor (think Microsoft eco-system) and it will enable you to gain invaluable insights from industry experts focused on the above topics and more from around the globe YES thats right not just the UK! Check out the speakers bios at – http://www.ucday.co.uk/ourspeakers/.
As I published this blog post it got me thinking as this is my very first UCDay I’d like to understand the origins of UCDay, how as a presenter vs. attendee on the day I can benefit from attending this great event. So I posed the following questions to the Founder of UC and Cloud Day Andrew J. Price – http://lyncme.co.uk (Personal Site) whom is also an Office Servers and Services MVP.
1. How has UCDay changed vs. evolved since you first founded it and delivered that first opening keynote?
UC Day has evolved from a dedicated Microsoft UC Event into a leading Community Conference focusing on all the whole Microsoft 365 stack. When I originally started this journey I never expected it to grow as much as its done over the past 3 years. There is a lot of work happening in the background to continue the growth of this event to becoming a leading EMEA region conference that is free for all to attend.
2. What can attendees expect from the day based upon your experience?
Attendees can expect an action pack day full of networking with sponsors, peers and industry leaders in all things Microsoft Cloud related. UC and Cloud Day is a perfect platform for like minded invidiuduals to learn and grow as IT Professional and create new partnerships with our sponsors.
3. What are the key takeaways for attendees about the day vs. sessions?
Attendees will be able to take away knowledge from real world scenarios that our speakers encounter during their engagements with customers, as well new professional contacts that may assist with existing or future projects.
4. You are a MVP for Office Servers and Services what is it and how many other MVP’s will be at UCDay?
MVP Status is given to community leaders who go above and beyond the call of duty to share their experience with the Microsoft Community. I am recognised as Office Servers and Service MVP for my work within the Office 365 and Skype for Business communities. This year we will have over 20 MVPS across multiple award categories from around the global.
5. Any hints for what you’ll be discussing in your keynote at UCDay this year?
I will be talking about the “evolution” of UC Day and handing over to Microsoft who will be delivering the latest message about the “evolving” marketspace.
The views expressed here are my own and do not necessarily reflect the views of Citrix.
Shortened Names
CITRIX USER GROUP COMMUNITY – cugc
HYPER CONVERGED INFRASTRUCTURE – hci
Introduction
Its my 5th #CitrixSynergy and this is def one of the best Synergy’s I have ever had the privilege of watching virtually from London, England. Why not in person? I prefer to watch virtually as I am to consume more content faster and translate that into content to update Citrix partners/customers in a timely manner at high level and tech deep dive where required in particular areas or topics. Finally this blog post will most likely change over the next 2-3 weeks as I consume all of the Synergy 2017 content as when/how I can.
My Highlights of the Key Notes Vision Keynote
– 4:45 Citrix User Group Community – https://www.mycugc.org THANK YOU! Join the community today its powered by some of the most passionate Citrix and Technology advocates from around the global!
– 11:00 Red Bull Racing I’m not going to say anything you need to watch it!
– 21:45 Cloud powers the world
– 27:00 Digital Frontier Companies
– 39:00 Citrix Secure Digital Workspace with a software-defined preimeter
– 40:57 Citrix Workspace Services and a brief demonstration by Citrix’s CEO
– 42:25 SD-WAN / Gateway / WebApp Firewall / DDoS (NS 12+) as a Service
– 47:35 Citrix Analytics Service
– 1:01:00 “Better Together” and video message from Microsoft CEO Satya Nadella
– 1:12:25 Citrix + Google Chromebook (Skype for Business, Office365 and much more…)
– 1:18:00 Healthcare customer story “Partners Healthcare”
Technology Keynote
– 22:00 Unified Workspace (its Adaptive and Contextual by device/location and it changes the users published resources and its access type!) which brings together some of the most crucial aspects of todays modern apps, desktops, data & your location in a single view with casting capabilities but not demoed as instead instead*
– 29:00 *Workspace IoT (SmartSpaces) demonstration with a users own mobile phone enables an auto login to a Win 10 VD at guest location including welcoming the user based upon his/her smart phone used as there identity. Security people feel free or you will be going nuts right now!
– 32:30 Its all about layering you guessed it Citrix App Layer enabling IT to say YES! Note demo was demoed using a Samsung DEX check it out – https://www.citrix.com/blogs/2017/03/29/instant-desktop-computing-from-the-new-samsung-galaxy-s8-smartphone/
– 39:40 Workspace Appliance Program e.g HCI
– 42:35 Protect against Zero day attacks with XenServer and BitDefender which is available but is something which Citrix announced on 21/06/2016 yes thats right 2016 entitled “A Revolutionary Approach to Advanced Malware Protection” – https://www.citrix.com/blogs/2016/06/21/a-revolutionary-approach-to-advanced-malware-protection/ 21/06/2016 yes 2016!
– 47:00 Brad Anderson Corporate Vice President of the Enterprise Client & Mobility @Microsoft discusses shortly and then prefers to demonstrates our joint Citrix + Microsoft “Better Together” capabilities in Mobility, Virtualisation delivery from Azure and more.
– 1:01:38 Digital Jungle discussion its def worth your time if you about security and managing the experiences of your users workspace!
– 1:47:25 Vision of how the Digital Workspace is going to evolve
Citrix Synergy TV Breakout Sessions
The following are my current top sessions to watch in no particular order that I believe you’ll gain a lot of value out of watching BUT note that this may change as I continue to consume more of the on-demand content from Synergy 2017.
Innovation Super Session
Awaiting for the on-demand video publication but for now I will leave you with the following Tweet as a thought or rather a reminder to make sure that you watch it if you missed it!
The following content is a brief and unofficial prerequisites guide to better understand Citrix Cloud, Connector technology and the overall architecture required to setup, configure and test delivering virtual apps and desktops powered by XenApp & XenDesktop Service prior to deploying in a PoC, Pilot or Production environment by the author of this entry. The views, opinions and concepts expressed are those by the author of this entry only and do not necessarily conform to industry descriptions or best practises. The views expressed here are my own and do not necessarily reflect the views of Citrix.
Shortened Names
HIGH-AVAILABILITY – h/a
XENAPP – xa
XENDESKTOP – xd
XENAPP/XENDESKTOP – xad
VIRTUAL DELIVERY AGENT – vda
HIGH DEFINITION EXPERIENCE – hdx
CITRIX CLOUD – cc
INFRASTRUCTURE AS A SERVICE – iaas
CITRIX CLOUD CONNECTOR – connector
The Three Primary Cloud Types (Draft Section)
Firstly i’d like to provide my definition of public, private vs. hybrid cloud and in my personal view things like SaaS, PaaS have naturally been spin out or off from IaaS e.g Public Cloud.
Public Cloud is whereby a ISP provides you with SPLA licensing (OS, Application, Service), compute, storage and network capabilities which in turn enables you to create your very own VM instances running in a virtual datacentre on the ISP’s h/w and example providers may include AWS, Azure, Google Cloud Platform e.t.c
Private Cloud is where you the organisation owns there own OS, Application or Service licenses as well as the physical hardware that allows you to create your own VM instances within your virtual datacentre. In this scenario the h/w is could (a) be purely Colocatied (Colocation) at ISP with or without managed services over and above the Colocation and example providers could include Rackspace, Qubems, Peer1 or (b) your h/w is hosted within your own custom and purpose built data centres facility or comms room dependant upon the organisations size and IT/Technology requirements.
Hybrid Cloud is when public and private clouds are connected securely over a IPSec R/A, L2L or SSL VPN connection.
What is and how Citrix Cloud works
Citrix Cloud is an evergreen, managed control plane from Citrix that provides the traditional Citrix management technologies to delivery e.g Virtual Apps & Desktops as Services thereby reducing overhaul management updates & upgrades. This means that Citrix is responsible for the availability of your Citrix management infrastructure in there Control Plane including ensuring that it is on the latest up to day and production version of e.g XAD to deliver DaaS and or virtual apps. Citrix customers and partners are responsible for what is known as a resource location which is where your apps, network and data resides and can exist in a public, private or hybrid cloud deployment scenario and each resource location is securely connected to the control plane using the Citrix Cloud Connector which initiates an outbound HTTPS connection so your completely in control of your apps, network & data within your resource location(s) at all times.
If I have not technically explained what is and how Citrix Cloud works successfully then please feel free to watch the below embedded YouTUBE video.
Please note that Citrix Workspace Cloud is now know as Citrix Cloud
Citrix Cloud Services as of Jan 2017
The following is my own technical spin/view of each of the Citrix services you can review the Citrix official view of each service at – https://www.citrix.com/products/citrix-cloud/services.html.
XenApp and XenDesktop Service – HDX virtual app & desktop delivery from any supported resource location running server/workstation VDA(s) while all the XenApp/XenDesktop mgmt infrastructure (Studio/Director) resides in your tenant/account at https://citrix.cloud.com.
XenMobile Service – Deploy Secure Apps (MAM), MDM to control your organisation devices with no need to deploy the XenMobile v/a even at your resource location all you need is either an IPSeC VPN tunnel or the Connector to enumerate users in AD to be assigned to delivery groups.
ShareFile Service – Follow-me data now controlled within one WebUI.
NetScaler Gateway Service – Provides a simple and easy deployment method to gain external remote access to virtual apps & desktops from your resource location(s) via the Citrix Cloud Connector.
Smart Tools Service previously Lifecycle Management – Design, build, automate, auto check & update your resource locations with Citrix validated blue prints.
Secure Browser Service – Provides a secure remote virtual browser(s) to access web (internal vs. external), SaaS apps from the Citrix Cloud with zero configuration, with only a link to access your published web apps via the HTML5 Receiver.
Citrix Cloud Labs – My personal favourite as this area of Citrix Cloud allows you get to test out some of the latest Citrix Innovations from our Labs team as services e.g AppDNA Express; Citrix Provisioning for Microsoft Office 365; IoT Automation; Citrix Launch for Microsoft Access; XenMobile MDX Service and Session Manager
Connector Architecture & Security
The following diagram depicts the H/A deployment of Citrix Cloud Connector for use with the XenApp and XenDesktop Service from Citrix Cloud. Please note that this is a simple architectural diagram that does not include a NetScaler in resource location so the assumption is that you users will connect to their virtual apps and desktops either from within the actual Resource Location or via the NetScaler Gateway service hosted and managed by Citrix Cloud. My personal preference is to leverage a NetScaler physical or virtual appliance within your resource location as the benefits of a NetScaler far exceed and go above and beyond that of a simple ICA Proxy gateway for XenApp/XenDesktop. Perhaps a follow-up blog article why I presume NetScaler in the resource location from my personal view point only or I may decide to update this blog article.
Citrix Cloud Connector
The following is deep dive overview of Citrix Cloud connector technology for all the services with the exception of the Smart Tools service which leverages its own connector which is used to check your Citrix workloads, scale up/down and or even build or tear down workloads in resource location(s) via blueprints.
Installation & Troubleshooting
You must download and only install the Citrix Cloud Connector for your resource location from “Identity and Access Management” that matched your domain forest, don’t mix and match these! The installation is fairly straight forward and simple as descriobed and outlined at http://docs.citrix.com/en-us/citrix-cloud/citrix-cloud-connector/installation.html, once the installation completes wait for the connectvity test to pop-up and complete successfully prior to navigating back to Citrix Cloud to validate that the Connector has scuessfully registered with Citrix Cloud+.
You can also perform automated installation leveraging the following command line arguments when installing the Connector “CWCConnector.exe” /q /Customer:Customer /ClientId:ClientId /ClientSecret:ClientSecret /ResourceLocationId:ResourceLocationId /AcceptTermsOfService:true.
Although the Connector communicates outbound on HTTPS 443 it make also require one or more of the following ports outbound only as described at – http://docs.citrix.com/en-us/citrix-cloud/overview/get-started/secure-deployment-guide-for-the-citrix-cloud-platform.html for one or more of the Citrix Cloud Services so please consultant the documenation for each Service carefuly for high security enviroments to ensure that the organisations firewall ACL’s for the PoC are correctly configured.
You can install hypervisor tools, anti-virus software (Tested as of 26/10/2016++ McAfee VirusScan Enterprise + AntiSpyware Enterprise 8.8) on your VM instances that have the Citrix Cloud Connector technology installed however it is not recommended to install any other software or unnecessary system services nor should you allow any domain users access unless they are a Domain or System administrator of the Citrix environment. In summary treat these Connectors as you would your XAD Controller(Broker).
The installation logs are available at “%LOCALAPPDATA%\Temp\CitrixLogs\CloudServicesSetup” and post the installation its consolidated to the following location “%ProgramData%\Citrix\WorkspaceCloud\InstallLogs“.
Monitoring your Citrix Cloud Services
1. http://status.cloud.com/ is your friend and will provide you with vital up to date information about the Citrix Cloud platform (control plane or SaaS tier) and each of its Services e.g XenApp and XenDesktop Service or Smart Tools.
2. Monitor the following Connector services described below ++
3. The leading best practises is for the Citrix Cloud Connectors to not be offline longer than two weeks as the connectors are regularly updated from Citrix Cloud with the latest updates (Evergreen) which is why each resource location requires at a bare min 2x or a pair of Connectors.
Connectivity & High-Availability
The Citrix Cloud Connector firstly should always be implemented in pairs at a minimum within any resource location and installed onto either Windows Server 2012 R2 or 2016 AD joined VM instances. The connectors are stateless and brokering requests are load-balanced via Citrix Cloud to the connectors within your resource location(s) and if a connector does not respond the queued tasks are redistributed to the remaining connector(s). As the connectors are stateless this also means that they do store any mgmt configuration for Citrix Workloads at the resource location as this is held within the Citrix Cloud by the Service that you are utilising e.g XenApp and XenDesktop Service.
+If you setup a PoC with a single Connector it will probably display as amber for a period of time prior to turning green as you have only configured 1x Connector for your resource location. You can check your Connector status for your resource locations by navigating from https://citrix.cloud.com/ to https://citrix.cloud.com/identity and under “Domains” select your domain forest(s) and expand it and you can review your Connectors name e.g servername.dommain e.g connector1.x1co.eu and its status (red, amber or green).
Logs & Services++ of the Connector
The Connector logs are stored at “C:\ProgramData\Citrix\WorkspaceCloud\Logs or use %ProgramData%\Citrix\WorkspaceCloud\Logs” for verifying ongoing communication and helping with troubleshooting. Once the log(s) size exceeds a certain threshold its deleted BUT Administrators are able to control the log retention size by adjusting the following entry in the Windows registry “HKEY_LOCAL_MACHINE\SOFTWARE\Citrix\CloudServices\AgentAdministration\MaximumLogSpaceMegabytes” to meet your organisations logging/auditing requirements.
The core four primary functions/roles of the Connector are Authentication, Proxy, Provisioning and Identity which are powered by the following Citrix Cloud services listed below (as of Jan 2017). You can view a detailed architecture technical diagram of the Connector under the XenApp and XenDesktop Service online documentation at – http://docs.citrix.com/en-us/citrix-cloud/xenapp-and-xendesktop-service/technical-security-overview.html.
I’ll update this section with what each of the Connector services actually does
Citrix Cloud AD Provider
Citrix Cloud Agent Logger
Citrix Cloud System
Citrix Cloud WatchDog
Citrix Cloud Credential Provider
Citrix Cloud WebRelay Provider
Citrix Cloud Config Synchronizer Service
Citrix Cloud High Availability Service
Citrix Cloud NetScaler Cloud Gateway
Citrix Cloud Remote Broker Provider
Citrix Cloud Remote HCL Server
Citrix Cloud Session Manager Proxy
Citrix Cloud PoC Guide for the XenApp and XenDesktop Service
I have writen a fairly detailed blog article describing how-to deploy the XenApp and XenDesktop Service here.
The following content is a brief and unofficial overview of how-to front your virtual apps & desktops powered by Citrix Cloud XenApp & XenDesktop Service and the NetScaler Gateway Service using an Azure (IaaS) resource location. The views, opinions and concepts expressed are those by the author of this entry only and do not necessarily conform to industry descriptions, best practises. The views expressed here are my own and do not necessarily reflect the views of Citrix.
Shortened Names
XENAPP – xa
XENDESKTOP – xd
VIRTUAL DELIVERY AGENT – vda
HIGH DEFINITION EXPERIENCE – hdx
VIRTUAL DESKTOP – vd
THINWIRE COMPATIBLE MODE – tcm also known as ecm or thinwire+
SELF-SERVICE PASSWORD RESET – sspr
VIRTUAL GPU – vgpu
PROOF OF CONCEPT – poc
XENAPP AND XENDESKTOP SERVICE – xad service
CITRIX CLOUD CONNECTOR – CC Connector
ACCESS CONTROL LISTS – acl
FIREWALL – f/w
What is Citrix Cloud? Firstly this blog post will be updated through-out Nov, Dec 2016 as I still have a few minor additions and adjustments to make but in principle this blog post should help you stand up a Citrix Cloud – XAD Service PoC successfully with your chosen resource location.
Citrix Cloud provides a control plane that includes Citrix technologies as services e.g XenApp and XenDesktop Service that allows Citrix SysAdmin’s to setup, configure and deliver virtual apps & desktops to users on any device, anytime and from any location from your chosen resource location which could be hosts runnings in a data centre running XenServer, Hyper-V, Acropolis*, vSphere vs. hyper-converged appliances (Nutanix*, Atlantis) or it could running in an IaaS or public cloud providers e.g Azure or AWS e.t.c
Your resource location of choice is connected to the Citrix Cloud control plane through something called the Citrix Cloud Connector which is installed onto a supported Windows server OSes that is domain-joined in pairs which runs a services that communicates to the control plane outbound on HTTPS/443 which also has the added benefit of NOT requiring any type of VPN (SSL, R/A or IPSec GRE Tunnel)!
Adopting Citrix Cloud introduces an evergreen or SaaS-style update(s) approach to the Citrix infrastructure components as an example within the XenApp and XenDesktop Service e.g the controller, licensing server, storefront are hosted and managed by Citrix and auto updated (evergreen) thus reducing infrastructure updates, upgrades so IT can focus on other workspace projects e.g implementing Skype for Business – http://axendatacentre.com/blog/2016/04/25/deploying-skype4b-2015-offloaded-from-a-citrix-hdx-virtual-app-or-desktop/ or daily tasks, activities thus reducing System Administration time which equates to cost savings or shifting more IT time onto providing the very best near to local like delivery and user experience as they have more time.
The Goal of this PoC
In this blog post I will describe how-to setup and deploy the “Citrix Cloud – XenApp and XenDesktop Service” using Microsoft Azure as my resource location of choice for this PoC to deliver virtual apps & desktops (Server based) including enabling remote access in its simplest form using the NetScaler Gateway Service which enables secure, remote access to virtual apps & desktops from anywhere with an internet connection using the Citrix Receiver or the HTML5 Receiver all without having to deploy a NetScaler in your resource location – https://docs.citrix.com/en-us/citrix-cloud/xenapp-and-xendesktop-service/netscaler-gateway-as-a-service.html and accesing a published Skype for Business 2015 HDX optimised virtual app powered by the HDX Optimisation Pack 2.x.n – http://docs.citrix.com/en-us/hdx-optimization/2-1.html published from a Windows Server 2012 R2 OS server to virtual desktop powered by Windows Server 2016.
Traffic Flows, Metadata & Credential Handling
The following provides insight into the traffic flows when/how users connect to there virtual apps & desktop when using the Citrix Cloud – XenApp and XenDesktop Service.
Pre-requisites & System Requirements
0. Trial Checklist – http://docs.citrix.com/content/dam/docs/en-us/workspace-cloud/downloads/apps-desktops-trial-checklist.pdf which via the XAD Service eDoc root at – http://docs.citrix.com/en-us/citrix-cloud/xenapp-and-xendesktop-service.html.
1. An Azure subscription with sufficient credits and compute resources for your own personal requirements for your own PoC. You’ll also need to understand the concepts of Azure so I’d suggest you begin with reviewing the online documentation available at – https://azure.microsoft.com/ or visit VMFocus blog at https://vmfocus.com/2016/11/07/70-533-implementing-microsoft-azure-infrastructure-solutions-prep-exam-experience/ and scroll to the prepartion text in bold.
2. A Citrix Cloud account with access to the XAD Service check out – https://www.citrix.com/products/citrix-cloud/ for details and information about a trial.
3. Citrix Cloud Connector downloaded from your XAD Service to your Azure resource location onto a shared folder e.g network share on your Windows domain controller or file server. For the basic’s of how-to download and install check out the installation overview at – http://docs.citrix.com/en-us/citrix-cloud/citrix-cloud-connector/installation.html.
4. Download the VDA’s from https://apps.cloud.com/downloads which is only accessiable once your have sucessfully authenticated at https://citrix.cloud.com/.
5. A Windows Server 2012 R2 VM running at a min “Active Directory”, “DNS” and the “Citrix Cloud Connector” and one more VM optional only if you want to keep costs down but preferred to match a real-work scenario would be to have a second Windows Server 2012 R2 VM running the “Citrix Cloud Connector” so that you have a pair of connectors talking to Citrix Cloud.
6. A pair of Windows Server 2012 R2 one to be used for or as a +hosted shared server virtual desktop and the other to deliver virtual apps e.g Skype for Business 2015-16 HDX Optimised Doc’s – http://docs.citrix.com/en-us/hdx-optimization/2-1/hdx-realtime-optimization-pack-overview.html, video overview at – https://www.youtube.com/watch?v=IpOSi_FkA7c.
7. A Windows Server 2016 VM to be your second +hosted shared server virtual desktop (Preferred choice for me :-)) so you can demonstrate publishing virtual apps into both +virtual desktops and demonstrate Windows Server 2016 as a DaaS VD or just a show and tell back to your organisations management to begin thinking moving to Windows Server 2016 from 2008 R2 or 2012 R2.
Deploying your Citrix Cloud Connectors
1. Prior to starting your installation please be sure to switch “Enhanced Security Configuration (ESC)” off during the installation.
2. Right-click on the CC Connector and run as Administrator.
3. Enter in your Citrix Cloud Administrator access details and you’ll receive a list of available customer accounts in your case you should only have one so select it and continue.
4. The installation will install the required software components and prior to finishing it will perform “connectivity test” this will take up to 60 seconds.
5. Make some coffee or tea if you’re British or a British South African born while the Citrix Cloud Connector communicates with the Citrix CLoud control plane successfully registers.
6. Navigate to Citrix Cloud select from the menu bar in the top left-hand corner “Identity & Access Management” on the “Domains” tab you should now see your domain with a status of “Ready ✓” if you see amber anywhere this is because one of your connectors is not in a ready state or you only have 1x connector in your choosen resource location.
7. Don’t proceed until your connector(s) are in a Ready ✓ state in Citrix Cloud, this is very important!
Deploy your Virtual Apps & Desktops
1. At https://citrix.cloud.com/ select under “Services List” parallel to the “XenApp and XenDesktop Service” click on “Manage” blue button. Note that you can also get to mgmt consoles by clicking the menu icon top left-hand corner and from the list select the service that you wish to administer e.g XAD Service.
2. You’ll now be redirected to https://apps.cloud.com/ and scroll to the bottom of the webpage to identify what your cloud hosted StoreFront server address is e.g https://tttemea10.xendesktop.net/Citrix/StoreWeb/, right click and say open in a new tab.
3. Now click on the downwards arrow on “Manage” and you’ll see two options e.g “Service Creation” and “Service Delivery”. Please click on Service Delivery which should take you to https://apps.cloud.com/delivery and you’ll see the below available options. Simply toggle to select your preferred delivery options for delivery of your virtual apps & desktops choosing in this case to utilise the Citrix Cloud – XAD Service cloud hosted StoreFront and or NetScaler Gateway Service. I will follow-up with another blog post in the future covering off deploying this PoC BUT using StoreFront and NetScaler (Unified) Gateway in your chosen “resource location” BUT for now I am keeping it clean and simple. Please verify that your toggle’s match what you see in the below image prior to proceeding (Also see the 3rd tip!!!). If want to use StoreFront – http://docs.citrix.com/en-us/citrix-cloud/xenapp-and-xendesktop-service/setting-up-storefront.html and NetScaler – http://docs.citrix.com/en-us/citrix-cloud/xenapp-and-xendesktop-service/getting-started.html#par_anchortitle_1403 in your resource location the read the provided links above.
TIP/HINT 1: You can choose to toggle off “Session Reliability”.
TIP/HINT 2: Where you configure the XAD Controller point this to the Citrix Cloud Connector.
TIP/HINT 3: The NetScaler Gateway Service is sold separately from the XAD Service as of 2017 Q1 ref – https://www.citrix.com/products/citrix-cloud/subscriptions.html
4. Now click on the downwards arrow on “Manage” and now please click on Service Creation which should take you to https://apps.cloud.com/manage you’ll notice a spinning icon in the middle of your screen for a few seconds and then your securely hardened Studio console will be avaiable to you published using the latest HTML5 Receiver which includes auto screen resizing dynamically (change the browser window size :-)), copy and paste.
5. Create your “Machine Catalog(s)” as per normal if your unsure then follow the steps as outlined at http://docs.citrix.com/en-us/xenapp-and-xendesktop/7-11/install-configure/machine-catalogs-create.html then return back to Citrix Cloud published Studio. Create three machine catalog’s if following the blog post 1x machine catalog for virtual apps powered by Win Srv 2012 R2, 2x virtual desktops one powered by Win Server 2012 R2 and one by 2016. Once you have created your machine catalog’s then check that the VM within each “Machine Catalog(s)” have a successful Registered State if the VM(s) in your each catalog(s) don’t register then review my quick troubleshooting guidance below at the end of this blog article.
6. Next create a “Delivery Group” almost like normal once agian if your are unsure the how-to is avaiable at – http://docs.citrix.com/en-us/xenapp-and-xendesktop/7-11/install-configure/delivery-groups-create.html remeber agin if following this blog post 1x delivery group for virtual apps powered by Win Srv 2012 R2 and 2x delivery groups for virtual desktops powered by Win Server 2012 R2 and 2016 BUT there is one very important exception which is that once you select the machines and you get to the user section be very sure to select“⚹Leave user management to Citrix Cloud. This makes the Delivery Group available as an offering when configuring your Citrix Cloud Workspaces.” – http://docs.citrix.com/en-us/citrix-cloud/overview/get-started/creating-and-publishing-a-workspace.html.
⚹
6. Now that you have created a Machine Catalog, Delivery Group you need to assign users to these resources so click the menu icon in the top left-hand corner and select “Workspaces“. You’ll see “My First Workspace” just ignore it for now and select the “+ Workspaces” icon it’s large you just cannot miss it! Note that workspaces are now referred service offerings which you assign to users from your Library – http://docs.citrix.com/en-us/citrix-cloud/overview/get-started/assigning-users-to-offerings-using-library.html.
7. Enter in a name for your workspace e.g PoC Workspace.
8. Select “✎ Manage” under your Workspace name and now from the available “Citrix Cloud Services” list select the “XenApp and XenDesktop Service” and you’ll see your delivery group(s) dependant if you completely followed this blog post on the right-hand side so simply select your virtual apps and virtual desktops that you wish to publish to this workspace, it’s your choice but in this PoC we’ll be selecting all avaiable delivery groups to delivery virtual apps & desktops. Once selected click on “Update Workspace” blue button above.
9. Your workspace now contains virtual apps & desktops that can be consumed by subscribers e.g users.
10. Now that you have created your first Workspace e.g PoC Workspace in Citrix Cloud using the XenApp & XenDesktop Service all that is left to do is to add users BUT in a Citrix Cloud world they are known as “subscribers“!
11. Select your e.g PoC Workspace once more and click on “Subscribers” tab and you’ll see a domain list below on your left-hand side so select your “domain” and to your right you’ll see an input field type in your subscriber’s username e.g lynd which will then query your AD via the Citrix Cloud connector securely and it will find and return your user(s) e.g lyndon-jon@x1co.eu and once it is listed select the user(s) from your query and they will be added to the list below, now repeat the process to add all other test/poc subscribers or AD test/poc security groups to your e.g PoC Workspace and then click on the “Update Workspace” blue button above to save the subscribers to this workspace.
TIP/HINT: You can also select AD Security Groups not just AD users.
Initial Test
Your users/subscribers should now be able to login to the Cloud hosted StoreFront available at e.g https://YOURCUSTOMERNAME.xendesktop.net using an HTML5 internet browser or Citrix Receiver.
HDX Policies
Please assign your policies as you prefer to users, delivery groups e.t.c. You’ll also notice that I have not applied a FPS limit to every policy only the ones that are balanced as most often these need to adjusted to be fit for purpose for standard office workers to enable user density gains on the backend and bandwidth savings while maintaining a decent and good UX. My personal preference is “HDX Adaptive Display v2“.
HDX Adaptive Display v2
HDX Adaptive Display v2 (Balanced)
Thinwire Compatible Mode
Thinwire Compatible Mode (Balanced)
H.264
1.”Use video codec for compression” then select the option to be “For actively changing regions“
1.”Use video codec for compression” then select “For actively changing regions“ 2. “Preferred color depth for simple graphics” then select “16 bits per pixel” and also try 24.
1.”Use video codec for compression” then select the option to be “Do not use video codec“
1.”Use video codec for compression” then select the option to be “Do not use video codec“ 2. “Preferred color depth for simple graphics” then select “16 bits per pixel” and also try 24. 3. “Frames Per Second” then enter in a value of “25-30“.
1.”Use video codec for compression” then select the option to be “For the entire screen“ 2. “Frames Per Second” then enter in a value of “30” (Optional)
My personal preferred choice
My 2nd personal preferred choice
Advanced Remote Access using a NetScaler in your Resource Location with(out) StoreFront
The following has been tested using the latest NS firmware 11.1 available in the Azure marketplace as of 05/03/2017.
1. Login to NetScaler admin WebUI using the following firmware 11.1.x.n
2. Check that your appliance is correctly licensed.
3. Select the “Unified Gateway” wizard.
4. Enter in your assigned VIP (private IP addr or in Azure NSIP:8443) and enter in a vServer friendly name e.g myUG
5. Select to “Install Cert” a valid public CA signed cert either *.pfx vs. *.pem.
6. Configure LDAP either use an exciting or add a new server for LDAP auth and choose the “Server Logon Name Attribute” as userPrincipalName .
7. Select “Portal Theme” and select “RfWebUI”
8. Now under the under “Applications” select and add “XenApp/XenDesktop” and now enter in your resource location or Cloud-Hosted StoreFront “FQDN” and select “Test Connection” which should retrieve and auto configure the required settings and thereafter a green bar will appear if successful if not then manually configured based upon the following guidance below.
– Enter in “Site Path” e.g /Citrix/StoreWeb/
– Enter in your Sign Sign-on Domain e.g x1co.eu
– Enter in “Store Name” e.g Store
– Enter in “Secure Ticket Authority (STA) Server” which will be the Citrix Cloud Connector IP addr
– StoreFront server IP Addr:
Option 1 – If using the cloud-hosted StoreFront FQDN e.g https://*.xendesktop.net then please use the IP addr of the Citrix Cloud Connector in your resource location. Option 2 – If using a StoreFront server in the resource location please use its IP addr.
9. Do not configure a “Xen Farm” please just select and “Continue” and complete steps to finish the Wizard.
10. The dashboard overview of “Unified Gateway” should indicate all up and green.
Troubleshooting Guidance VDA Registration Issue
1. Make sure that forward and reverse DNS is setup correctly for the VDA’s and the CC Connectors.
2. Check that the following Citrix Cloud services “Citrix Remote Broker Provider” and “Citrix Cloud Agent System, Logger & WatchDog“are successfully started on your Citrix Cloud Connector(s) VM instances.
3. Ensure that HTTPS/443 is NOT disabled outbound on any of your CC Connectors either via the Windows Firewall or your hardware or virtual f/w ACL’s.
The following content is a brief and unofficial prerequisites guide to setup, configure and test delivering virtual apps and desktops powered by Citrix Workspace Cloud (CWC) – App’s & Desktop Service with a AWS EC2 resource location prior to deploying in a PoC, Pilot or Production environment by the author of this entry. The views, opinions and concepts expressed are those by the author of this entry only and do not necessary conform to industry descriptions or best practises. The views expressed here are my own and do not necessarily reflect the views of Citrix.
Shortened Names
AMAZON WEB SERVICES – aws
SECURITY GROUPS – sg
ELASTIC COMPUTE CLOUD – ec2
HYBRID CLOUD PROVISIONING – hcp
XENAPP – xa
XENDESKTOP – xd
XENAPP/XENDESKTOP – xad
VIRTUAL DELIVERY AGENT – vda
HIGH DEFINITION EXPERIENCE – hdx
INDEPENDENT COMPUTING ARCHITECTURE – ica
CITRIX WORKSPACE CLOUD CONNECTOR – cwc connector/agent
EXPERIENCE 1st – x1
VIRTUAL DESKTOP – vd
VIRTUAL APPS – va
INFRASTRUCTURE AS A SERVICE – iaas
CITRIX WORKSPACE CLOUD – cwc
CITRIX LIFECYCLE MANAGE
Video Citrix Workspace Cloud: How It Works
PoC Introduction & Overview (This is a Public Draft Blog Article & May Contain Some Errors)
In this particular instance I will be deploying a Citrix Workspace Cloud (CWC) PoC using the Apps & Desktop service which is Citrix online service and is essentially made up of five compoments in my personal view these are people (Users, Consultants & SysAdmins), the Control Plane which is hosted by Citrix and is high available and accessible at – https://workspace.cloud.com/, Resource Locations which could be private, public (IaaS) or hybrid clouds which host and run your actual CItrix workloads e.g servers or desktops OSes with the VDA’s installed and optionally StoreFront and or NetScaler Unified Gateway, Receiver for access to your published virtual apps & desktops and finally the CWC connector which makes everything just work safe & securely.
Please note that I will update this blog post with a how-to re deploying NS for remote access from AWS EC2.
What you need
For this PoC I may refer to AWS and XenServer concepts as my home lab is deployed in a Hybrid Cloud model e.g some of my Citrix workloads are in hosted in AWS EC2 (N.Virgina) while others are running on a XenServer 6.5 SP1+ host at my house in London. You don’t have to use AWS like I am for your PoC you could use any IaaS provider e.g Azure, Rackspace, Peer1 or even on-prem with your own host(s) running XenServer, Hyper-V and of course vSphere :-).
1 – CWC trial account entitling you to the CWC Apps & Desktop Service and Identity & Access Management e.g for adding users from your domain and to download the CWC Connector.
2 – Your resource location of choice mine is AWS from here on in through-out this blog article.
3 – 1x Windows Server 2012 R2 I’ll call this VM WDC01 running AD, DNS at a minimum and the Citrix Receiver (http://receiver.citrix.com), CWC Connector downloaded on the desktop (explained later).
4 – 1x Windows Server 2012 R2 domain joined and I’ll call this VM CXA01 with the latest XA 7.8+ Server VDA (https://www.citrix.com/downloads.html which requires a valid Citrix.com customer/partner account with access details ) downloaded.
5 – AWS security groups (on-prem f/w ACL) to allow outbound traffic on TCP 443 (HTTPS) to the Internet, allow HTTPS/ICA/HDX/RDS traffic including HDX RealTime ports for audio and video between all VM’s within your chosen network.
6 – Some suggested test application examples could be Microsoft’s Office 2016 or OpenOffice, Notepad ++, The Gimp, Autodesk Viewer. WaRnInG!!! Disclaimer – Please refer to the ISV’s EULA for terms of usage prior to downloading, installing, configuring and publishing virtual apps to test and play with!.
7 – *Create friendly DNS entries to be used later for WDC01 e.g DNS entry of cwccontroller.axendatacentre.com or your could stick with host name.domainname format it’s your choice. Note: Be sure to setup and configure not just fwd. but also reverse DNS within resolution/look-up!
Setting up your Resource Location
1 – Login as the Domain Admin on WDC01 and navigate to https://workspace.cloud.com and sign in with your trial access details provided by Citrix.
2 – Select from the list on the very TOP left-hand corner Identity & Access Management next click the plus/+ sign and follow the onscreen prompts to download the CWC Connector/agent.
3 – Before installing the CWC Connector/Agent please be sure to read the following documenation – http://docs.citrix.com/en-us/workspace-cloud/workspace-cloud/what-is-a-workspace-cloud-connector-/workspace-cloud-connector-technical-details.html. Once downloaded double click on the CWC Connector/agent and when prompted enter in your CWC trial access details and the installation will complete successfully if the access details provided are correct and if 443 HTTPS is enable outbound to the Internet from WDC01 to https://workspace.cloud.com.
4 – Take a short 1-3 min comfort break then refresh your web page for https://workspace.cloud.com and navigate back to Identity & Access Management and you should see your domain appear within the list, then you may proceed. If you don’t check your firewall ACL’s locally on the Windows server or virtual f/w at the edge of your VPC network and also check your AWS Security Groups are setup correctly to allow in/outbound access on HTTPS/443.
Note: If you turn off WDC01 you’ll receive and error at this page and manage & monitor tabs within the Apps & Desktop Service are NOT accessible until access is restored! Likewise if you only have 1x CWC Connector/agent then you may see an amber warning under domain within Identity & Access Management as you only have 1x CWC Connector/agent and it suggested even for a PoC to install 2x instead of 1x.
5 – Login as a Domain Admin on CXA01 and mount the XA 7.8+ VDA media by right clicking and left clicking on Mount then navigate to Windows Explorer and double click on D drive that has recently mounted with the XA 7.8 installation media and then proceed to select to install the Server VDA from the splash screen or if your downloaded the Server VDA *.exe (suggested & recommended) from Citrix.com then double click to install the VDA. In each case you’ll require 2x reboots as per normal like on-prem installations however now on CXA01 there is one exception at the controller step type in cwccontroller.axendatacente.com* or the hostname.domainname for WDC01 (Point to the CWC Connector/agent that you previously installed) and then continue with installation and once the installation is completed on CXA01, then verify that the VDA has registered and is communicating with WDC01 e.g cwccontroller.axendatacentre.com by reviewing CWC service or the event logs within Computer Management. Tip: Install to enabling remote connections initially to get your head around how the CWC Apps & Desktop Service actually works.
6 – You’ve now successfully completed setting up your XenApp worker for your chosen resource location in my case it’s an AWS EC2 located out of N.Virginia. If your curious about the CWC connector there is a tech overview avaiable at – http://docs.citrix.com/en-us/workspace-cloud/workspace-cloud/what-is-a-workspace-cloud-connector-/workspace-cloud-connector-technical-details.html be sure to review it.
7 – Now we need to continue with creating a machine catalog, delivery group in the hosted Studio and obviously publishing your virtual apps & desktop (server based).
Create a Machine Catalogue and Delivery Groups to publish Virtual apps & desktops
1 – Now go back to the homepage at https://workspace.cloud.com and to the right of the Apps & Desktop Service click “Manage” to launch the management interface which provides you with an Overview page (Scroll to the bottom to find out your cloud hosted StoreFront address. Tip: If you get an red bar with an error message check that your CWC Connector/agent at your resource location is up and available and showing as green for your domain at the Identity & Access Management tab!.
2 – Scroll to bottom of the overview web page to find out exactly what your cloud hosted StoreFront addr is. It should follow the following format https://{TENANT NAME}.xendesktop.net/Citrix/StoreWeb/. Right click on it to open a new tab and to remain at https://apps.cloud.com/. You should be able to login using your test AD security group. Tip: You won’t see any published virtual apps or desktops currently as you have not created a machine catalogue or delivery group.
3 – Go back to the Manage Apps & Desktops Service web page and click Manage or Monitor this will embed a custom, hardened published app version of Studio or Director using the HTML5 Receiver so please ensure that you are utilising an HTML5 compliant internet browser that supports the HTML5 Receiver.
4 – Assuming you’ve clicked on Manage firstly navigate to Hosting Connections create a connection to your chosen resource location either on-prem or cloud (Private or Public) details for setting up hosting connections are available at – http://docs.citrix.com/en-us/xenapp-and-xendesktop/7-8/manage-deployment/connections.html. Once setup wait 1-2 min before proceeding you don’t have to by the way! I do.
5 – Click Machine Catalogue and create as per normal for detailed on how-to please refer to – http://docs.citrix.com/en-us/xenapp-and-xendesktop/7-8/install-configure/machine-catalogs-create.html. Tip: I’d suggest as its your first time using the CWC Apps and Desktop service create your machine catalogue with a single VM with the VDA installed to allow remote connections as described earlier to allow you to get around how the CWC Apps and Desktops Service actually works. You don’t have to either it’s your choice.
6 – Click Delivery Groups and create as per normal aswell and please refer to – http://docs.citrix.com/en-us/xenapp-and-xendesktop/7-8/install-configure/delivery-groups-create.html for guidance delivering virtual apps (Skype for Business 2015 also implment the HDX Optimisation Pack 2.0 check out – https://www.citrix.com/blogs/2016/01/12/citrix-and-microsoft-unveil-v2-solution-for-skype-for-business/ for more information) & desktops (Windows Server 2012 R2). TIP: The name you provide your Delivery Group filters through to the Workspaces at – https://workspace.cloud.com/workspaces and becomes the default name of your published virtual & desktops services that you will assign to your subscribers (users) workspace.
7 – You’ve now successfully setup a Machine Catalog and Delivery Group using the CWC Apps & Desktop Service to published a virtual apps & desktop, however prior to accessing your virtual apps & desktops you’ll need to create a Workspace and add subscribers (users) including which published resources your subscribers (users) are able to access otherwise they wont be able to login nor access any published resources.
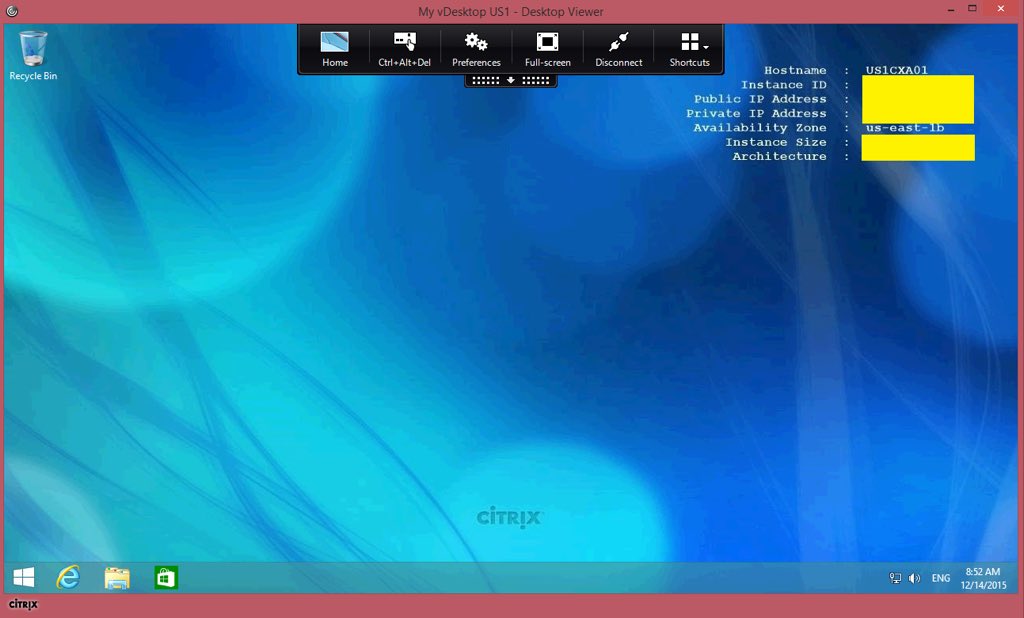
You should have the Server VDA and CWC Connector now installed see the below example image below.
Create a Workspace to Delivery published virtual apps & desktops
1 – A workspace consists of a collection of services from CWC e.g Secure Documents (ShareFile), Apps & Desktop Service (XenApp/XenDesktop) and so forth that SysAdmins can combine together to form e.g a Pre-Sales workspace that may consist of a virtual apps e.g Skype for Business 2015 that is also offloaded with the HDX Optimisation Pack 2.0 – https://docs.citrix.com/en-us/hdx-optimization/2-0/hdx-realtime-optimization-pack-about.html and a virtual desktop e.g a dedicated Windows 10 or 2012 R2 desktop. A workspace also consists of subscribers (users) who access the workspace which contains published resources created by Citrix SysAdmins. Please ref to http://docs.citrix.com/en-us/workspace-cloud/workspace-cloud/get-started/creating-and-publishing-a-workspace.html which explains how-to create a workspace, define subscribers and published resources.
2 – Once you have created a Workspace and assigned subscribers, resources then users can login at https://{TENANT}.xendesktop.net/Citrix/StoreWeb/ from there resource location and gain access to there virtual apps & desktops.
3 – Managing your newly created Workspace is easy following this useful online document from eDocs – http://docs.citrix.com/en-us/workspace-cloud/workspace-cloud/get-started/manage-a-workspace.html.
Example of my virtual desktop (Server based) delivered by CWC using the XenApp 7.8 VDA. I also use the same theme for my complete XenApp 7.8 deployment in AWS yes I have both deployed and configured 🙂
A first for me
This is the first time I’ve written a blog post (primarily) completed in the air traveling from somewhere between London – England, Oslo – Norway and Stockholm – Sweden.
Disclaimer
This blog article should be considered to be a draft still and therefore may contain errors and I will be updating and adjusting it time permitting and adding in how-to front this CWC Apps & Desktop service deployment in my AWS EC2 resource location with NetScaler Unified Gateway – https://www.youtube.com/watch?v=qT739UoR8d0.
The following content is a brief and unofficial prerequisites guide to setup, configure and test delivering virtual apps and desktops powered by XenApp 7.8 in AWS EC2 prior to deploying in a PoC, Pilot or Production environment by the author of this entry. The views, opinions and concepts expressed are those by the author of this entry only and do not necessary conform to industry descriptions or best practises. The views expressed here are my own and do not necessarily reflect the views of Citrix.
Shortened Names
AMAZON WEB SERVICES – aws
SECRUITY GROUPS – sg
ELASTIC COMPUTE CLOUD – ec2
HYBRID CLOUD PROVISIONING – hcp
XENAPP – xa
XENDESKTOP – xd
XENAPP/XENDESKTOP – xad
VIRTUAL DELIVERY AGENT – vda
HIGH DEFINITION EXPERIENCE – hdx
INDEPENDENT COMPUTING ARCHITECTURE – ica
FEATURE PACK – fp
EXPERIENCE 1st – x1
VIRTUAL DESKTOP – vd
VIRTUAL APPS – va
INFRASTRUCTURE AS A SERVICE – iaas
CITRIX WORKSPACE CLOUD – cwc
CITRIX LIFECYCLE MANAGEMENT – clm
THINWIRE COMPATIBLE MODE – tcm also known as ecm
Experience Deploying My 1st Virtual Desktop & Apps in AWS
The following screenshot is of a virtual desktop (Windows Server 2012 R2 powered by XenApp 7.8) hosted in AWS EC2 located in N.Virginia, US delivered Windows 8.1 (Yes I know I need to get to Win 10 :-)) laptop running Citrix Receiver Windows 4.4 in London, England with the HDX Thinwire Compatible Mode graphics mode configured with a Preferred Color Depth set to 16-Bit and the performance is very good considering what Ive configured I then adjusted my HDX policies to then switch to HDX SuperCodec (H.264) the UX gets even better providing an even closer HD local like experience in my personal view only so give it ago for yourself.
The HDX policies overview is documented below so for now back to my experience deploying XenApp 7.8 on AWS.
It was substantially easier than I anticipated or even expected as the AWS documentation is easy to understand I believe however that maybe due to the fact I used to previously work for a Managed Services ISP in City of London so many concepts related to Managed Hosting, IaaS, Private and Hybrid Cloud come quiet naturally to me.
Introduction to Provisioning XenApp Workloads on AWS EC2
Citrix has had the capability to deploy virtual applications and desktops powered by XenApp 6-7.x.n for quiet sometime utilising the traditional Manual CTX SysAdmin approach then Citrix introduced a concept entitled Hybrid Cloud Provisioning (HCP) under the unified FMA architecture for XAD some time ago which allows CTX SysAdmins the capability to expand there existing Citrix workloads e.g virtual apps and desktops (server based only) to IaaS providers e.g AWS or often generically referred to as the Cloud by adding in a secure new hosting connection within Studio for AWS the requirements include providing the Connection URL, API key and Secret key from your AWS EC2 account ref – http://docs.citrix.com/en-us/xenapp-and-xendesktop/7-6/xad-connections.html. You can utilise this exact same concept to provision XenApp based workloads from within a AWS EC2 XenApp 7.x FMA Site as described in detail in the following deployment guide entitled “Deploy XenApp 7.5 and 7.6 and XenDesktop 7.5 and 7.6 with Amazon VPC” available at – http://support.citrix.com/article/CTX140427. Finally if I have not explained well enough what hybrid cloud provisioning actually is powered by XenApp 7.x then this short and simple YouTube video from Citrix below should hopefully re-enforce your understanding of HCP.
You can still utilise hybrid cloud provisioning within XenApp 7.8 today and Citrix continues to evolve with its next generation cloud 1st approach of provisioning of Citrix workloads within IaaS, Private and Hybrid clouds with Citrix Workspace Cloud (CWC) its now known as Citrix Cloud. How does it work? Once more there is a fantastic YouTube video which demonstrates setting up, configuring, publishing and delivering a Windows virtual application utilising CWC by one of Citrix’s CTO its well worth watching!
Finally you can utilise Citrix Lifecycle Management (CLM) to automate the deployment and auto scaling of your Citrix workloads on AWS EC2, however this topic is currently not in scope for this blog article however I may update this blog article in the future to include provisioning XenApp on AWS EC2 powered by Citrix Lifecycle Management (CLM).
Pre-requisites & System Requirements for Deploying a XA 7.8 PoC in AWS EC2 (Draft + The Basic’s Only)
0. Check that your XAD license entitlement is correct at – https://www.citrix.com/go/products/xendesktop/feature-matrix.html to provision XenApp workloads on AWS EC2. As of writing and publishing this blog article you require XenApp or XenDesktop Enterprise or above licensing in order to provision workloads on AWS and also Azure.
1. You need an AWS account, Credit card
2. Choose your EC2 region e.g N.Virgina
3. Create your “Security Groups” which acts as a virtual firewall for ICA 1494, 2598 Session Reliability, HTTPS 443, RDS 3389 (SysAdmin access)
4. Lunch an single instance from the EC2 dashboard under “Create Instance” this will be your mgmt. VM
5. Decrypt the passwd & login your mgmt. VM install your require roles e.g AD, DNS as a min requirement for XA 7.x
6. Lunch another single instance from the EC2 dashboard under “Create Instance” this will be your XA PoC VM
7. Download the media from Citrix.com and any FP’s and install all the components onto your XA PoC VM (Studio, Director, Controller, MS SQL Express, StoreFront, License server)
7. Install the latest VDA (existing connections) once ready launch Studio and create your Site, configure your machine catalogue and delivery groups.
8. Modify SFS default.ica file to include your external static IP and check your Windows f/w rules to ensure 1494 is correctly configured to allow traversing NAT’s
9. Navigate to https://AWS-XA-PoC-VM/Citrix/StoreWeb/ and login as a domain admin or user and launch a virtual app and or desktop.
10. Shutdown and turn off your VM’s within your AWS VPC when you are finished with your tests to ensure that your cost(s) are kept to a minimum.
Begin with the following HDX policies listed below to enable TCM/ECM/Thinwire+/Thinwire Compatible Mode and be sure to check out CTX202687 described below in-line with the Very High Definition Experience HDX Policy template.
Policy Name
Default Value
Comment
Preferred color depth for simple graphics
24 bits per pixel
Legacy Mode
Target frame rate
30 fps
Legacy Mode
Use video codec for compression
Do not use Video codec
Force ECM on explicitly by turning H.264 off (Testing)
2. Configuring the super codec (H.264) is actually very easy select the Very High Definition Experience form the HDX templates in Studio and create a policy from it applying again to your test security group (preferred) or domain users it’s your choice. Please note that this policy will enable H.264 however it will default to TCM if you connect from a device that does not support H.264.
3. Finally for all those advanced CTX consultants and SysAdmins out there check the following CTX article – http://support.citrix.com/article/CTX202687 entitled “HDX Graphics Modes – Which Policies Apply to DCR/Thinwire/H.264 – An Overview for XenDesktop/XenApp 7.6 FP3” which documents each policy for each HDX encoding or graphics mode supporter by XAD 7.8